
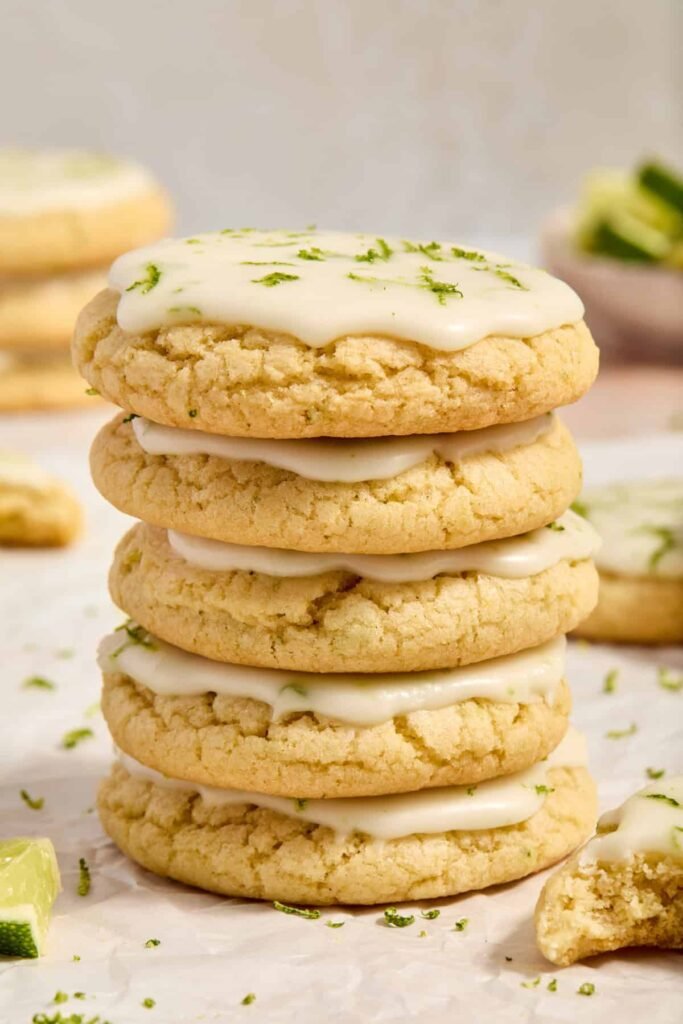
Forget everything you thought you knew about citrus desserts — these Key Lime Cookies are about to become your new obsession. Pillowy in the center, slightly crisp at the edges, and finished with a zippy lime glaze that practically sings summer. From mixing bowl to cooling rack, you’re looking at one of the easiest cookies you’ll ever pull off. The dough comes together in under 10 minutes and zero refrigeration is needed — just pure, tart, citrusy bliss.
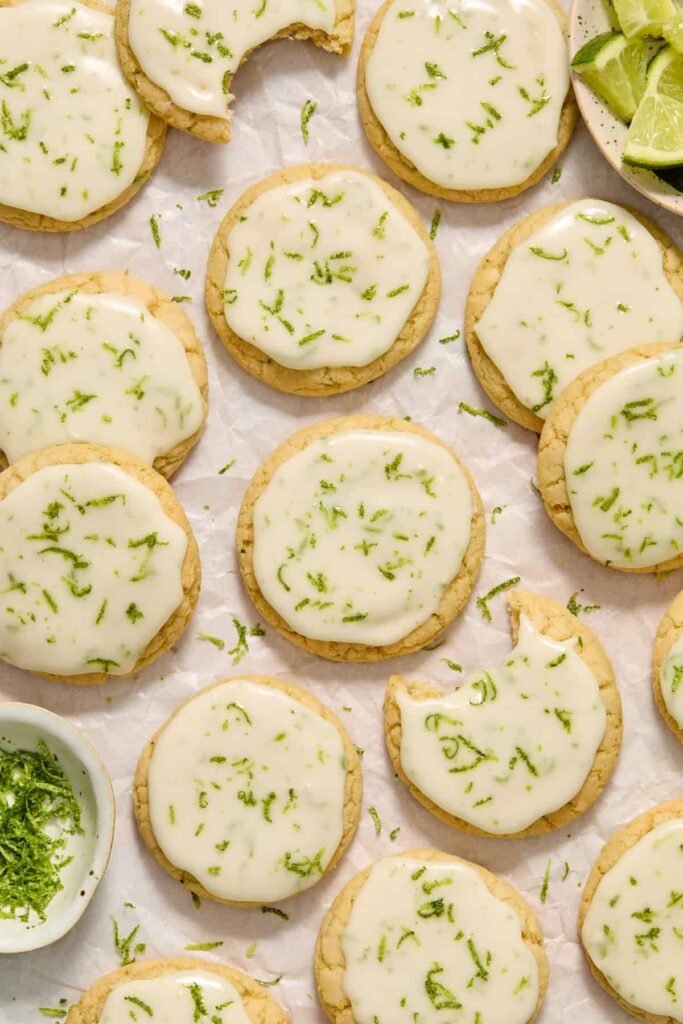
Table of Contents
Why You Will Love These Key Lime Cookies
- That texture is everything. There’s a sweet spot between cakey and crunchy, and these cookies hit it dead center. The centers stay plush and tender while the bottoms develop just enough structure to hold up to that gorgeous glaze.
- Real lime flavor, front and center. The secret weapon here is it. It carries the most intense, aromatic lime oil and infuses every single bite with that bright, tart, floral punch that juice alone can never fully deliver.
- Weeknight-friendly, party-worthy. No chilling. No special equipment beyond a hand mixer. No complicated techniques. These are the kind of cookies you make on a Tuesday and somehow they disappear by Wednesday morning.
- A warm-weather baking win. Most people abandon the oven the moment temperatures climb. These cookies give you every reason to crank it back up — because something this fresh and vibrant belongs on every summer table.
Ingredient Notes
See the recipe card below for exact quantities and measurements.
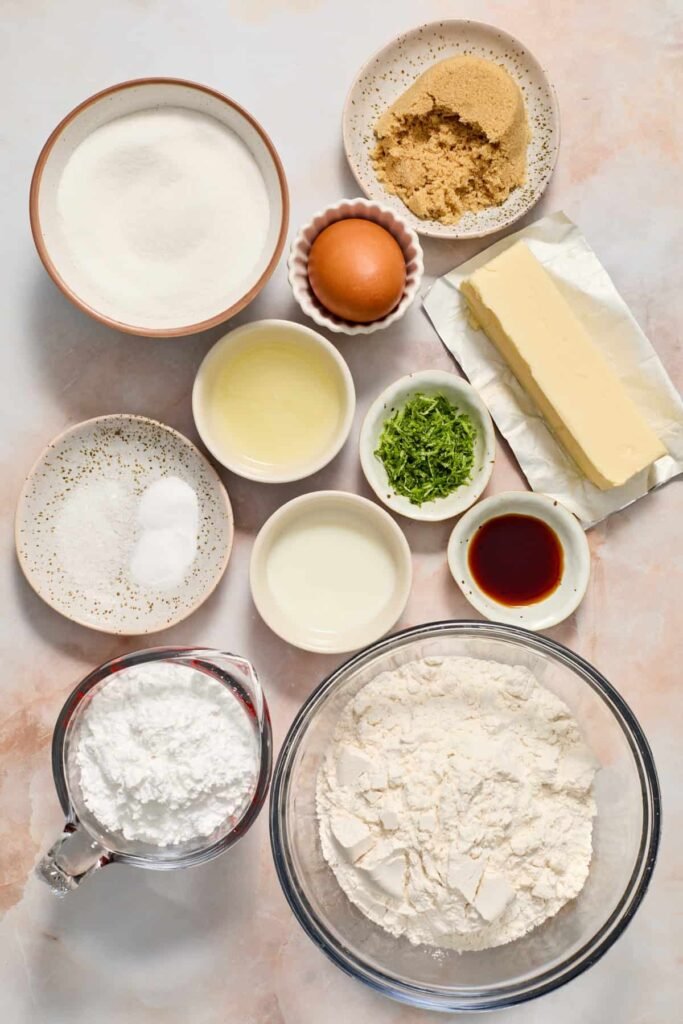
- Unsalted butter — Pull it out of the fridge at least an hour ahead. It should be soft enough to press a fingerprint into, but not greasy or slick.
- Light brown sugar — Adds a gentle caramel undertone that pairs surprisingly well with the tartness of lime.
- Large egg — Room temperature eggs blend more evenly into the batter for a smoother, more uniform dough.
- Vanilla extract — Just a touch rounds out the citrus edge. For extra lime intensity, swap half of it for lime extract.
- Key limes — You’ll use only the cookie dough, but both zest and juice go into the glaze. Fresh is non-negotiable here for the best aroma and flavor.
- All-purpose flour — Weighing at 219 grams gives the most consistent results. If you’re scooping by volume, stir the flour first to aerate it, then spoon it into the measuring cup and level off the top.
- Powdered sugar — The backbone of the glaze. Keep extra nearby — if your glaze turns too thin, a spoonful or two will bring it right back.
What is the Difference Between Key Limes and Regular Limes?
At first glance, key limes look almost like a different fruit entirely. They’re notably smaller, round rather than oval, and their skin is thin and pale yellow-green when ripe.
Flavor-wise, key limes punch harder. They’re more acidic, slightly more bitter, and carry a floral, almost perfume-like aroma that regular Persian limes don’t quite replicate. That aromatic quality is what makes key lime desserts so distinctive.
That said, key limes aren’t always easy to track down at a regular grocery store. If you can only get Persian limes, go for it — the flavor will be slightly milder and less complex, but once baked into a cookie and glazed, the difference is barely noticeable. Both versions are absolutely worth making.
Step-By-Step Instructions:
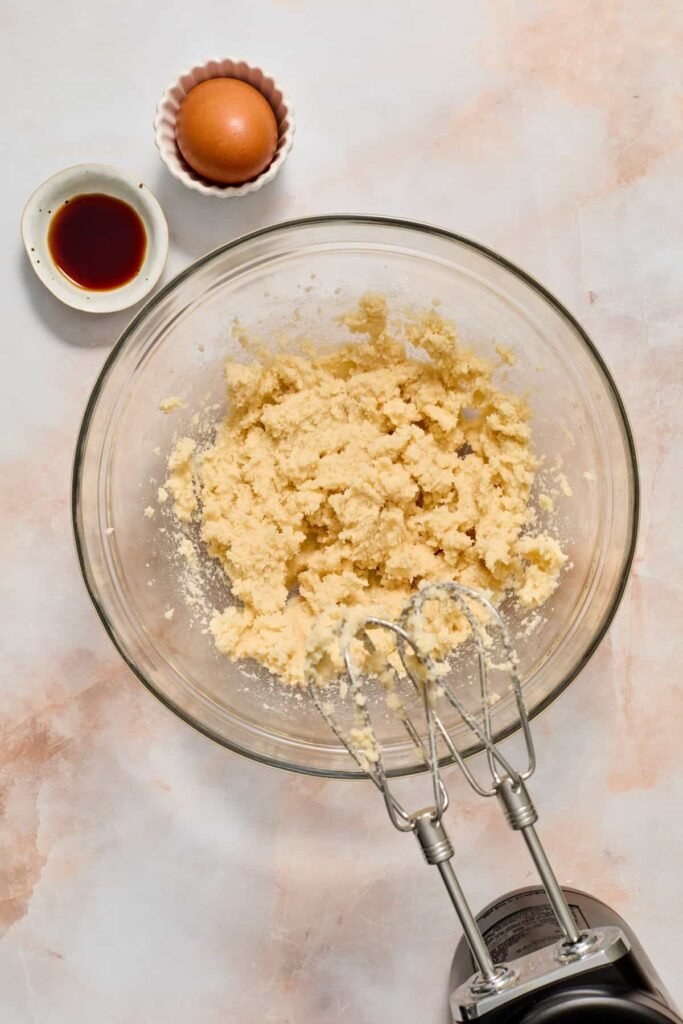
Step 1: Beat the softened butter and brown sugar together in a large mixing bowl using a hand or stand mixer. Run it on medium-high for a full minute or two until the mixture looks noticeably lighter in color and feels airy. This step builds the structure of the cookie — don’t rush it.
Step 2: Crack in the egg, add the vanilla, and mix just until everything is incorporated. In a separate small bowl, whisk together the flour, baking soda, and salt so they’re evenly distributed before hitting the dough.
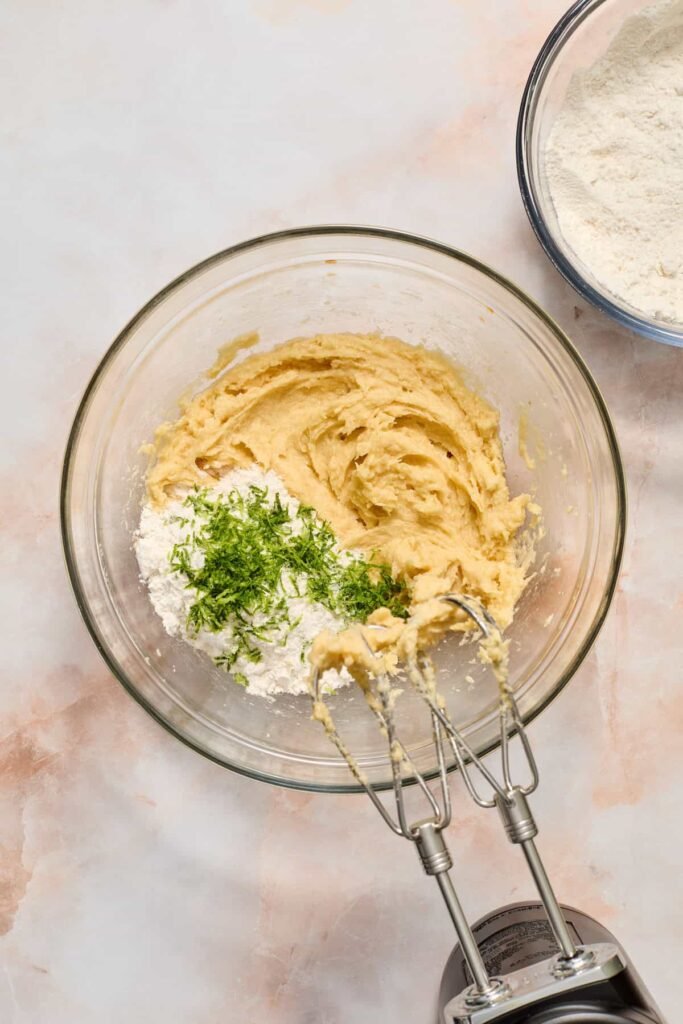
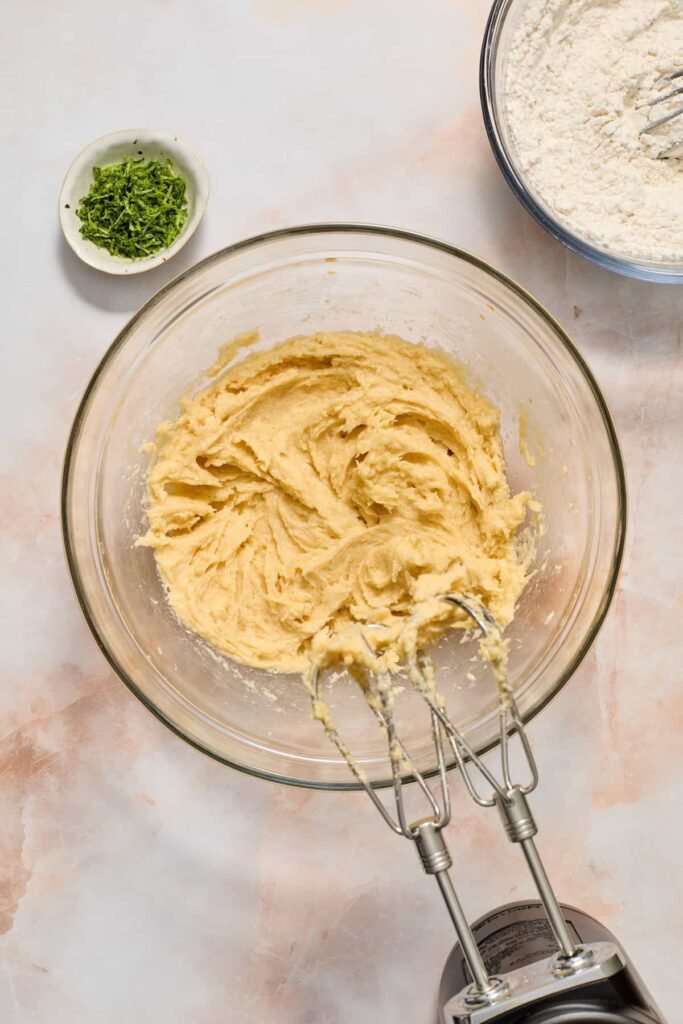
Step 3: Add the dry ingredients in thirds, alternating with the key lime zest, mixing on low after each addition. The goal is a dough that just comes together — no more.
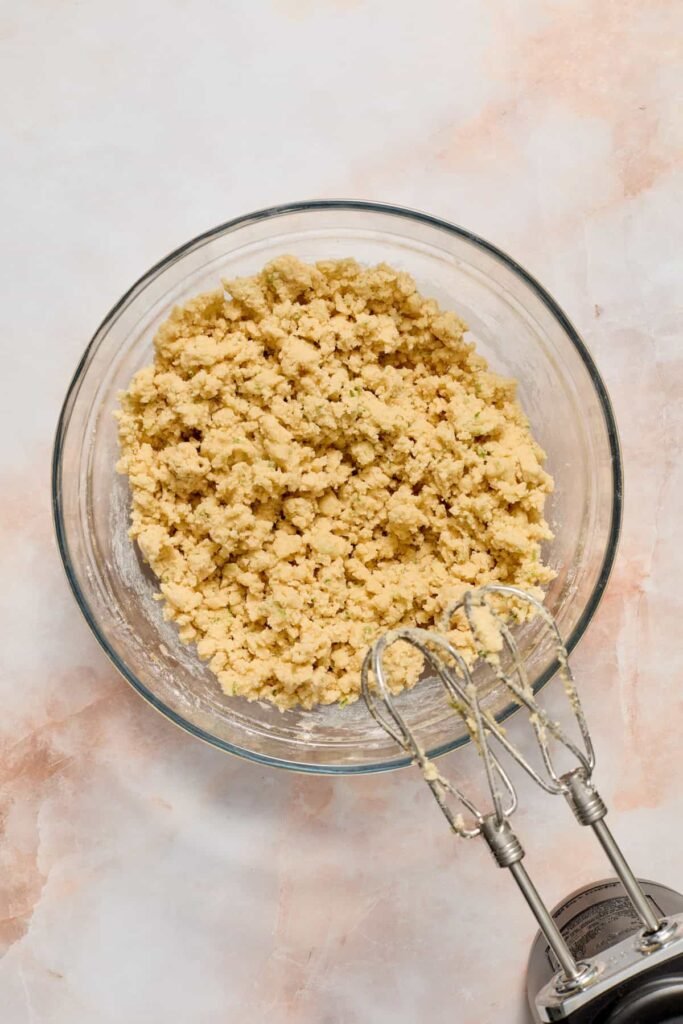
Step 4: Stop mixing the moment you no longer see streaks of dry flour. Overworking the dough activates the gluten and leads to tougher, denser cookies — the opposite of what we’re going for.
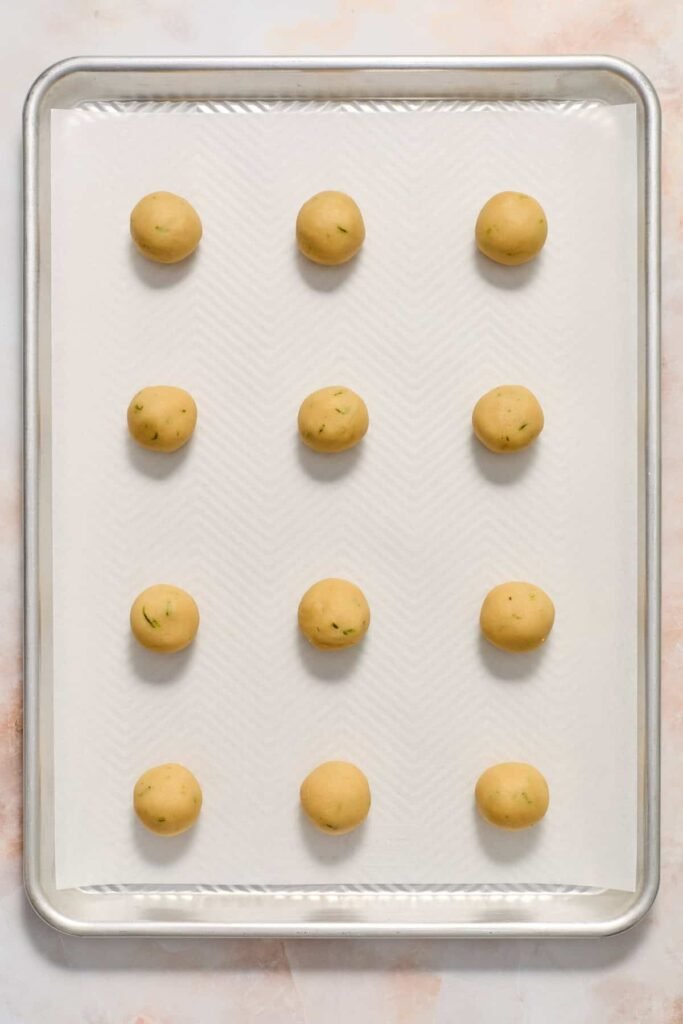
Step 5: Scoop the dough and roll it between your palms into smooth 1½-inch balls. Place them on a parchment-lined baking sheet with a couple inches between each one. If your kitchen is running warm and the dough feels sticky, a quick 15-minute chill in the fridge will firm things right up.
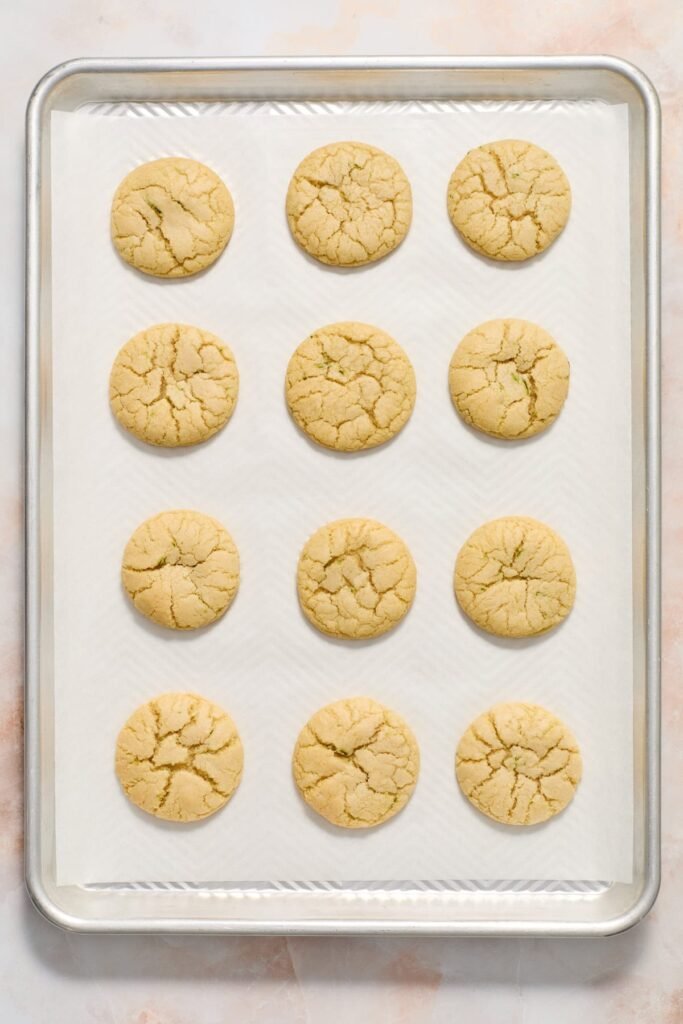
Step 6: Bake in a preheated oven for 9 to 11 minutes. These cookies are done when the edges look just set and the centers still appear slightly underdone. They’ll continue cooking on the hot pan after you pull them out, so trust the process and take them out early.
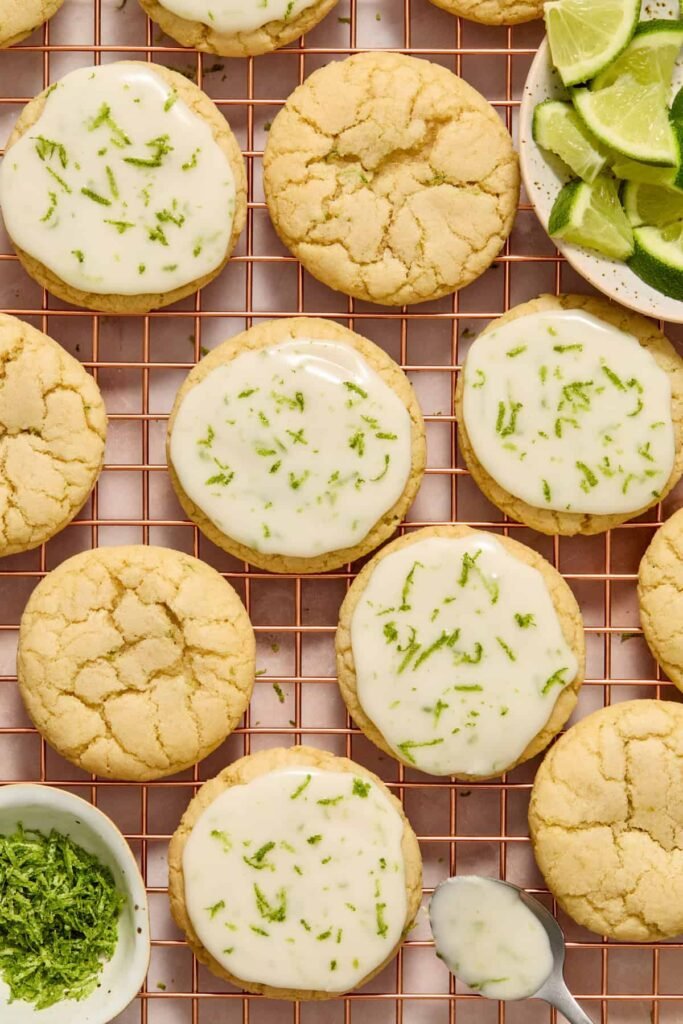
Step 7: Let the cookies cool completely on a wire rack — glazing warm cookies means a runny mess. Whisk together your lime glaze and let it rest for 5 to 10 minutes before using; it thickens slightly as it sits and clings to the cookies much better. Dip the tops straight into the glaze or spread it on with a spoon. Finish with a pinch of fresh zest for color and extra fragrance.
Recipe Tips
Butter temperature makes or breaks these cookies. Too cold and it won’t cream properly, resulting in dense, flat cookies. Too warm and the dough turns greasy and spreads too aggressively in the oven. Properly softened butter holds its shape but yields to gentle pressure.
Pull them out before you think they’re ready. This sounds counterintuitive, but it’s the single most important tip for achieving that chewy center. If they look done in the oven, they’re already overdone. Trust the timer, not your eyes.
Hand-rolling over scooping. Using a cookie scoop is faster, no argument there. But rolling the dough between your palms creates smoother, rounder cookies with a more uniform bake and a cleaner look once glazed. Worth the extra two minutes.
Storage
At room temperature: Stored in an airtight container, these cookies stay soft and chewy for up to 4 to 5 days. They’re at their absolute peak within the first 2 to 3 days when the glaze is still slightly set and the centers are perfectly tender.
In the refrigerator: Refrigerating extends their shelf life to about 5 days. Let them come to room temperature before eating for the best texture.
Freezing baked cookies: Cool completely before freezing. Ideally, freeze them un-glazed and add the lime glaze after thawing — it keeps the coating looking fresh and prevents any texture weirdness. If you do freeze them glazed, layer parchment paper between stacked cookies to prevent sticking.
Freezing The Cookie Dough
Raw cookie dough freezes beautifully. Roll the dough into balls first, spread them out on a baking sheet, and freeze until solid before transferring to a zip-top freezer bag. They’ll keep for up to 3 months.
To bake from frozen, add an extra 2 to 4 minutes to the bake time and keep a close eye on them. Alternatively, thaw overnight in the fridge and bake as normal the next day.
Frequently Asked Questions
Can I use bottled key lime juice instead of fresh key limes?
For the glaze, bottled key lime juice works in a pinch — just make sure it’s 100% juice with no added sweeteners. However, you’ll still need fresh limes for the zest, which gives the actual cookies most of their flavor. Zest doesn’t come in a bottle, so there’s no real shortcut there.
Can I make these without a mixer?
You can, but it takes some elbow grease. The butter needs to be very soft, and you’ll need to beat the butter and sugar vigorously with a wooden spoon or silicone spatula for at least 2 to 3 minutes to get it light and fluffy. The results are slightly less airy but still delicious.
How do I know when the glaze is the right consistency?
The glaze should coat the back of a spoon and drip off slowly — not pour like water, not sit stiff like frosting. If it’s too thin, stir in more powdered sugar a tablespoon at a time. Too thick? Add lime juice or a tiny splash of water, drop by drop, until it loosens up.
Can I double this recipe for a crowd?
Absolutely. This recipe doubles without any issues. Just make sure you’re not overcrowding your baking sheets — cookies need space to spread and bake evenly. Rotate the pans halfway through if baking multiple sheets at once.
Do these taste better the next day?
Honestly, yes. The lime flavor deepens slightly as the cookies sit, and the glaze sets into a thin, slightly chewy layer that makes them even more satisfying. If you can wait, they’re worth it.
Can I make these vegan?
With a couple of swaps, yes. Replace the butter with a high-quality vegan butter stick (not a spread) and use a flax egg (1 tablespoon ground flaxseed mixed with 3 tablespoons water, rested for 5 minutes). The texture will be slightly different but still very good.

Key Lime Cookies
Ingredients
For the Cookies:
- ½ cup Unsalted butter Softened to room temperature
- ¾ cup Light brown sugar Packed
- 1 Large egg Room temperature
- 1 tsp Vanilla extract Or ½ tsp vanilla + ½ tsp lime extract
- 1 tbsp Key lime zest From about 6–8 key limes
- 1 ¾ cups All-purpose flour 219g, spooned and leveled
- ½ tsp Baking soda
- ¼ tsp Salt
- 1 cup Powdered sugar Sifted
- 2 tbsp Key lime juice Freshly squeezed
- 1 tsp Key lime zest Plus extra for garnish
- 1-2 tsp Milk or cream To adjust consistency
Instructions
- Preheat your oven to 350°F (175°C). Line two baking sheets with parchment paper and set aside.2. Cream the butter and sugar. In a large bowl, beat the softened unsalted butter and light brown sugar together using a hand mixer or stand mixer on medium-high speed for 1 to 2 minutes, until the mixture is pale, fluffy, and noticeably increased in volume. Don't cut this step short — proper creaming is the foundation of a soft, chewy cookie.3. Add the wet ingredients. Mix in the egg and vanilla extract on medium speed until fully incorporated and smooth, about 30 seconds.4. Whisk the dry ingredients. In a separate small bowl, whisk together the all-purpose flour, baking soda, and salt until evenly combined.5. Combine wet and dry. With the mixer on low, add the dry ingredients in three additions, sprinkling in the key lime zest alongside the final addition. Mix only until no dry streaks remain — stop as soon as the dough comes together. Overmixing leads to tough cookies.6. Shape the dough. Scoop out portions of dough and roll each one between your palms into a smooth, round ball about 1½ inches in diameter. Arrange them on the prepared baking sheets, spacing about 2 inches apart. If the dough feels sticky or soft, refrigerate for 15 minutes before baking.7. Bake for 9 to 11 minutes, until the edges are just barely set and the centers still look slightly underdone and puffy. They will firm up as they cool — pulling them out early is the key to that soft, chewy center.8. Cool completely. Transfer cookies to a wire rack and let them cool fully before glazing. Glazing warm cookies will cause the icing to slide right off.9. Make the glaze. Whisk together the powdered sugar, key lime juice, and zest in a small bowl. Add milk or cream one teaspoon at a time to reach a smooth, pourable consistency that coats the back of a spoon. Let it sit for 5 to 10 minutes — it thickens slightly as it rests and clings much better to the cookies.10. Glaze the cookies. Dip the top of each cooled cookie into the glaze or spread it on with a small spoon. Sprinkle with extra key lime zest while the glaze is still wet. Allow the glaze to set for 15 to 20 minutes before stacking or storing.
Notes
- Butter temperature matters more than you think. Properly softened butter should hold its shape but yield to gentle finger pressure. If it’s shiny or greasy, it’s too warm — pop it in the fridge for 10 minutes before starting.
- Can’t find key limes? Regular Persian limes work as a substitute. The flavor will be slightly less aromatic and tart, but the cookies are still absolutely delicious.
- Stronger lime flavor? Replace half of the vanilla extract with lime extract for a more intense citrus punch throughout the cookie.
- Storage: Keep in an airtight container at room temperature for up to 4 to 5 days, or refrigerate for up to 5 days. Freeze un-glazed cookies for up to 3 months; add glaze after thawing.
- Freezing the dough: Roll into balls, freeze on a baking sheet until solid, then transfer to a freezer-safe bag. Bake from frozen at 350°F, adding 2 to 4 extra minutes to the bake time.
- Glaze too thin? Add powdered sugar one tablespoon at a time. Too thick? Add lime juice or water, one drop at a time, until it loosens to the right consistency.
Nutrition
Calories: 123kcal, Carbohydrates: 21g, Protein: 1g, Fat: 4g, Saturated Fat: 3g, Polyunsaturated Fat: 1g, Monounsaturated Fat: 1g, Trans Fat: 1g, Cholesterol: 17mg, Sodium: 76mg, Potassium: 19mg, Fiber: 1g, Sugar: 13g, Vitamin A: 129IU, Vitamin C: 1mg, Calcium: 6mg, Iron: 1mg Nutrition information is automatically calculated and should only be used as an approximation.Shop This Post:
Hand Mixer
Mixing Bowls
Zester
Citrus Juicer
Leave a Reply