
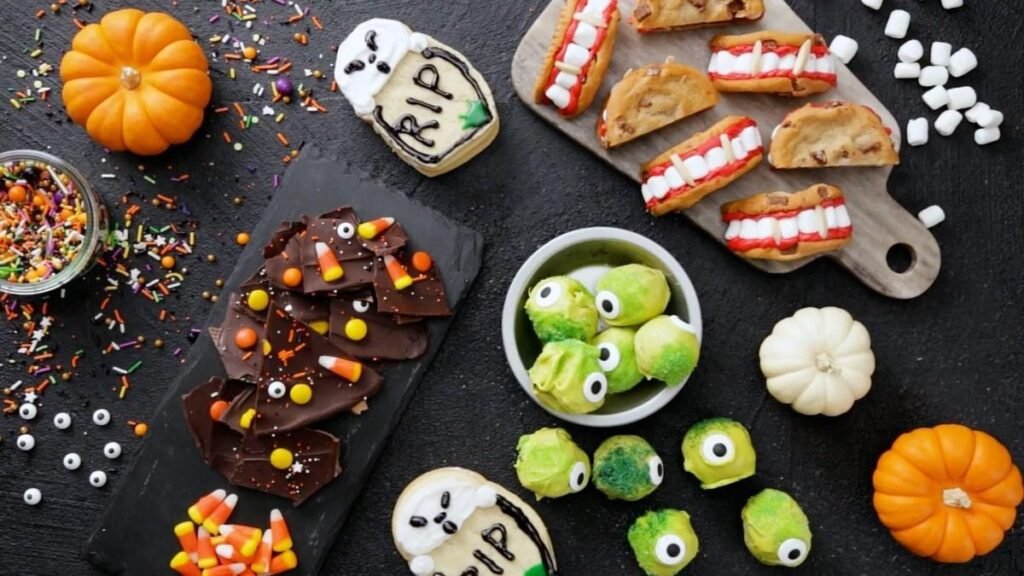
Halloween is the perfect excuse to make something a little spooky, sweet, and fun. But between decorating the house, planning costumes, and getting ready for a Halloween party, spending hours in the kitchen isn’t always practical.
That’s where these 15 easy Halloween treats ready in 30 minutes come in. From chocolate-covered strawberries transformed into little ghosts to crunchy mummy pretzels and colorful monster treats, these ideas use simple ingredients and easy decorating techniques to create festive desserts without complicated baking projects.
You’ll find options for kids’ Halloween parties, school celebrations, family movie nights, and last-minute gatherings. Many use convenient ingredients like cookies, marshmallows, pretzels, chocolate, and ready-made brownie bites, so you can spend less time preparing and more time enjoying the holiday.
Whether you’re looking for cute Halloween treats for kids or quick Halloween desserts for a party table, these recipes offer plenty of inspiration for a deliciously spooky celebration.
Table of Contents
Why You’ll Love These Easy Halloween Treats
- Quick and convenient: Most of these ideas use simple ingredients and straightforward decorating methods. They’re ideal when you need festive treats without spending the whole afternoon in the kitchen.
- Perfect for Halloween parties: Ghosts, spiders, monsters, and mummies bring a playful Halloween look to dessert tables. Arrange several varieties together for an eye-catching party spread.
- Fun for kids and families: Little hands can help add candy eyes, drizzle chocolate, or decorate cookies. Choose age-appropriate tasks and supervise children around hot ingredients.
- Easy-to-find ingredients: Cookies, pretzels, marshmallows, chocolate, fruit, and pudding make Halloween preparation simple. You won’t need specialty baking equipment for most of these treats.
- Plenty of variety: Choose chocolatey desserts, fruity snacks, crunchy treats, and no-bake options. There is something for different tastes and party occasions.
15 Easy Halloween Treats Ready in 30 Minutes
1. Halloween Chocolate-Covered Strawberry Ghosts
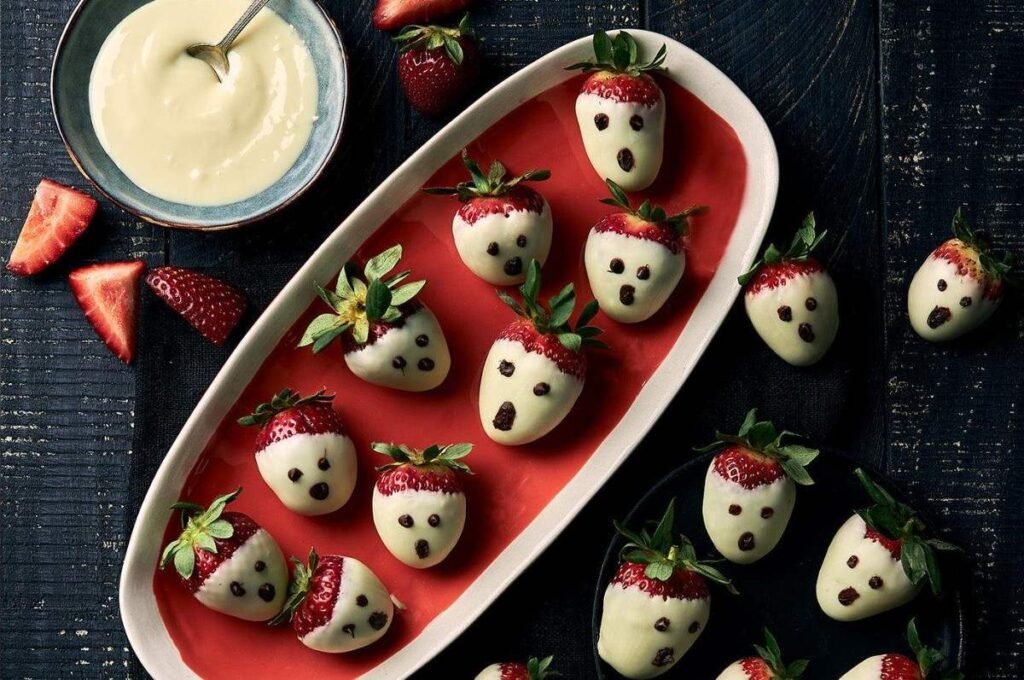
These adorable strawberry ghosts are a simple way to add fresh fruit to your Halloween dessert table. Their white chocolate coating and tiny chocolate eyes make them festive without requiring special decorating skills.
Prep time: 15 minutes. Setting time: 10–15 minutes, depending on the chocolate
Ingredients
- Fresh strawberries — choose firm, dry berries with their green tops.
- White chocolate or white candy melts — for the ghost coating.
- Dark chocolate or mini chocolate chips — for the eyes and mouth.
- Coconut oil — optional, to help thin the coating if needed.
Instructions
- Wash the strawberries and dry them completely.
- Melt the white chocolate gently according to the package instructions.
- Hold each strawberry by its green top and dip it into the melted chocolate.
- Place the strawberries on parchment paper, letting a little chocolate pool at the bottom to create a ghost shape.
- Once the coating begins to set, add small dark chocolate eyes and a mouth.
- Allow the coating to firm up before serving.
Quick tip: Even a little moisture can make melted chocolate seize, so dry the berries thoroughly.
2. Oreo Spider Cookies
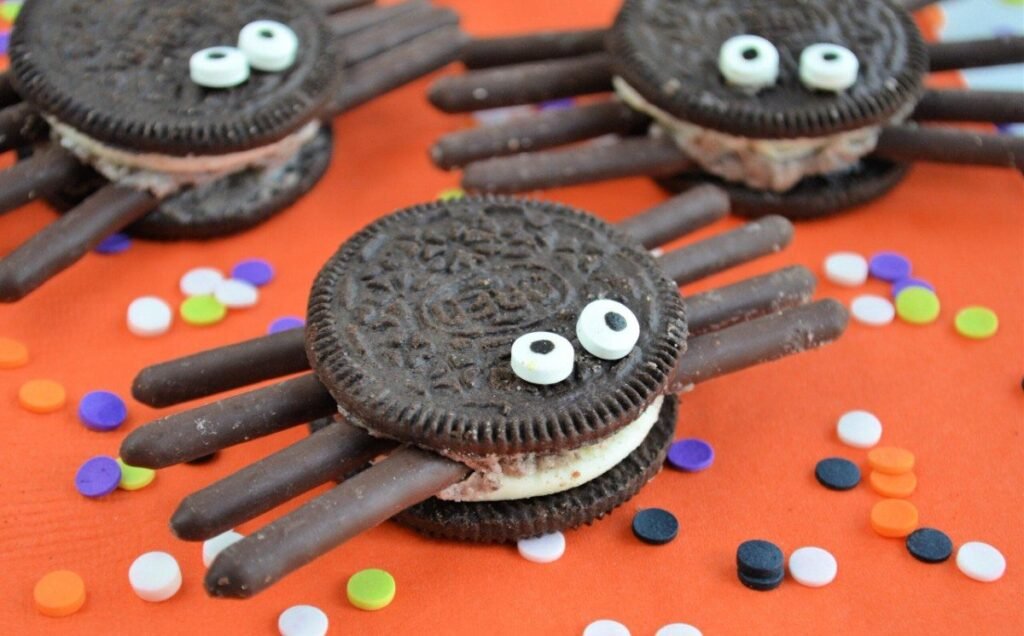
Turn ordinary chocolate sandwich cookies into creepy-cute spiders with a few simple decorations. These no-bake treats are especially useful when you need something quick for a classroom celebration or Halloween snack table.
Prep time: 15 minutes
Ingredients
- Chocolate sandwich cookies — the spider bodies.
- Thin pretzel sticks — for the legs.
- Candy eyes — for a playful expression.
- Melted chocolate or decorating icing — to attach the decorations.
Instructions
- Carefully twist open each cookie if needed.
- Press four short pretzel pieces into each side of the cream filling to form eight legs.
- Close the cookie gently to secure the legs.
- Attach two candy eyes with a small dot of melted chocolate or icing.
- Let the decorations set before arranging the spiders on a serving plate.
Quick tip: Break the pretzels over a plate to catch crumbs and make the legs easier to size evenly.
3. Mummy Pretzel Rods
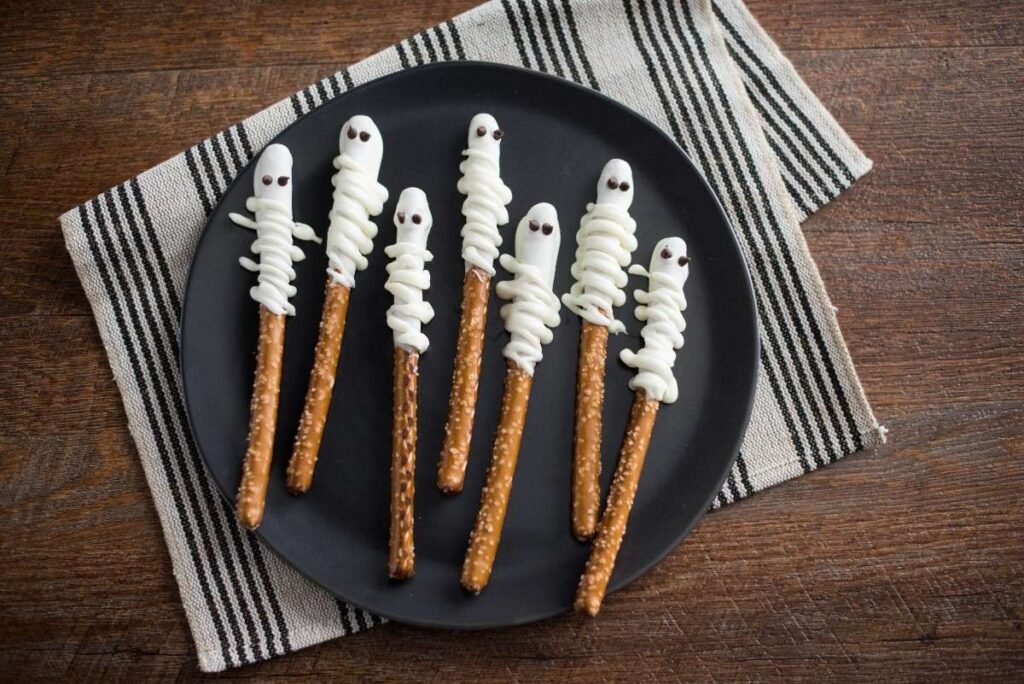
Sweet, salty, and wonderfully crunchy, mummy pretzel rods are an easy Halloween treat that looks impressive on a party platter. The white chocolate drizzle creates the mummy bandages, while candy eyes finish the spooky design.
Prep time: 15 minutes. Setting time: 10–15 minutes
Ingredients
- Pretzel rods — the crunchy base.
- White chocolate or white candy melts — for the mummy bandages.
- Candy eyes — for decoration.
- Dark chocolate — optional for extra details.
Instructions
- Melt the white chocolate until smooth.
- Dip each pretzel rod partially into the chocolate, leaving a section uncovered for easy handling.
- Place the rods on parchment paper.
- Drizzle more white chocolate back and forth over the coated portion to resemble mummy bandages.
- Add two candy eyes before the chocolate sets.
- Leave the pretzels at room temperature or chill briefly until firm.
Quick tip: Use a spoon or piping bag to create thin, irregular chocolate lines instead of thick layers.
4. Monster Rice Krispies Treats
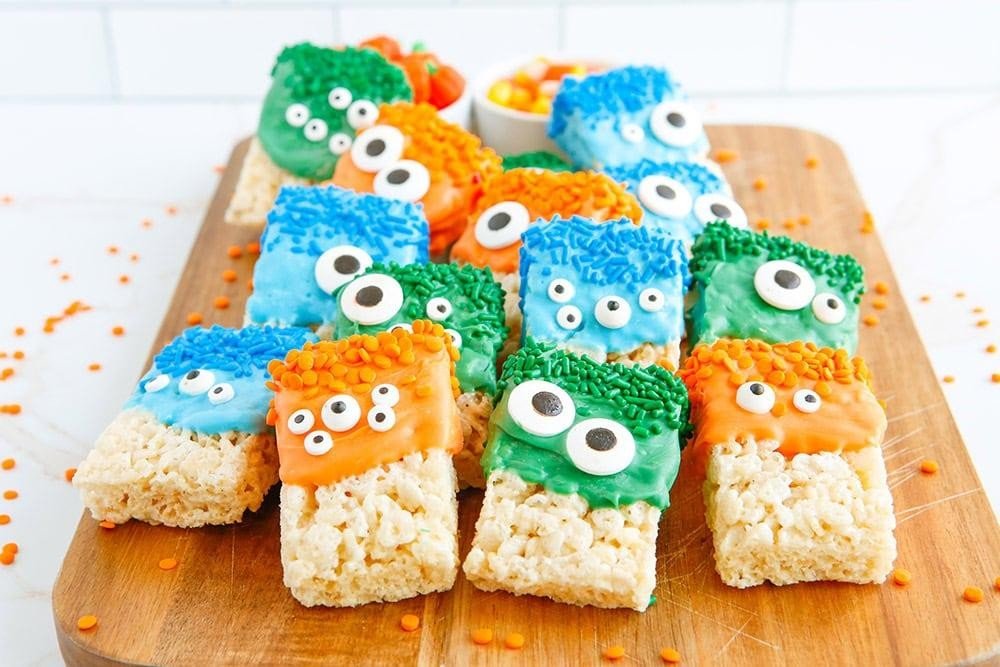
These colorful cereal treats are chewy, crunchy, and easy to customize. Green coloring, candy eyes, and a few sprinkles transform a familiar snack into a fun Halloween monster.
Prep time: 20 minutes
Ingredients
- Crispy rice cereal — for a light, crunchy texture.
- Marshmallows — to bind the cereal.
- Butter — for melting with the marshmallows.
- Green food coloring — optional for the monster look.
- Candy eyes and Halloween sprinkles — for decorating.
Instructions
- Melt the butter in a saucepan over low heat.
- Add the marshmallows and stir until melted and smooth.
- Mix in a little green food coloring, if desired.
- Remove from the heat and fold in the cereal.
- Press the mixture gently into a greased or parchment-lined pan.
- While still slightly warm, decorate with candy eyes and sprinkles.
- Let cool enough to hold its shape, then cut into squares.
Quick tip: Lightly grease your spatula and hands to keep the sticky mixture manageable. Avoid packing it too tightly, or the treats may become hard.
5. Halloween Popcorn Mix
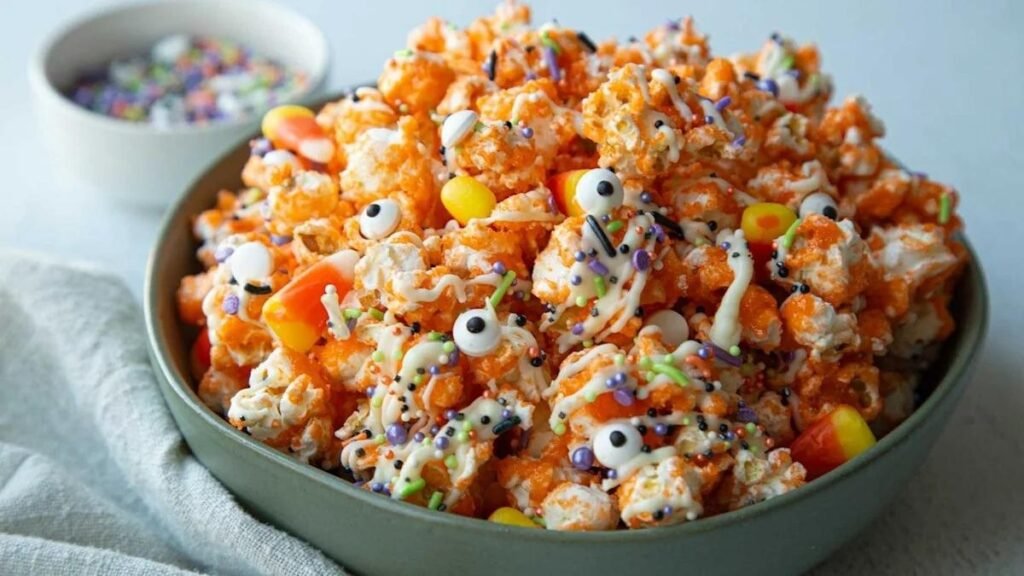
If you need a snack that feeds a crowd, this Halloween popcorn mix is a practical choice. Sweet candy, crunchy pretzels, and fluffy popcorn create a colorful combination that’s easy to serve in bowls or individual party bags.
Prep time: 10 minutes. Setting time: 10–15 minutes if using chocolate
Ingredients
- Popped popcorn — the light, crunchy base.
- Mini pretzels — for a salty contrast.
- Halloween-colored candy pieces — for sweetness and color.
- Candy corn — optional for a traditional seasonal touch.
- Melted white chocolate — optional as a drizzle.
Instructions
- Spread the popcorn over a large baking sheet.
- Add the mini pretzels and candy pieces.
- Drizzle with melted white chocolate, if using.
- Scatter candy corn over the mixture.
- Let the chocolate set before breaking the mix into clusters.
- Serve in a large bowl or portion into treat bags.
Quick tip: Add delicate candy after the popcorn has cooled, and use plain popcorn without unpopped kernels.
6. Witch Hat Cookies
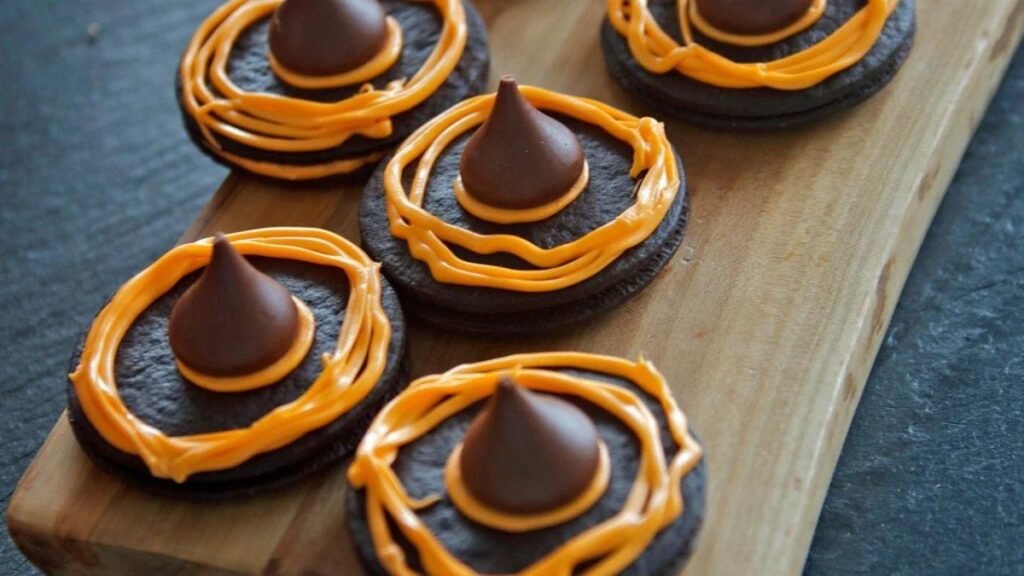
Witch Hat cookies look like they came straight from a Halloween storybook, but they take very little effort to assemble. Chocolate cookies and chocolate candies create the hat shape, while colourful icing adds a festive finishing touch.
Prep time: 15 minutes
Ingredients
- Round chocolate cookies — for the hat brims.
- Chocolate kiss-shaped candies — for the pointed tops.
- Orange or purple decorating icing — to attach the pieces and add details.
- Halloween sprinkles — optional decoration.
Instructions
- Arrange the chocolate cookies on a flat tray.
- Pipe a small circle of icing in the center of each cookie.
- Press a chocolate candy onto the icing to create the hat.
- Pipe a colored band around the base of each candy.
- Add sprinkles if desired, then allow the icing to set.
Quick tip: Choose flat cookies with enough space around the candy to make the hat brim visible.
7. Ghost Marshmallow Pops
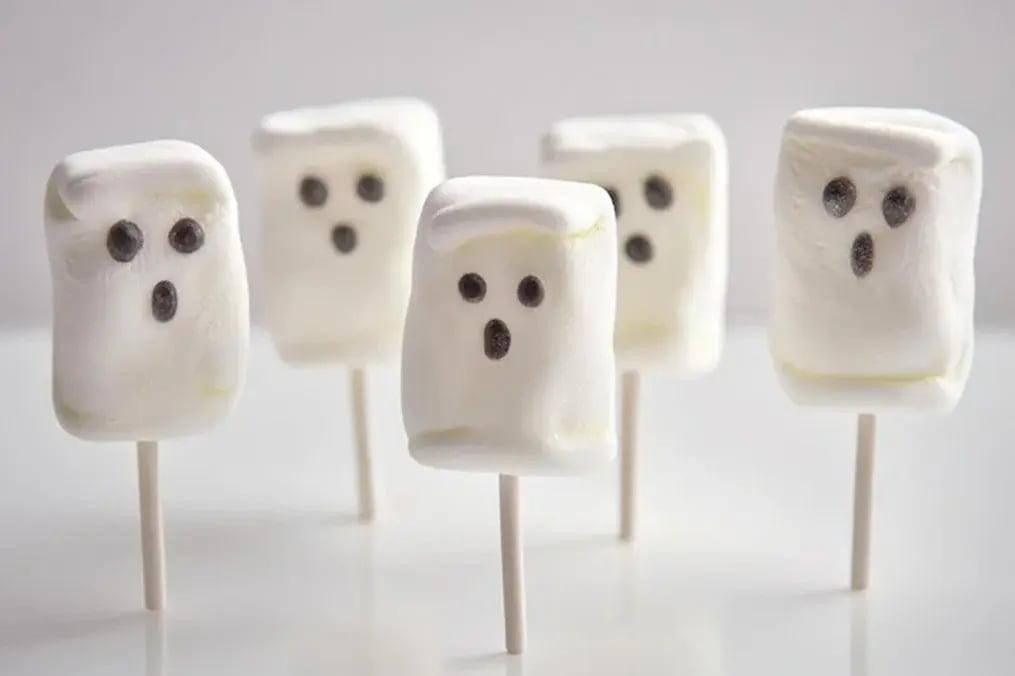
These ghost pops are a simple, kid-friendly option that doubles as a party decoration. Their soft marshmallow centers and sweet coating make them easy to serve individually.
Prep time: 15 minutes. Setting time: 10–15 minutes
Ingredients
- Large marshmallows — for the ghosts.
- Lollipop sticks — for easy handling.
- White chocolate or white candy melts — for coating.
- Dark chocolate or edible food markers — for the faces.
Instructions
- Insert a lollipop stick into each marshmallow.
- Melt the white chocolate according to the package directions.
- Dip the marshmallows into the coating and gently shake off excess.
- Stand them upright in a holder or lay them on parchment paper.
- Add ghost faces once the coating is firm enough to hold the details.
- Allow the coating to set completely before serving.
Quick tip: A block of clean, floral-free craft foam designed for food-safe use or a dedicated cake-pop stand can help keep the pops upright while they set.
8. Pumpkin-Shaped Chocolate Truffles
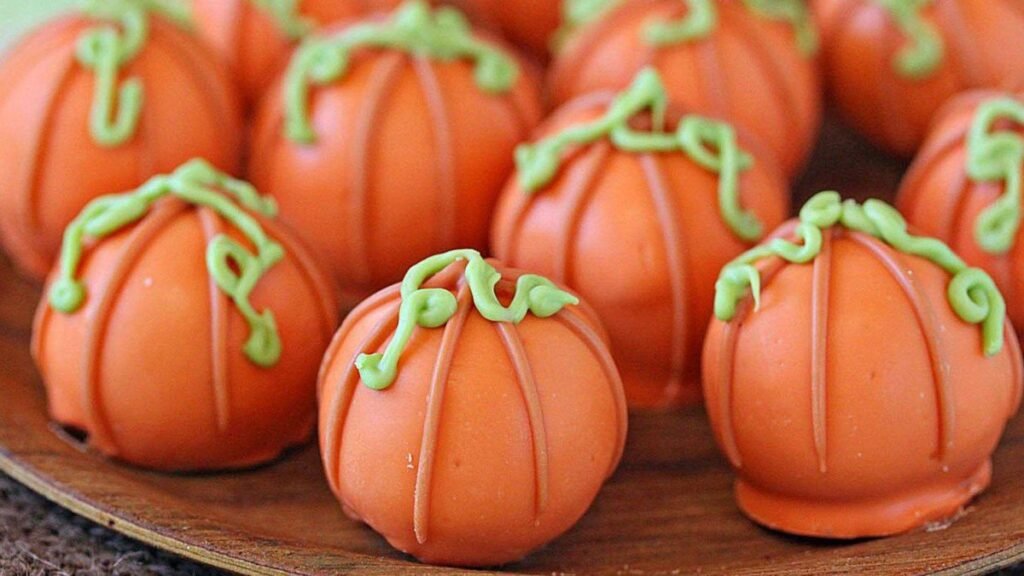
These pumpkin-inspired truffles bring a polished look to a Halloween dessert table. A shortcut using prepared chocolate truffles or soft chocolate sandwich-cookie crumbs can make the process much quicker than traditional candy making.
Prep time: 20 minutes. Setting time: May require additional chilling
Ingredients
- Chocolate sandwich cookies — for a quick crumb-based filling.
- Cream cheese — to bind the crumbs.
- Orange candy melts — for the pumpkin coating.
- Green candy pieces — for the stems.
- Melted chocolate — optional for pumpkin ridges.
Instructions
- Crush the chocolate sandwich cookies into fine crumbs.
- Mix with softened cream cheese until a moldable mixture forms.
- Roll into small balls and gently shape them like pumpkins.
- Dip each ball into melted orange candy coating.
- Add a small green candy piece at the top for the stem.
- Use a toothpick to create subtle pumpkin ridges before the coating sets.
- Chill until firm.
Quick tip: If the filling becomes too soft to shape, refrigerate it briefly. Because chilling adds time, these are best described as a 30-minute preparation project rather than guaranteed ready-to-eat in 30 minutes.
9. Halloween Brownie Bites
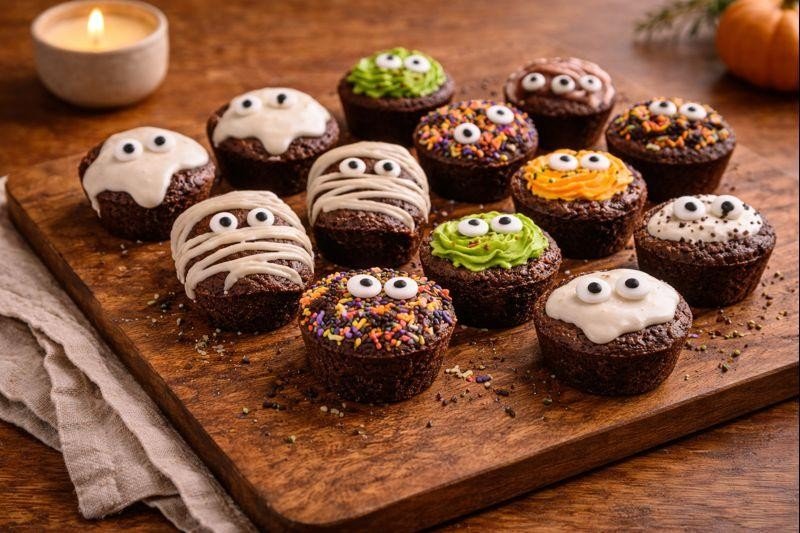
Brownie bites are ideal when you want a rich chocolate dessert without baking a full tray from scratch. Using prepared brownie bites makes decorating quick and lets you create several different designs from one batch.
Prep time: 15 minutes using ready-made brownie bites
Ingredients
- Prepared brownie bites — the chocolatey base.
- Orange and purple decorating icing — for Halloween colors.
- Candy eyes — for monster faces.
- Halloween sprinkles — for extra texture.
- White icing — optional for spiderweb designs.
Instructions
- Arrange the brownie bites on a tray.
- Pipe orange or purple icing over the tops.
- Add candy eyes to create monster faces.
- Use white icing to draw simple spiderwebs or zigzag patterns.
- Finish with Halloween sprinkles.
- Let the decorations set before stacking or transporting.
Quick tip: Decorate some brownies as monsters and others as spiderwebs to create variety without buying extra ingredients.
10. Candy Corn Pretzel Treats
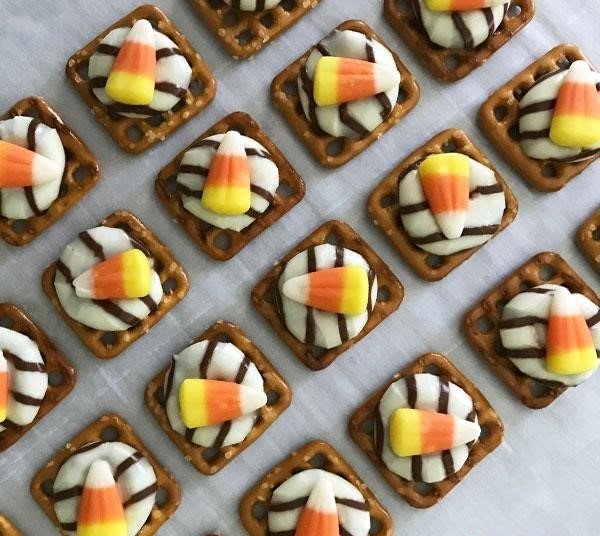
These colorful pretzel treats combine the salty crunch of pretzels with sweet candy coatings inspired by classic candy corn. They are especially useful for party snack bowls and homemade Halloween gift bags.
Prep time: 15 minutes. Setting time: 10–15 minutes
Ingredients
- Mini pretzel twists — for a crunchy base.
- White chocolate or candy melts — for dipping.
- Orange and yellow candy melts — for seasonal colors.
- Halloween sprinkles — optional.
Instructions
- Arrange the pretzels on parchment paper.
- Melt the white, orange, and yellow candy coatings separately.
- Dip portions of the pretzels into the different colors, or drizzle the colors in stripes.
- Add sprinkles while the coating is still wet.
- Let the treats set until the coating is firm.
Quick tip: Use small bowls and dipping forks to keep the colors separate and the designs neat.
11. Halloween Monster Apple Slices
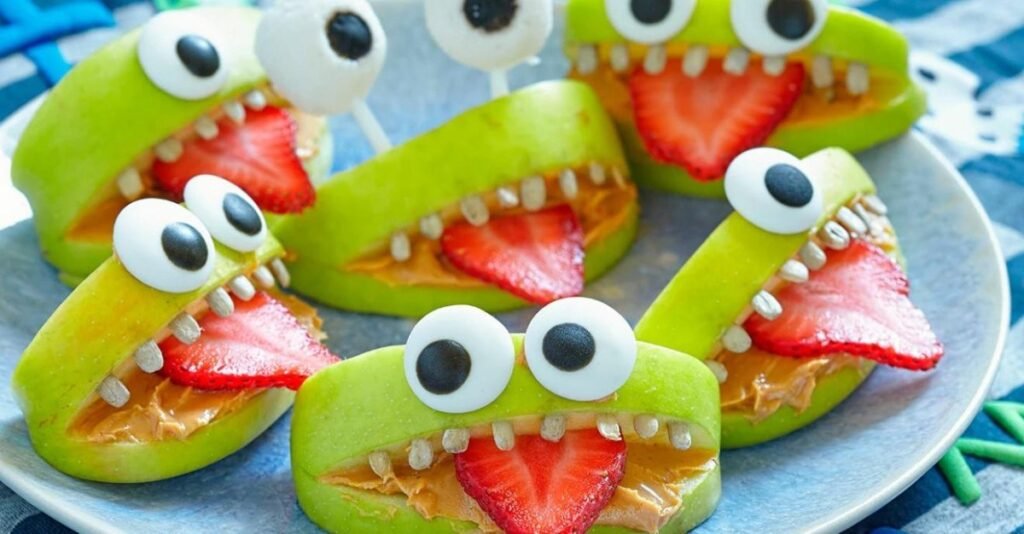
For a fresher option among all the sweets, try monster apple slices. Crisp apple wedges become funny little monster mouths with a creamy filling, candy eyes, and strawberry details.
Prep time: 15 minutes
Ingredients
- Apples — for crisp, juicy wedges.
- Peanut butter or sunflower seed butter — for the filling.
- Mini marshmallows — for monster teeth.
- Candy eyes — for the faces.
- Strawberries — optional for tongues.
- Lemon juice — to help slow browning.
Instructions
- Wash and core the apples, then cut them into thick wedges.
- Toss the cut surfaces lightly with lemon juice.
- Spread a thin layer of nut or seed butter on one side of each wedge.
- Add mini marshmallows along the edge to resemble teeth.
- Top with another apple wedge to form a mouth, if desired.
- Attach candy eyes with a small amount of spread and add strawberry tongues.
Quick tip: Keep the apple slices chilled until serving. Check allergy requirements carefully before using nut butter or candy decorations.
12. Spiderweb Chocolate Bark
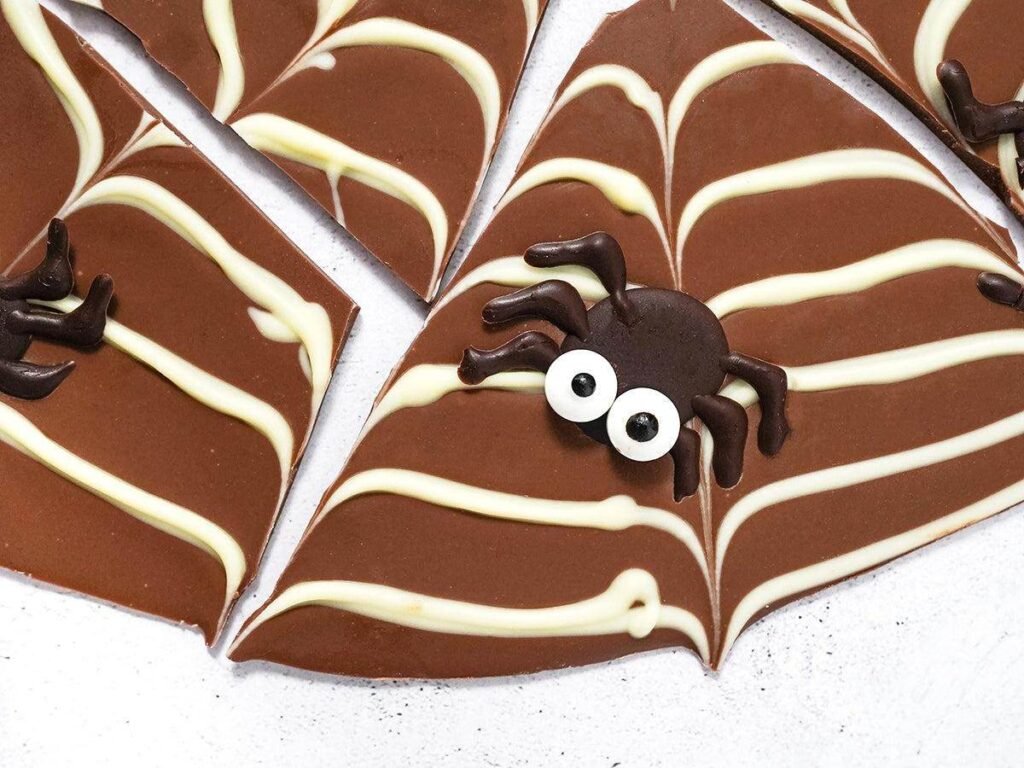
Chocolate bark is a great last-minute dessert because it looks decorative without requiring individual pieces to be shaped. A simple spiderweb pattern makes it feel festive, and you can break it into pieces for easy serving.
Prep time: 15 minutes. Setting time: 15–30 minutes or longer, depending on thickness
Ingredients
- Dark or milk chocolate — for the bark base.
- White chocolate — for the spiderweb.
- Halloween sprinkles — for color.
- Candy eyes — optional decoration.
Instructions
- Melt the dark or milk chocolate until smooth.
- Spread it in a thin, even layer on parchment paper.
- Melt the white chocolate and pipe concentric circles over the surface.
- Drag a toothpick from the center outward at intervals to create a spiderweb pattern.
- Add sprinkles and candy eyes while the chocolate is still soft.
- Chill or allow to set until firm, then break into pieces.
Quick tip: Keep the bark relatively thin so it sets more quickly and is easier to break into attractive pieces.
13. Halloween Sugar Cookies
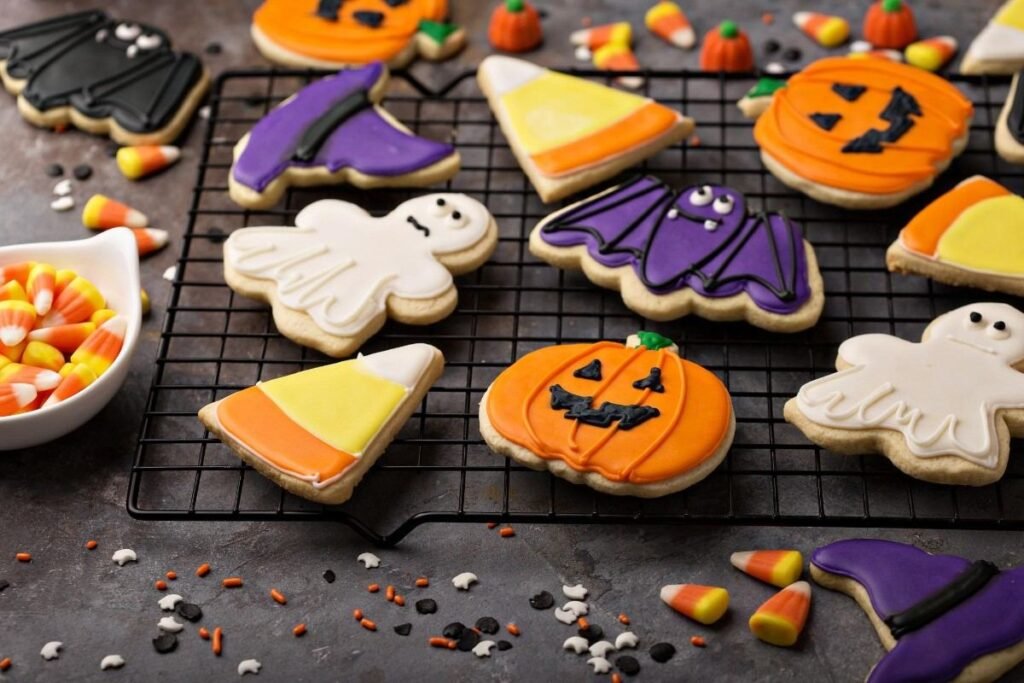
Decorated sugar cookies are a Halloween classic. To keep this recipe within a quick preparation window, use ready-made plain sugar cookies or cookies baked ahead of time, then focus on simple icing designs.
Prep time: 15–20 minutes using prepared cookies
Ingredients
- Plain sugar cookies — homemade and cooled or store-bought.
- Orange, black, purple, and white icing — for colorful designs.
- Halloween sprinkles — for quick decoration.
- Candy eyes — optional for ghost or monster faces.
Instructions
- Place the cooled cookies on a clean work surface.
- Spread or pipe icing onto each cookie.
- Create pumpkins, ghosts, bats, or simple striped patterns.
- Add candy eyes and sprinkles while the icing is still wet.
- Leave the cookies undisturbed until the icing has set.
Quick tip: Choose two or three simple designs instead of trying to decorate every cookie differently. If baking from scratch, include the baking and cooling time in your total preparation estimate.
14. Mini Mummy Pizzas
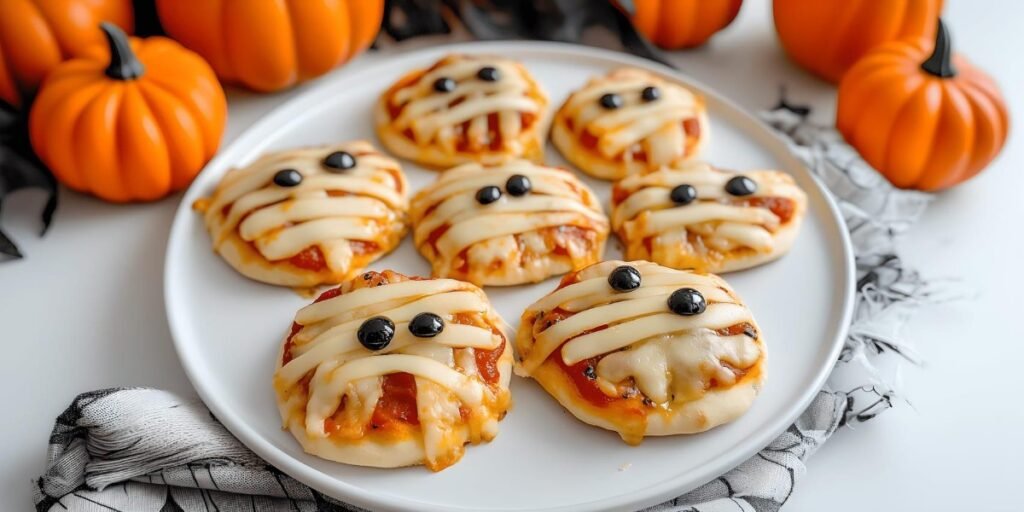
Not every Halloween treat has to be sweet. These mini mummy pizzas are a fun savory snack for Halloween movie nights, children’s parties, or a casual dinner before trick-or-treating.
Prep time: 10 minutes. Cook time: 8–12 minutes
Ingredients
- English muffins or mini pizza bases — for the crust.
- Pizza sauce — for a flavorful base.
- Mozzarella cheese — cut or pulled into strips.
- Black olives — for the mummy eyes.
- Italian seasoning — optional for extra flavor.
Instructions
- Preheat the oven according to the pizza base package directions, usually around 400°F (200°C).
- Split the English muffins and arrange them on a baking sheet.
- Spread a thin layer of pizza sauce over each half.
- Arrange mozzarella strips across the top to resemble mummy bandages.
- Add small olive pieces for eyes.
- Bake for 8–12 minutes, or until the cheese is melted and the bases are heated through.
Quick tip: Overlap the cheese strips in different directions for a more convincing mummy look. Allow the pizzas to cool slightly before serving to children.
15. Halloween Pudding Cups
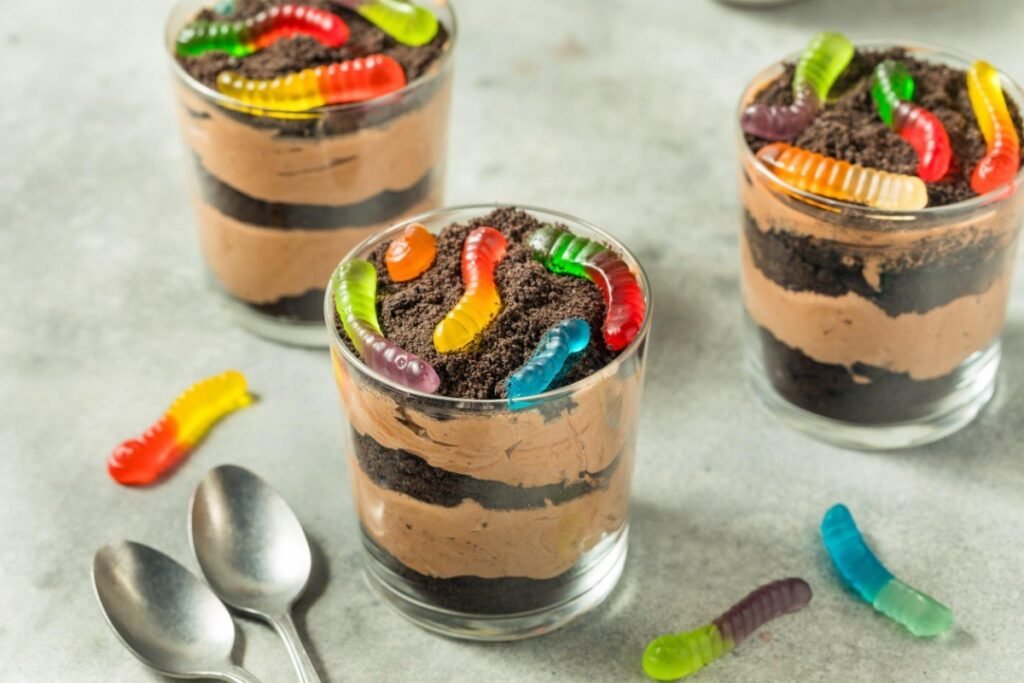
These Halloween pudding cups are a convenient make-ahead option for parties. Layers of chocolate pudding and crushed cookies create a spooky dirt-cup effect, while gummy worms or candy eyes provide the finishing touch.
Prep time: 10–15 minutes using prepared or instant pudding. Chilling time: Depends on the pudding used
Ingredients
- Chocolate pudding — prepared according to package directions or purchased ready-made.
- Chocolate sandwich cookies — crushed to resemble dirt.
- Whipped cream — optional for layering.
- Gummy worms or candy eyes — for decoration.
- Clear dessert cups — to show the layers.
Instructions
- Prepare the pudding according to the package directions, if using a mix.
- Spoon a layer of chocolate pudding into each clear cup.
- Add a layer of crushed chocolate cookies.
- Repeat the layers if the cups have enough space.
- Finish with whipped cream, gummy worms, or candy eyes.
- Refrigerate until serving, following the pudding package instructions.
Quick tip: Assemble the cups a few hours ahead if needed, but add crunchy cookie toppings shortly before serving to help them retain their texture.
Tips for Making Halloween Treats Quickly
- Use ready-made ingredients: store-bought cookies, brownie bites, pudding, and pretzels can save valuable preparation time. Focus your effort on decorating rather than making every component from scratch.
- Prepare your decorations first: Separate candy eyes, sprinkles, icing, and chocolate before you begin. Having everything within reach makes assembly faster and less messy.
- Choose no-bake recipes: ghost strawberries, mummy pretzels, witch hat cookies, and popcorn mix are excellent options when you want to avoid using the oven.
- Make treats in batches: dip several pretzels or strawberries before decorating them all together. Working assembly-line style saves time and helps keep the finished treats consistent.
- Keep food safety in mind: refrigerate perishable ingredients and finished desserts when required. Check ingredient labels for allergies, and follow school or event rules before sending treats for children.
Easy Halloween Treats for Different Occasions
Halloween parties
Serve a mixture of mummy pretzel rods, Halloween popcorn, spider cookies, and chocolate bark. Combining sweet and salty treats creates a varied dessert table.
Kids’ celebrations
Monster cereal treats, ghost pops, and decorated cookies are colorful and fun to make together. Choose decorations that are appropriate for the children’s ages and avoid small choking hazards for young children.
Family movie nights
Put together a bowl of Halloween popcorn mix with brownie bites and chocolate pretzels. These easy snacks are convenient to share during a spooky movie marathon.
Halloween gifts and favors
Package fully set pretzels, cookies, or chocolate bark in food-safe bags. Keep chocolate away from heat and label common allergens when sharing treats.
Make-Ahead and Storage Tips
The best storage method depends on the ingredients used. Chocolate treats can soften in warm conditions, while fruit-based and dairy-based desserts need more careful refrigeration.
- Room temperature: Fully set chocolate bark, pretzel treats, and plain decorated cookies can often be kept in an airtight container in a cool, dry place. Follow the ingredient packaging and recipe-specific storage requirements.
- Refrigerator: Store chocolate-covered strawberries, pudding cups, cream cheese truffles, and other perishable treats covered in the refrigerator. For the best quality, prepare fresh fruit treats close to serving time.
- Freezer: Some undecorated brownies and baked cookies freeze well in airtight packaging. Decorations and textures may change after thawing, so test a small batch first.
- Reheating: Most candy-coated and chocolate-decorated treats do not need reheating. Mini mummy pizzas can be reheated until hot throughout, while pudding cups and fresh fruit desserts should be served chilled as appropriate.
For party planning, prepare shelf-stable decorations and dry ingredients in advance, then assemble the more delicate treats closer to the event.
Final Thoughts
Halloween food doesn’t have to be complicated to be memorable. With a few everyday ingredients, colorful decorations, and some simple shortcuts, you can create a table full of spooky treats that look festive and taste delicious.
From chocolate-covered strawberry ghosts to crunchy mummy pretzels and savory mini mummy pizzas, these 15 ideas give you plenty of options for parties, school celebrations, and cozy nights at home.
Pick two or three favorites, get the decorations ready, and invite the family to join in. Save this list of easy Halloween treats so you have plenty of inspiration when October gets busy.
Leave a Reply