
Forget the store-bought version! These from-scratch Pop-Tarts are surprisingly simple to pull together, endlessly customizable, and taste far better than anything that comes out of a foil wrapper. Whether you grab a ready-made pie crust from the store or roll out your own dough from scratch, these pastries come together quickly and make for a genuinely fun kitchen project.

Table of Contents
WHY YOU WILL LOVE THESE HOMEMADE POP TARTS:
- Kid-approved and kid-friendly. Almost every step of this recipe is something little hands can tackle — shaping the dough, spooning in the filling, pressing the edges shut, and decorating with icing and sprinkles. It’s a great weekend activity that ends with something delicious.
- Totally customizable flavors. Strawberry, blueberry, Nutella, brown sugar cinnamon — the combination possibilities are practically endless. You’re the chef here.
- You control the icing. No more cracking open a package only to find a sad, half-frosted corner. Pile it on as thick as you like.
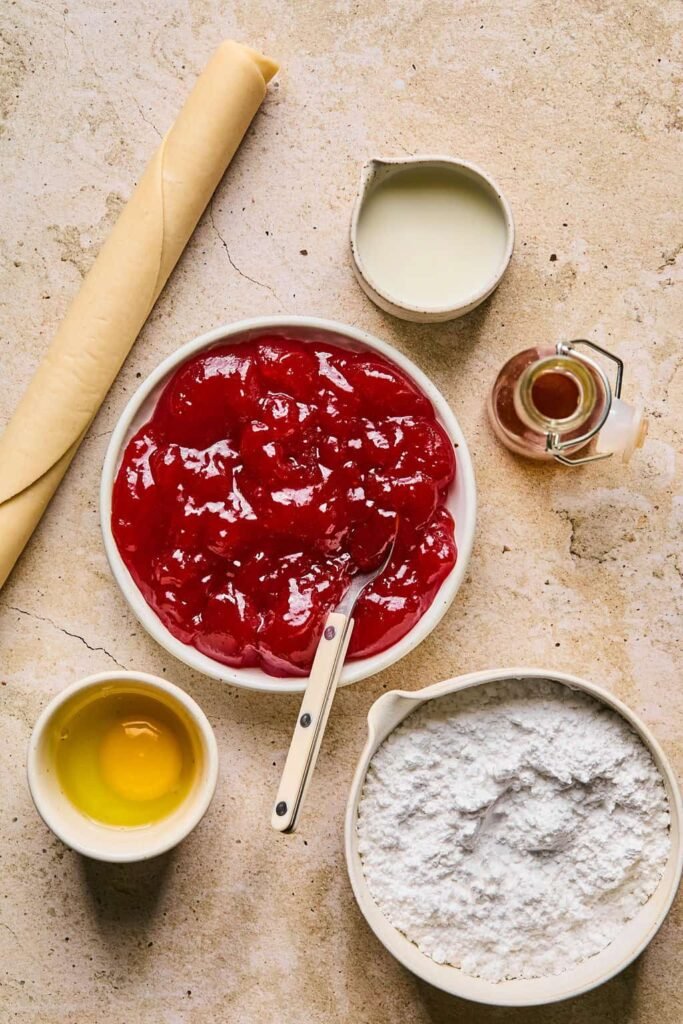
INGREDIENT NOTES
- Pie crust: A store-bought rolled crust keeps things quick and easy. If you have extra time and love a challenge, homemade pastry dough works beautifully, too.
- Egg wash: A beaten egg brushed on the edges helps seal and brown the pastry. For an egg-free swap, try melted coconut oil or a mixture of almond milk and agave.
- Frosting liquid: Both heavy cream and regular milk work well in the icing — use whatever you have on hand.
STEP-BY-STEP INSTRUCTIONS
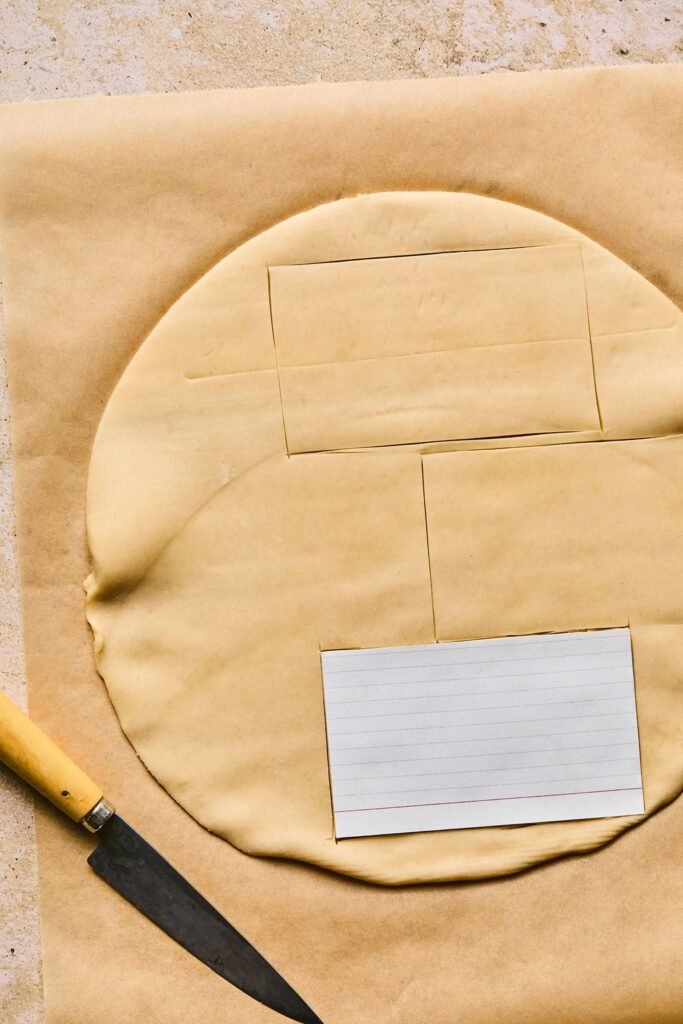
- Bring your dough to room temperature. Cold pie crust cracks and tears, so give it a few minutes on the counter before working with it.
- Cut into rectangles. Stack the two dough sheets and cut into roughly 3×4-inch rectangles using a pizza cutter, sharp knife, or pastry cutter. Gather the scraps, re-roll to about ¼-inch thickness, and cut additional rectangles.


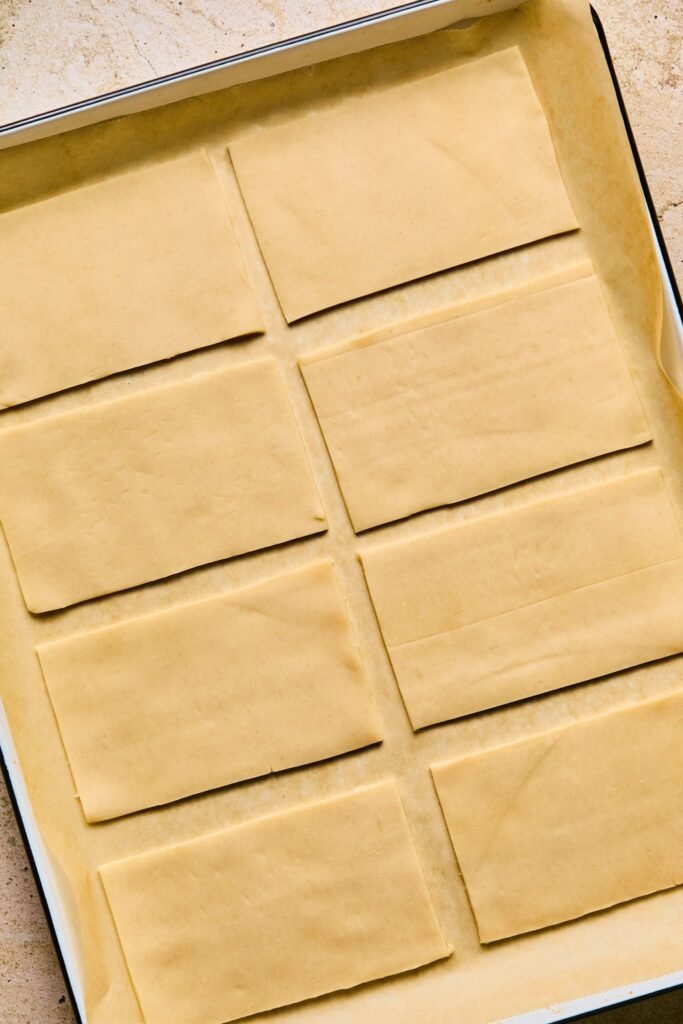
- Lay out the base layer. Arrange the bottom rectangles on a parchment-lined baking sheet.
- Add your filling. Spoon about 1½ tablespoons of jam or your chosen filling into the center of each rectangle. No need to spread it edge-to-edge — just keep it roughly centered.
- Apply the egg wash and top. Brush beaten egg around the border of each filled rectangle, then press a second rectangle firmly on top.


- Seal the edges. Use your fingers first to press the layers together, then run a fork along all four edges to crimp them tightly. This double-seal is the key to keeping the filling inside where it belongs.
- Vent and glaze. Poke a few holes in the top of each pastry with a fork to let steam escape, then brush the entire surface with egg wash.
- Bake at the recommended temperature for 12–15 minutes, or until the tops are a deep golden brown.


- Cool completely before frosting. Patience here pays off — icing applied to a warm pastry will slide right off.
- Frost and decorate. Whisk together your icing ingredients and spread over each cooled pastry. Top with sprinkles if you like.

TIPS FOR THE BEST RESULTS
- Don’t overfill. Too much jam creates pressure inside and will push through the sealed edges during baking.
- Double-crimp the edges. Fingers first, then fork — this two-step method makes a real difference in keeping everything neatly sealed.
- Let them cool fully. This step is non-negotiable if you want the icing to set properly.
FLAVOR IDEAS TO TRY
- Brown Sugar Cinnamon: Combine ¾ cup brown sugar, 2–3 tablespoons softened butter, and 2–3 teaspoons ground cinnamon for the filling. Add a pinch of cinnamon to your icing as well.
- S’mores: Fill with chopped chocolate and mini marshmallows. Top with marshmallow fluff or chocolate icing and crushed graham crackers.
- Other creative options: Lemon curd, Nutella, peanut butter and jelly, apple butter, your favorite pie filling, or blueberry preserves all work wonderfully.

STORAGE GUIDE
- Room temperature: Keep in an airtight container for up to 2 days.
- Refrigerator: Stays fresh for 4–5 days when wrapped and sealed.
- Freezer: Freezes well for up to 3 months.
To reheat, warm them in a 350°F oven or pop them in an air fryer for a few minutes. Skip the toaster — it tends to burn the outside before the inside warms through.
Frequently Asked Questions
Can I make these ahead of time?
Absolutely. You can assemble and refrigerate unbaked Pop-Tarts overnight, then bake them fresh in the morning. Alternatively, bake them in full and store them in the refrigerator or freezer until needed.
What’s the best jam or filling to use?
Any thick jam, preserve, or fruit butter works well. Thicker fillings tend to stay put better during baking, so if your jam is very runny, consider simmering it briefly to thicken it up before using.
Can I make these gluten-free?
Yes — simply substitute a gluten-free pie crust or make your own using a gluten-free flour blend. The rest of the recipe stays the same.
Why did my filling leak out?
This usually comes down to two things: too much filling, or edges that weren’t sealed tightly enough. Stick to about 1½ tablespoons of filling per pastry and make sure to crimp firmly with both your fingers and a fork.
Do I have to use egg wash?
No. If you need an egg-free version, brush the edges with melted coconut oil or an almond milk and agave mixture. These alternatives help bind the edges and give a light golden color.
Can I use a different shape other than rectangles?
Of course! Cookie cutters and biscuit cutters work great — especially for using up the dough scraps. Just make sure your shapes have enough surface area to hold the filling and seal the edges.

Easy Homemade Pop Tarts with Pie Crust
Ingredients
For the Pastry:
- 2 Store-bought rolled pie crusts Or homemade pie crust
- 1 Large egg
- tbsp Water Mixed with egg for wash
For the Filling:
- ¾ cup Strawberry jam or preserves Or any flavor you prefer
For the Frosting:
- 1 cup Powdered sugar Sifted
- 2-3 tbsp Heavy cream or milk Add more for thinner icing
- Sprinkles
Instructions
- 1. Bring dough to room temperature. Remove pie crusts from the refrigerator and let them rest on the counter for 10–15 minutes until pliable and easy to work with.2. Cut rectangles. Stack both pie crust sheets and cut into rectangles approximately 3×4 inches using a pizza cutter, a sharp knife, or a pastry cutter. Gather scraps, re-roll to ¼-inch thickness, and cut additional rectangles.3. Prepare the baking sheet. Line a baking sheet with parchment paper. Preheat your oven to 375°F (190°C). Arrange the bottom rectangles on the prepared baking sheet.4. Add the filling. Spoon approximately 1½ tablespoons of jam into the center of each bottom rectangle. Keep the filling away from the edges — do not spread it to the borders.5. Apply egg wash to edges. In a small bowl, whisk together the egg and water. Using a pastry brush, brush the egg wash along all four edges of each filled rectangle.6. Top and seal. Place a second rectangle over each filled piece and press the edges together firmly with your fingers to seal.7. Crimp with a fork. Press the tines of a fork along all four edges of each Pop-Tartto crimp and fully seal. Then poke a few holes in the top of each pastry to allow steam to escape.8. Brush with egg wash. Brush the entire top surface of each Pop-Tartwith the remaining egg wash, making sure to cover the edges too.9. Bake. Bake in the preheated oven for 12–15 minutes, or until the pastries are golden brown. Remove and transfer to a wire rack.10. Cool completely. Allow pop tarts to cool fully before frosting — at least 20–30 minutes. Icing applied too early will melt and run off.11. Make the frosting. Whisk together powdered sugar, cream or milk, and vanilla extract until smooth. Adjust consistency by adding more cream to thin or more powdered sugar to thicken.12. Frost and decorate. Spread icing over each cooled Pop-Tart. Top with sprinkles if desired. Allow icing to set for a few minutes before serving.
Notes
- Don’t overfill. Too much jam will push through the sealed edges during baking. Stick to about 1½ tablespoons per pastry.
- Double-seal the edges. Press firmly with your fingers first, then crimp with a fork — this two-step method prevents leaking.
- Egg-free option. Substitute the egg wash with melted coconut oil or a mix of almond milk and agave nectar.
- Flavor variations: Try brown sugar and cinnamon, Nutella, lemon curd, peanut butter and jelly, apple butter, or your favorite pie filling.
- Brown Sugar Cinnamon Filling: Mix ¾ cup brown sugar, 2–3 tbsp softened butter, and 2–3 tsp cinnamon. Add ½ tsp cinnamon to the frosting too.
- Storage: Room temperature in an airtight container for 2 days, refrigerated for 4–5 days, or frozen for up to 3 months.
- Reheating: Warm in a 350°F oven or air fryer for a few minutes. Avoid the toaster.
Leave a Reply