
After years of testing, tweaking, and yes — eating a whole lot of fried chicken — I finally cracked the code on getting that perfect shatter-crispy crust every single time. This recipe isn’t just another pretty dish; it’s the result of collecting little nuggets of kitchen wisdom and putting them all together in one foolproof method. The secret? It’s less about fancy ingredients and more about how you handle them.
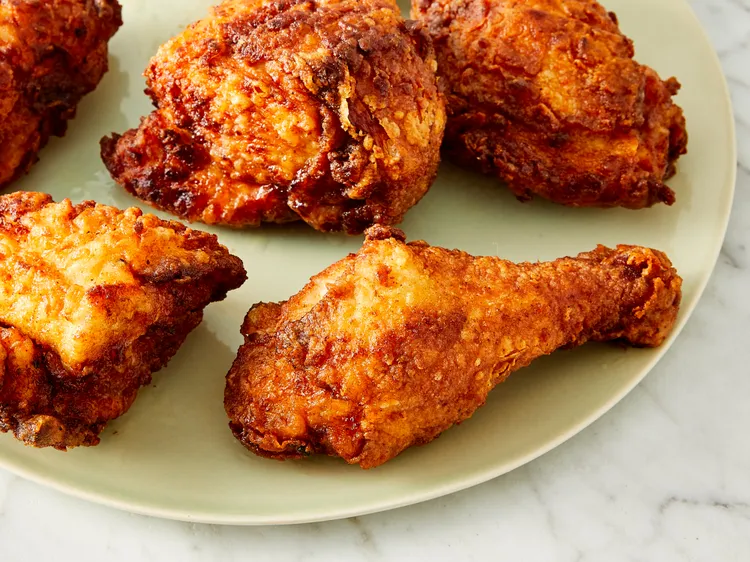
This is the last fried chicken recipe you’ll ever need. It pulls together every smart trick in the book — from the brine to the breading to the fry — to deliver chicken that’s golden on the outside, juicy on the inside, and absolutely impossible to resist.
Table of Contents
Why You Will Love This Crispy Fried Chicken Recipe
- Unbeatable crunch — The paste-resting technique creates a thick, deeply crispy crust that stays crunchy even after it cools
- Incredibly juicy inside — Buttermilk does the heavy lifting, breaking down the proteins so every bite is moist and tender
- Flavor all the way through — Seasoning goes into the flour AND the soak, so nothing tastes bland or one-dimensional
- Tested and reliable — No guessing, no crossed fingers — this method delivers consistent results every time
- Simple, everyday ingredients — Nothing exotic or hard to find; just pantry staples done right
- Works with any cut — Breasts, thighs, drumsticks, wings — mix and match based on what you have
Crispy Fried Chicken Ingredients
To make the crispiest, juiciest fried chicken you’ve ever tasted, you’ll only need a few simple ingredients:
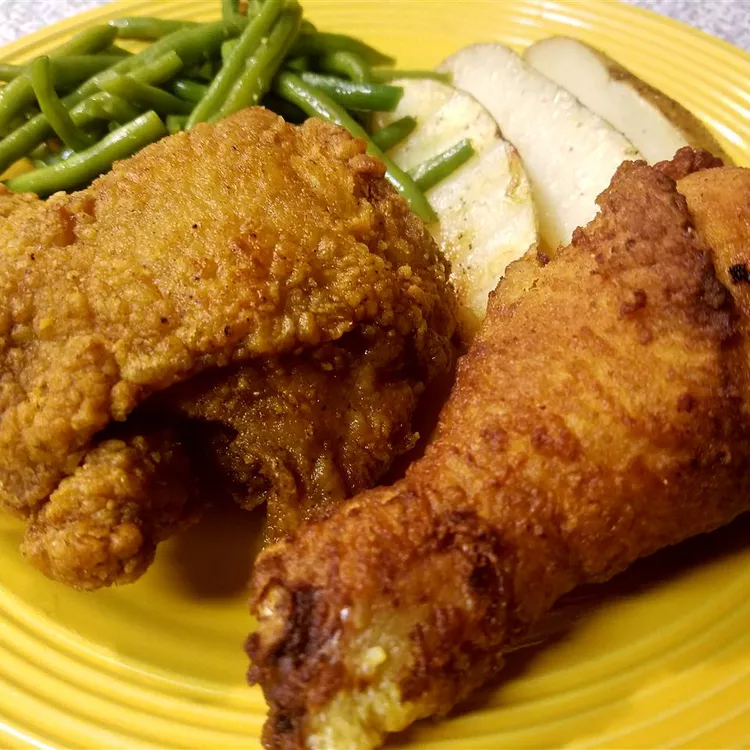
- Chicken: Start with a 4-pound whole chicken cut into serving pieces, or make things easier by picking up about 4 pounds of your favorite cuts, like breasts, drumsticks, wings, thighs, or legs.
- Buttermilk: Buttermilk is the secret to tender, flavorful chicken. Its natural acidity helps soften the meat without making it mushy, and it also helps the seasoned flour cling to every piece.
- Flour: All-purpose flour creates the perfect crispy coating. It combines with the buttermilk and seasonings to form that golden, crunchy crust everyone loves.
- Seasonings: A simple blend of paprika, salt, and black pepper is all you need to get started. Paprika adds great color while the salt and pepper boost the flavor. Feel free to mix in your favorite spices, like garlic powder, onion powder, or cayenne pepper, for an extra kick.
- Oil: Vegetable oil is an excellent choice for frying because of its high smoke point. It heats evenly and helps the chicken turn perfectly golden and irresistibly crispy.
Step-By-Step Direction
Step 1: If you’d like, remove the skin from the chicken pieces before you begin.
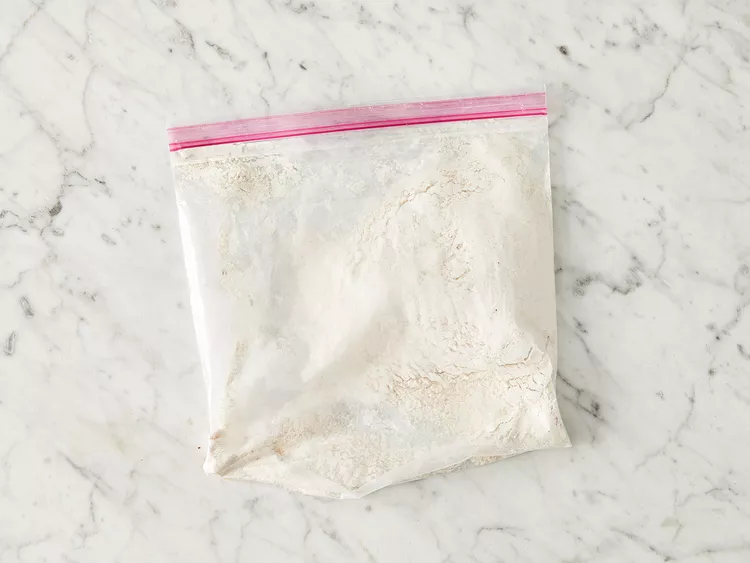
Step 2: Add the flour to a large resealable plastic bag. Season it with paprika, salt, and black pepper, adjusting the amount of flour to match the quantity of chicken you’re cooking.
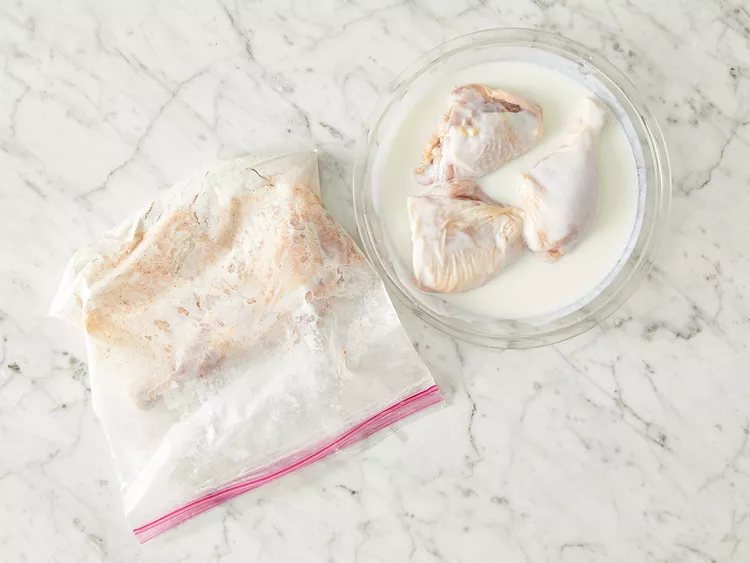
Step 3: Dip each piece of chicken into the buttermilk, then transfer a few pieces at a time to the bag of seasoned flour. Seal the bag and shake well until every piece is evenly coated. Repeat with the remaining chicken.
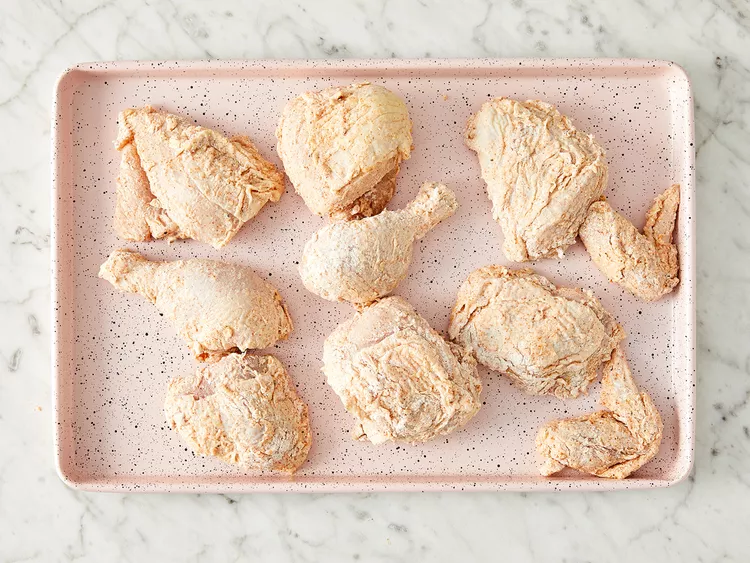
Step 4: Arrange the coated chicken on a baking sheet or tray and cover it with a clean kitchen towel or wax paper. Let it rest until the flour coating becomes soft and paste-like. Don’t skip this step—it helps create an extra crispy crust.
Step 5: Pour vegetable oil into a large skillet (a cast-iron skillet works best), filling it about one-third to halfway. Heat the oil until it’s very hot.
Step 6: Carefully place the chicken into the hot oil, making sure not to overcrowd the pan. Fry until golden brown on both sides.
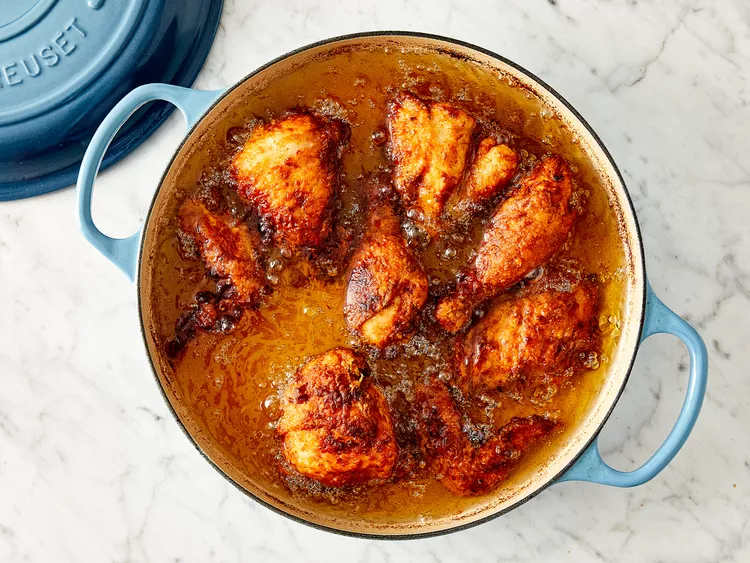
Step 7: Once the chicken is browned, reduce the heat to low and cover the skillet. Cook for about 30 minutes to ensure the chicken is fully cooked. Remove the lid, increase the heat again, and continue frying until the coating is perfectly crispy.
Step 8: Transfer the fried chicken to a paper towel-lined plate or wire rack to drain. If you’re cooking multiple batches, keep the finished chicken warm in a low-temperature oven while you fry the remaining pieces.
Tips for the Best Results
Don’t rush the rest — Letting the floured chicken sit until the coating turns paste-like is the single most important step. Plan for at least 20–30 minutes
Use a thermometer — Oil should be around 350°F before the first piece goes in. Too cool = greasy chicken; too hot = burnt outside, raw inside
Cast iron is king — It holds heat evenly and consistently, which prevents temperature drops when the cold chicken hits the pan
Room-temperature chicken fries better — Pull it from the fridge 15–20 minutes before cooking so it fries more evenly
Don’t crowd the pan — Overcrowding drops the oil temperature and steams the chicken instead of frying it. Give every piece room to breathe
Season every layer — Season the flour, and if you have time, add a pinch of salt and spices to the buttermilk too
Storage
- Refrigerator: Store leftover fried chicken in an airtight container for up to 4 days
- Freezer: Wrap pieces individually and freeze for up to 3 months
- Reheating: For best results, reheat in an oven or air fryer at 375°F for 10–15 minutes — never the microwave if you want to preserve that crust

Crispy Fried Chicken
Ingredients
- 1 4 pound chicken, cut into pieces
- 1 cup buttermilk
- 2 cups all-purpose flour for coating
- 1 teaspoon paprika
- salt and ground black pepper to taste
- 2 quarts vegetable oil for frying
Instructions
- If preferred, remove the skin from each chicken piece before starting. Skin-on stays crispier; skin-off allows more seasoning to penetrate the meat directly.
- Add all-purpose flour to a large zip-top bag — use enough to coat all your pieces generously. Season with paprika, salt, black pepper, and any optional spices. Seal and shake to combine.
- Dip each chicken piece into the buttermilk until fully coated, then transfer it into the flour bag one or two pieces at a time. Seal the bag and shake until every surface is thoroughly covered. Repeat with all remaining pieces.
- Arrange the coated chicken in a single layer on a baking sheet or tray. Cover loosely with wax paper or a clean kitchen towel and leave it to rest. Wait until the flour coating turns paste-like and tacky before moving on — this step is the key to a thick, craggly, deeply crispy crust.
- Pour vegetable oil into your cast iron skillet, filling it about one-third to halfway up the sides. Heat over medium-high until the oil is very hot — around 350°F. A small drop of water should spit back immediately when it’s ready.
- Carefully lower chicken pieces into the oil a few at a time, working in batches if needed. Never crowd the pan. Fry on each side until a deep golden-brown crust develops.
- Once both sides are browned, reduce the heat to medium-low and cover the skillet with a lid. Cook covered for 30 minutes — the chicken will cook through completely but the crust will soften. Remove the lid, raise the heat again, and continue frying for a few more minutes until the crust crisps back up perfectly.
- Transfer finished pieces to a paper towel-lined plate to drain. Keep completed batches in an oven set to its lowest setting while frying the rest so everything stays warm and crispy until serving.
Notes
- Don’t rush the rest — Letting the floured chicken sit until the coating turns paste-like is the single most important step. Plan for at least 20–30 minutes
- Use a thermometer — Oil should be around 350°F before the first piece goes in. Too cool = greasy chicken; too hot = burnt outside, raw inside
- Cast iron is king — It holds heat evenly and consistently, which prevents temperature drops when the cold chicken hits the pan
- Room-temperature chicken fries better — Pull it from the fridge 15–20 minutes before cooking so it fries more evenly
- Don’t crowd the pan — Overcrowding drops the oil temperature and steams the chicken instead of frying it. Give every piece room to breathe
- Season every layer — Season the flour, and if you have time, add a pinch of salt and spices to the buttermilk too.
- Refrigerator: Store leftover fried chicken in an airtight container for up to 4 days
- Freezer: Wrap pieces individually and freeze for up to 3 months
- Reheating: For best results, reheat in an oven or air fryer at 375°F for 10–15 minutes — never the microwave if you want to preserve that crust
Nutrition Facts
- Calories: 489
- Total Carbohydrate: 30g
- Dietary Fiber: 1g
- Total Sugars: 2g
- Protein: 41g
- Total Fat: 22g
- Saturated Fat: 6g
- Cholesterol: 116mg
- Vitamin C: 1mg
- Sodium: 140mg
- Calcium: 62mg
- Iron: 3mg
- Potassium: 385mg
Leave a Reply