
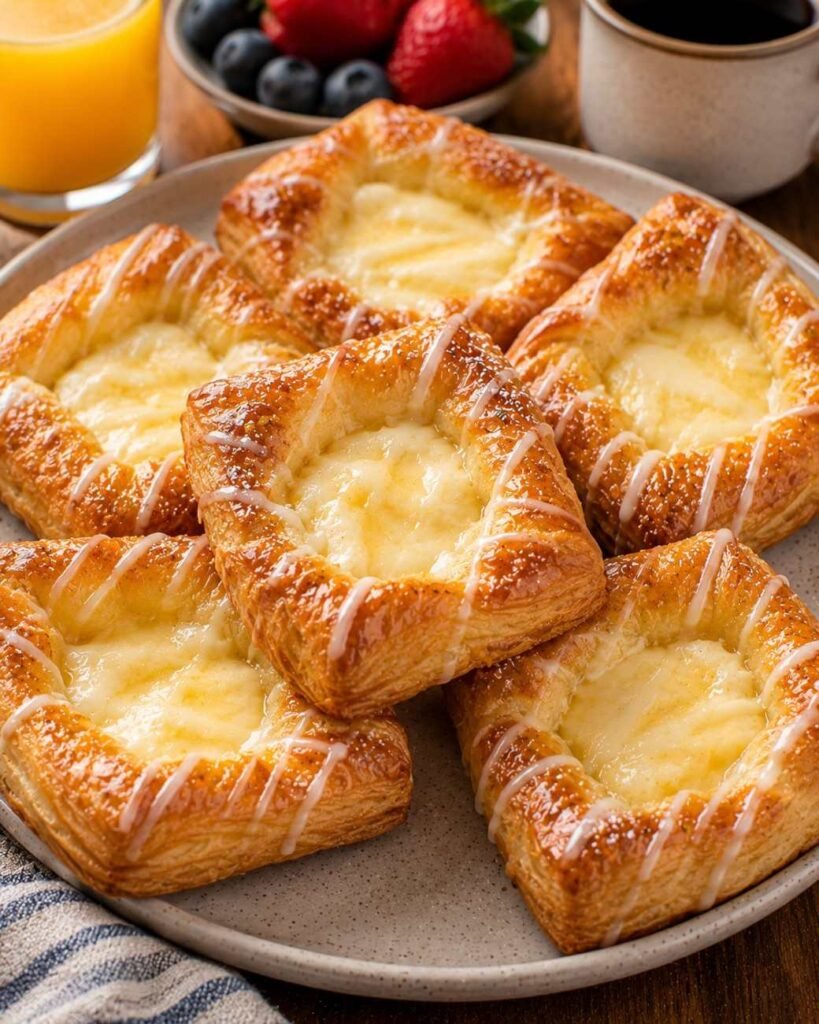
There’s something irresistible about a warm cheese Danish in the morning—the golden, flaky pastry, creamy sweet cheese filling, and lightly crisp edges make it feel like a bakery-style treat without the bakery trip. This Easy Breakfast Cheese Danish is a simple way to bring that same comforting flavor to your kitchen with minimal effort.
Perfect for a lazy weekend breakfast, holiday brunch, or quick make-ahead treat, this Danish combines buttery puff pastry with a smooth cream cheese filling and a touch of sweetness. It looks impressive on a breakfast table but is surprisingly easy to prepare.
If you’re looking for an easy breakfast recipe that feels special, this flaky cheese Danish is one you’ll want to keep in your recipe rotation.
Table of Contents
Why You’ll Love Easy Breakfast Cheese Danish – Flaky and Delicious
- Bakery-Style Without the Fuss: Enjoy golden, flaky pastry and creamy cheese filling without making homemade Danish dough.
It’s an easy shortcut recipe that delivers impressive results. - Perfect for Breakfast or Brunch: This Danish works beautifully for everyday breakfasts, weekend brunches, and holiday mornings.
Serve it warm with coffee for an especially comforting combination. - Creamy and Flaky in Every Bite: The smooth cream cheese filling pairs perfectly with crisp, buttery layers of pastry.
Every bite gives you that delicious contrast of textures. - Quick and Beginner-Friendly: Using ready-made puff pastry keeps the preparation simple and approachable.
Even beginner bakers can make this recipe with confidence. - Great for Sharing: Slice it into individual portions and serve it straight from the baking sheet.
It’s an easy crowd-pleaser for family breakfasts, brunch gatherings, and special occasions.
Ingredients You’ll Need
Flaky pastry, a creamy sweet cheese filling, and a light vanilla glaze — this one tastes like it came from a bakery, but you can make it at home.
Tip: cold puff pastry, softened cream cheese, and real vanilla make all the difference.
- Puff pastry – The shortcut that creates those beautiful flaky, golden layers. Thaw it according to the package directions before using.
- Cream cheese – Provides the rich, smooth, creamy center. Use softened cream cheese so the filling blends easily.
- Granulated sugar – Adds gentle sweetness to balance the tanginess of the cream cheese.
- Egg – Helps bind the filling and gives the pastry a beautiful golden finish when used as an egg wash.
- Vanilla extract – Adds a warm, bakery-style flavor that complements the creamy filling.
- Lemon juice – A small amount brightens the cream cheese mixture and adds a subtle fresh flavor.
- Powdered sugar – Perfect for a simple finishing touch or quick glaze after baking.
- Milk – Useful for loosening the powdered sugar into a smooth drizzle if you want a glazed Danish.
Step-By-Step Direction
Step 1: Prepare the Cream Cheese Filling
Place the softened cream cheese in a mixing bowl. Add the sugar, vanilla extract, and lemon juice, then mix until the filling is smooth and creamy.
Step 2: Prepare the Puff Pastry
Gently unfold the thawed puff pastry on a lightly floured surface. If necessary, roll it gently to smooth out creases without making the pastry too thin.
Step 3: Add the Cheese Filling
Place a generous spoonful of the cream cheese mixture in the center of each pastry portion. Leave enough pastry around the edges to create a beautiful border.
Step 4: Shape the Danish
Fold or shape the pastry around the filling according to your preferred Danish style. Gently press the edges where needed, so the pastry holds its shape during baking.
Step 5: Brush With Egg Wash
Whisk the egg until smooth and lightly brush it over the exposed pastry. Avoid getting too much egg wash on the cream cheese filling.
Step 6: Bake Until Golden
Transfer the baking sheet to a preheated oven and bake until the pastry is puffed, flaky, and deeply golden around the edges. Keep an eye on the Danish toward the end of baking.
Step 7: Cool and Finish
Allow the Danish to cool slightly before serving. Dust with powdered sugar or drizzle with a simple powdered sugar glaze for an extra sweet finish.
Serving Suggestions
Enjoy your Breakfast Cheese Danish with:
- Coffee
- Tea
- Fresh berries
- Yogurt
- Fresh fruit
- Orange juice
- Whipped cream
It’s perfect for:
- Breakfast
- Brunch
- Holiday mornings
- Weekend baking
- Afternoon tea
- Family gatherings
- Coffee breaks
Tips for the Best Results
- Use Softened Cream Cheese: Room-temperature cream cheese blends much more easily and creates a smooth, lump-free filling.
Let it soften naturally rather than overheating it in the microwave. - Keep the Puff Pastry Cold: Cold pastry is essential for creating flaky, defined layers in the oven.
If the dough becomes soft or sticky while shaping, chill it briefly before baking. - Don’t Overfill the Pastry: Too much filling can spread during baking and make the pastry difficult to shape.
A moderate amount gives you the best balance between creamy filling and flaky crust. - Give the Pastry Room to Expand: Arrange the Danish with enough space between each piece on the baking sheet.
This allows the puff pastry to expand and brown evenly on all sides. - Wait Before Adding the Glaze: Let the Danish cool slightly before dusting or glazing them.
This helps the finishing sugar or glaze stay attractive instead of melting immediately.
Storage Tips
Refrigerator
Allow the cheese Danish to cool completely before storing. Place them in an airtight container and refrigerate for up to 3–4 days.
Because the filling contains cream cheese, refrigeration is recommended rather than leaving the finished Danish at room temperature for extended periods.
Freezer
For longer storage, wrap completely cooled Danish pastries individually in plastic wrap and place them in a freezer-safe bag or container.
Freeze for up to 2 months for the best quality. Thaw them in the refrigerator before reheating.
Reheating
For the best texture, reheat refrigerated or thawed Danish in a 350°F oven or toaster oven until warmed through and the pastry becomes crisp again.
Avoid relying on the microwave for reheating if possible, as it can make the flaky pastry soft rather than crisp.

Easy Breakfast Cheese Danish – Flaky and Delicious
Ingredients
- 1 sheet puff pastry – Thawed according to package directions
- 8 oz cream cheese – Softened to room temperature
- ¼ cup granulated sugar – Adds sweetness to the filling
- 1 large egg – Helps bind the filling and creates a golden egg wash
- 1 tsp vanilla extract – Adds warm classic flavor
- 1 tsp lemon juice – Brightens the cream cheese filling
- ½ cup powdered sugar – For dusting or making a simple glaze
- 1 tbsp milk – Optional for thinning the glaze
Instructions
- Prepare the cream cheese filling: Add softened cream cheese, granulated sugar, vanilla extract, and lemon juice to a mixing bowl. Beat until smooth and creamy.
- Prepare the puff pastry: Gently unfold the thawed puff pastry on a lightly floured surface. Smooth out any creases without overworking the dough.
- Add the cheese filling: Cut the pastry into portions and place a spoonful of the cream cheese mixture in the center of each piece, leaving space around the edges.
- Shape the Danish: Fold and shape the pastry around the filling. Gently press the edges to help keep the filling contained.
- Brush with egg wash: Beat the remaining egg and lightly brush it over the exposed pastry edges. Avoid covering the cream cheese filling.
- Bake the Danish: Place the pastries on a parchment-lined baking sheet. Bake in a preheated 400°F oven for 18–22 minutes, or until puffed and golden brown.
- Cool and finish: Let the Danish cool for several minutes. Dust with powdered sugar or drizzle with the optional glaze before serving.
Notes
- Keep the puff pastry cold while working with it for the flakiest results.
- Make sure the cream cheese is softened so the filling becomes smooth and easy to spread.
- Don’t overfill the pastry, as the cream cheese mixture can spread during baking.
- For an extra bakery-style finish, drizzle the cooled Danish with a simple powdered sugar glaze.
- Store leftovers in the refrigerator for 3–4 days.
- For longer storage, freeze the baked Danish for up to 2 months and reheat in a 350°F oven until warm and crisp.
Nutrition Facts
- Calories: 265 kcal
- Total Fat: 17g
- Saturated Fat: 8g
- Trans Fat: 0g
- Cholesterol: 55mg
- Sodium: 250mg
- Total Carbohydrates: 24g
- Dietary Fiber: 1g
- Total Sugars: 12g
- Protein: 5g
- Calcium: 35mg
- Iron: 1mg
Kitchen Tools You’ll Need
| Product | Amazon.com |
|---|---|
| Silicone Pastry Brush | Shop On Amazon |
| Baking Sheet with Parchment Paper | Shop On Amazon |
| French Rolling Pin | Shop On Amazon |
Leave a Reply