
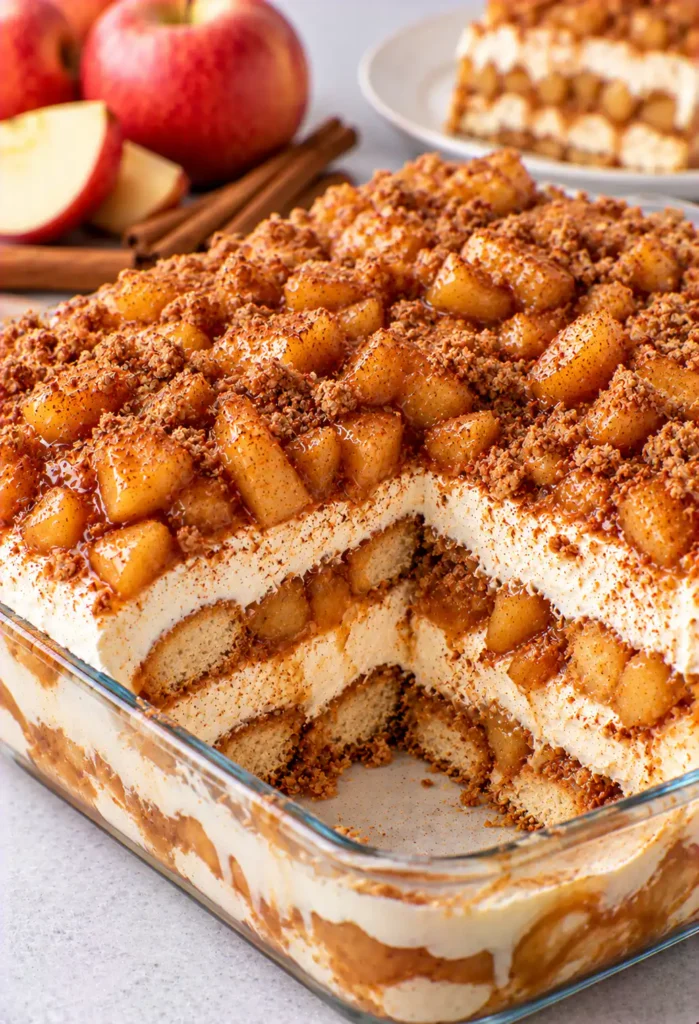
Apple Pie Tiramisu brings two beloved desserts together in one creamy, comforting treat. Imagine layers of soft ladyfingers, fluffy mascarpone-style cream, and tender apples cooked with cinnamon and brown sugar. Every bite has the familiar warmth of homemade apple pie with the smooth, delicate texture of classic tiramisu.
The best part? This is a no-bake apple dessert, so you can prepare it without turning on the oven. The apple filling adds a cozy fall flavor, while the creamy layers make the dessert feel special enough for Thanksgiving, Christmas, potlucks, or a weekend family dinner.
Whether you love traditional tiramisu or cannot resist a warm apple dessert, this easy Apple Pie Tiramisu is a delicious recipe to keep on hand. Make it ahead, let the layers chill, and serve it cold for a beautiful dessert that tastes even better when the flavors have time to come together.
Table of Contents
Why You’ll Love Apple Pie Tiramisu – Creamy and Easy
– Two Favorite Desserts in One: Enjoy the comforting flavor of cinnamon-spiced apple pie with the soft, creamy layers of tiramisu. It is a lovely twist on two familiar classics.
– Easy No-Bake Preparation: You do not need to bake a cake or prepare a complicated pastry. Simply cook the apples, whip the cream filling, layer everything, and refrigerate.
– Perfect for Fall Gatherings: The combination of apples, cinnamon, and brown sugar makes this dessert especially inviting during autumn. It is also a lovely addition to Thanksgiving and Christmas menus.
– Creamy, Fruity, and Full of Flavor: Tender apples balance the rich cream, while the ladyfingers soften into delicate layers. Each spoonful offers a little sweetness, spice, and creaminess.
– Make-Ahead Convenience: Prepare the dessert in advance and let it chill until serving time. This gives the layers time to set and helps the flavors blend beautifully.
What Makes Homemade Better?
Making Apple Pie Tiramisu at home gives you control over every layer, from the sweetness of the apples to the richness of the cream. You can choose crisp, flavorful apples, adjust the cinnamon to suit your taste, and cook the filling until the fruit is tender without becoming mushy.
Homemade apple filling also brings a fresher flavor than a ready-made pie filling. Brown sugar, cinnamon, and a little butter create a rich, fragrant mixture that pairs naturally with the creamy tiramisu layers.
You can even adjust the ladyfinger soaking liquid to suit your preference. Coffee gives the dessert a traditional tiramisu touch, while apple cider creates a fruitier flavor that complements the apple filling. Either option works well.
Most importantly, preparing this dessert yourself lets you balance the ingredients and create layers that look beautiful when served. It feels elegant enough for guests but is simple enough to make for a quiet evening at home.
Ingredients You’ll Need
- Apples: Choose firm, flavorful apples that hold their shape during cooking. Honeycrisp, Granny Smith, and Braeburn are good options.
- Ladyfinger Biscuits: These light, airy biscuits form the classic tiramisu layers and soften as they absorb a little soaking liquid.
- Mascarpone Cheese: This creamy Italian cheese gives the filling a smooth, rich texture and a traditional tiramisu flavor.
- Heavy Whipping Cream: Whipped cream lightens the filling and makes each layer soft, fluffy, and spoonable.
- Brown Sugar: Its warm, caramel-like sweetness brings out the natural flavor of the apples.
- Unsalted Butter: Butter helps the apples cook into a glossy, flavorful filling.
- Ground Cinnamon: This essential apple pie spice adds warmth and makes the dessert smell wonderful.
- Vanilla Extract: A little vanilla rounds out the apple filling and cream with a gentle sweetness.
- Apple Cider or Strong Coffee: Use apple cider for a fruity, autumn-inspired version or cooled coffee for a more traditional tiramisu flavor.
- Lemon Juice: A small squeeze brightens the apples and balances their sweetness.
- Ground Nutmeg: Optional, but a small pinch adds extra warmth to the apple pie flavor.
- Caramel Sauce: Optional for drizzling over the finished dessert when you want a sweeter, more indulgent finish.
Helpful note: Mascarpone gives the most traditional texture. If you use cream cheese instead, expect a slightly tangier filling. Choose heavy whipping cream that is cold before whipping.
Step-By-Step Direction
Step 1: Cook the Cinnamon Apples
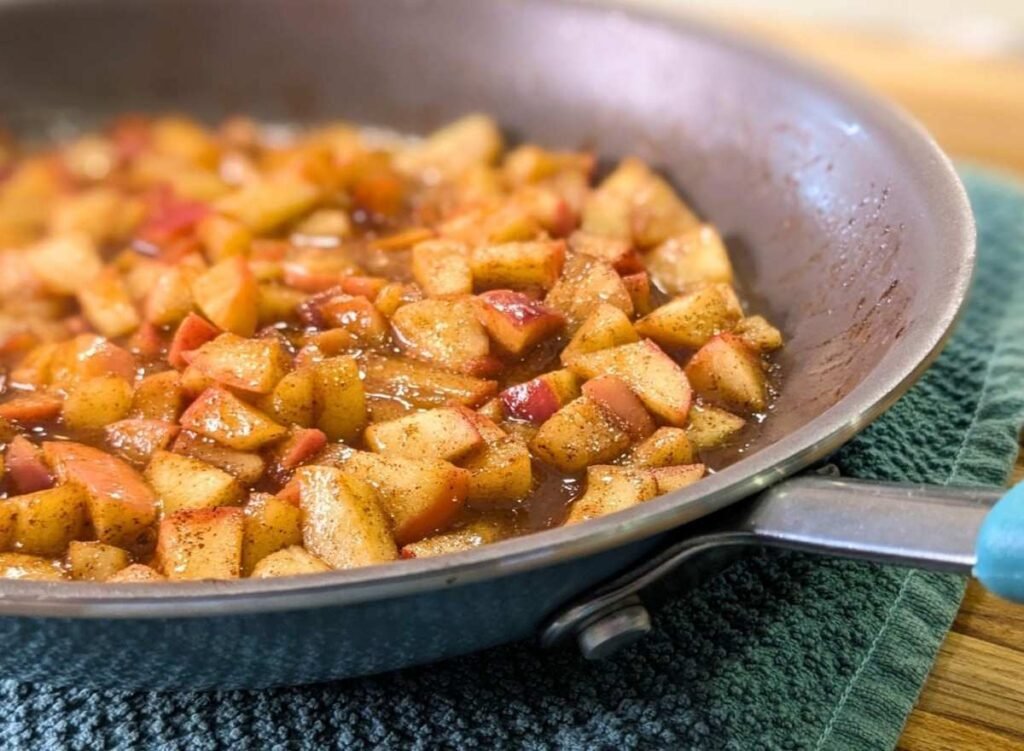
Peel the apples if you prefer a softer texture, then core and dice them into small, even pieces. Melt the butter in a skillet over medium heat and add the apples, brown sugar, cinnamon, vanilla, and a little lemon juice.
Cook, stirring occasionally, until the apples become tender but still hold their shape. If you enjoy a deeper apple pie flavor, let the mixture cook until the juices become slightly syrupy.
Remove the skillet from the heat and allow the apple filling to cool completely before assembling the tiramisu. Warm apples can soften the cream too much and make the layers slide.
Step 2: Prepare the Creamy Filling
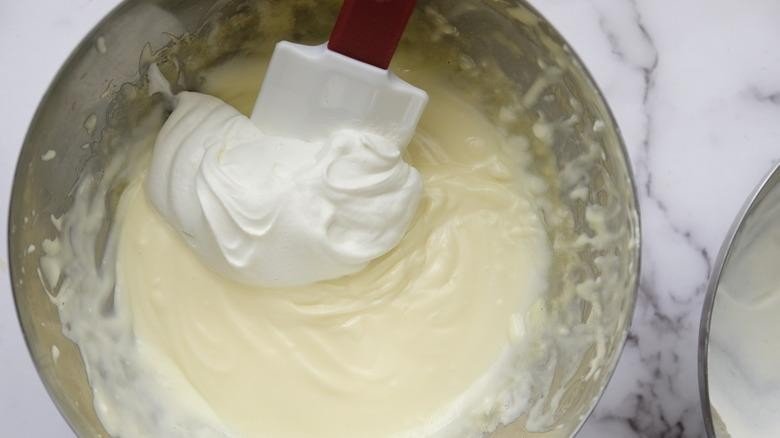
Place the mascarpone in a mixing bowl and gently mix until smooth. In a separate chilled bowl, whip the cold heavy cream until it reaches soft-to-medium peaks.
Fold the whipped cream into the mascarpone until the mixture looks light and fluffy. Add vanilla if desired, and taste the filling before adjusting the sweetness.
Avoid overmixing. The goal is a smooth cream that holds its shape while remaining soft enough to spread easily over the ladyfingers.
Step 3: Prepare the Ladyfingers
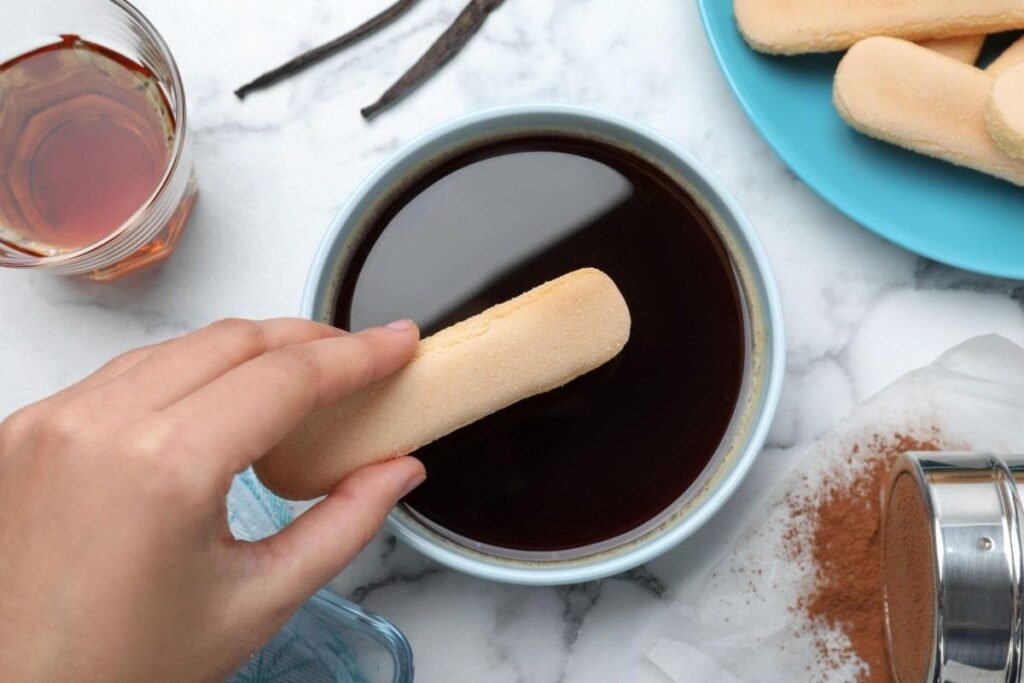
Pour cooled apple cider or strong coffee into a shallow dish. Dip each ladyfinger quickly, turning it if needed to moisten the outside without soaking the center.
Ladyfingers absorb liquid surprisingly fast, so avoid leaving them in the bowl. If they become too wet, the finished dessert may turn soggy instead of developing neat, tender layers.
For an apple-forward dessert, apple cider is a natural choice. For a more classic tiramisu character, use cooled coffee.
Step 4: Build the First Layer
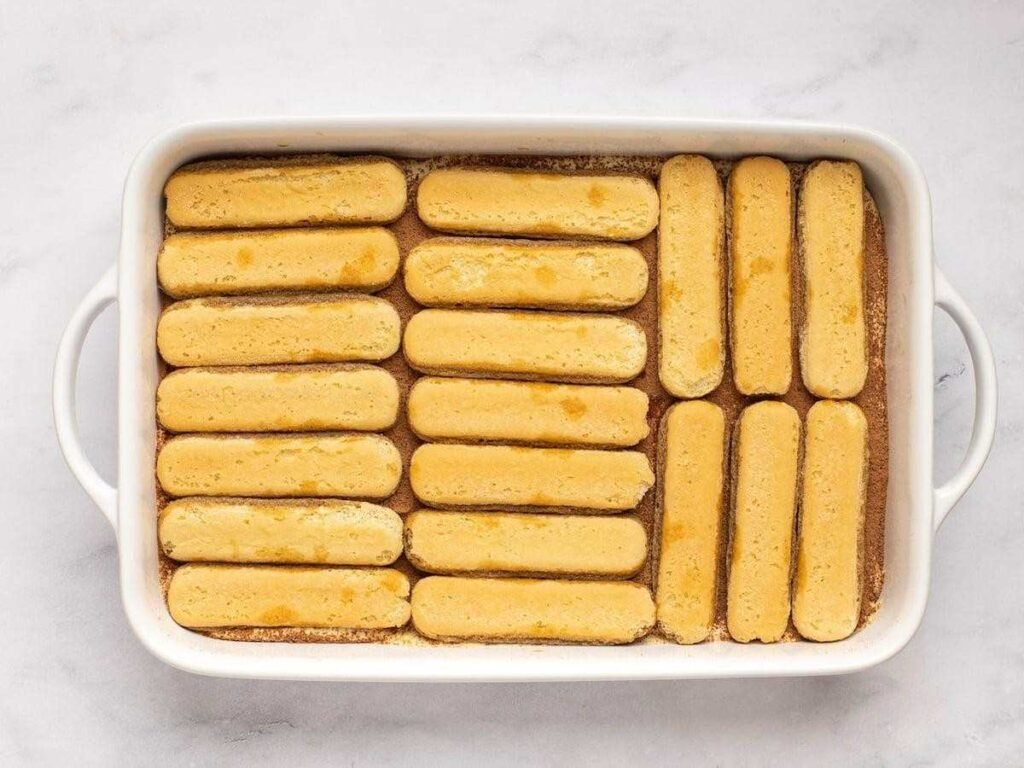
Arrange the prepared ladyfingers in a single layer across the bottom of a rectangular serving dish. Break a few biscuits if necessary to fill the gaps without leaving large spaces.
Spread a generous layer of the mascarpone cream over the biscuits, smoothing it gently to the edges. Keep the layer even so that each serving has a good balance of biscuit and cream.
Step 5: Add the Apple Pie Filling
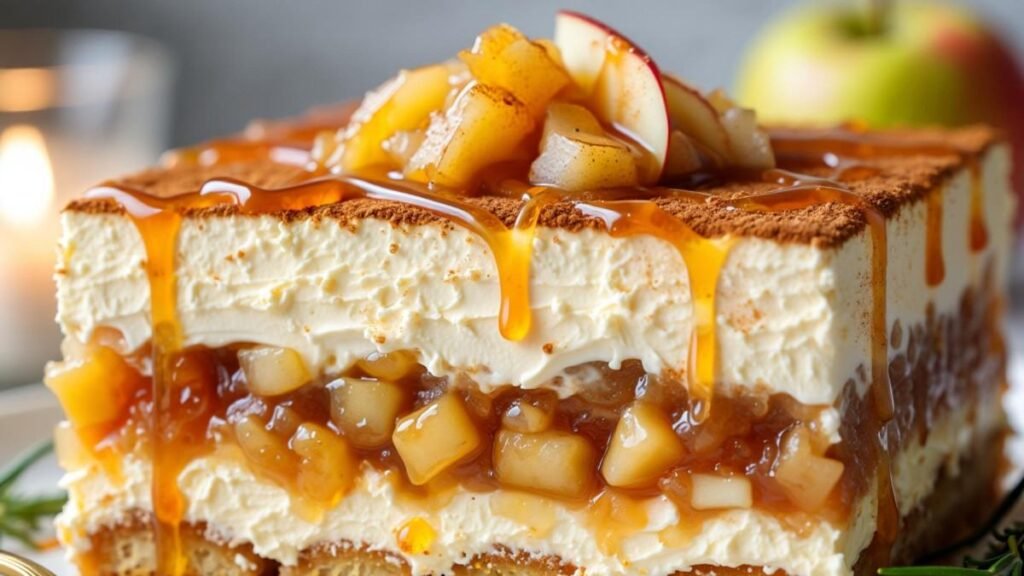
Spoon the cooled cinnamon apples over the cream and spread them into an even layer. Include some of the thick apple juices for flavor, but avoid adding excess liquid.
Repeat the layers with another row of dipped ladyfingers, followed by the remaining cream and apple filling as desired. For a neat finish, keep some of the prettiest apple pieces aside to decorate the top.
Step 6: Chill, Decorate, and Serve
Cover the dish and refrigerate until the layers have softened and set. A few hours is helpful, but chilling overnight usually gives the dessert a more cohesive texture and deeper flavor.
Before serving, add a light dusting of cinnamon, a drizzle of caramel sauce, or a few thin apple slices. Spoon into individual bowls or cut neat portions with a serving spatula, depending on how firmly the dessert has set.
Serve cold and enjoy the contrast between the smooth cream, tender apples, and soft ladyfingers.
Serving Suggestions
- With Hot Coffee: Serve a chilled portion alongside freshly brewed coffee for a cozy afternoon treat.
- With Apple Cider: Pair it with warm apple cider for an extra dose of autumn flavor.
- With Caramel Sauce: Drizzle a little caramel over each serving to complement the cinnamon apples.
- With Fresh Apple Slices: Add thin apple slices just before serving for a fresh, attractive garnish.
- For Thanksgiving Dinner: Include it on your holiday dessert table alongside pumpkin pie and pecan pie.
- In Individual Dessert Glasses: Layer the ingredients in small glasses or jars for an elegant presentation at parties and potlucks.
Tips for the Best Results
– Choose the Right Apples: Use firm apples that stay tender without turning mushy. A slightly tart variety balances the sweetness of the cream and brown sugar.
– Cool the Apple Filling Completely: Let the cooked apples reach room temperature before layering. This helps prevent the cream from melting and keeps the dessert looking neat.
– Don’t Over-Soak the Ladyfingers: Dip them quickly in apple cider or coffee rather than leaving them submerged. This helps the biscuits soften without making the dessert watery.
– Use Cold Whipping Cream: Cold cream whips more easily and creates a light, fluffy filling. Fold it gently into the mascarpone to preserve its airy texture.
– Give It Enough Chilling Time: Refrigerate the assembled dessert for several hours, preferably overnight. The biscuits soften, the cream sets, and the apple pie flavors blend.
Storage Tips
Refrigerator
Cover the Apple Pie Tiramisu tightly or store it in an airtight container in the refrigerator. For the best texture and flavor, enjoy it within 2–3 days. Keep it chilled until you are ready to serve, particularly when serving guests.
If you plan to garnish the dessert with fresh apple slices, add them just before serving to help prevent browning and keep the presentation fresh.
Freezer
You can freeze the assembled dessert, although the texture of the mascarpone filling may change slightly after thawing. For the best results, freeze it in a tightly covered, freezer-safe container for up to 1 month.
Thaw it slowly in the refrigerator overnight before serving. The cream may be a little less smooth than when freshly made, so freezing is best reserved for situations where preparation is important.
Reheating
Reheating is not necessary. Apple Pie Tiramisu is intended to be served cold, straight from the refrigerator. Warming it can cause the cream to soften and the layers to lose their structure.
If the dessert has been frozen, let it thaw in the refrigerator rather than on the counter. Keep leftovers refrigerated and avoid leaving the dairy-based dessert at room temperature for extended periods.
Final Thoughts
Apple Pie Tiramisu – Creamy and Easy is a wonderful way to bring a fresh twist to two classic desserts. The cinnamon-spiced apples deliver the familiar comfort of apple pie, while the creamy filling and soft ladyfingers create the indulgent layers that make tiramisu so appealing.
What makes this recipe especially lovely is how simple it is to prepare. You don’t need to bake a cake or spend hours assembling an elaborate dessert. Cook the apples, prepare the cream, layer everything together, and let the refrigerator do the rest.
Make it for a fall gathering, a holiday celebration, or simply when you’re craving something sweet and comforting. Serve it chilled with a little cinnamon or caramel on top, and you may find that this easy apple dessert becomes a new family favorite.
Apple Pie Tiramisu – Creamy and Easy
Ingredients
Apple Filling
- 2 medium Apples peeled, cored, and diced
- 1 tablespoon — Unsalted butter
- 2 tablespoons — Brown sugar
- ½ teaspoon — Ground cinnamon
- ½ teaspoon — Vanilla extract
- 1 teaspoon — Lemon juice
- 1 pinch — Ground nutmeg optional
Cream Layer
- 4 ounces — Mascarpone cheese softened slightly
- ½ cup — Heavy whipping cream cold
- 1 tablespoon — Powdered sugar optional
- ½ teaspoon — Vanilla extract
Tiramisu Layers
- 12 — Ladyfinger biscuits approximately
- ½ cup — Apple cider or strong coffee cooled
Optional Toppings
- 1 tablespoon — Caramel sauce
- 1 pinch — Ground cinnamon for dusting
- 4 thin slices — Fresh apple for garnish
Instructions
- Cook the Apples: Peel, core, and dice the apples into small pieces. Melt the butter in a skillet over medium heat. Add the apples, brown sugar, cinnamon, vanilla extract, lemon juice, and nutmeg if using. Cook for 8–10 minutes, stirring occasionally, until the apples are tender but still hold their shape. Remove from the heat and let the filling cool completely.
- Prepare the Cream Filling: Place the mascarpone cheese in a mixing bowl and mix gently until smooth. In a separate chilled bowl, whip the cold heavy cream with the powdered sugar, if using, until soft-to-medium peaks form. Fold the whipped cream into the mascarpone along with the vanilla extract until light and fluffy. Avoid overmixing.
- Dip the Ladyfingers: Pour the cooled apple cider or strong coffee into a shallow bowl. Quickly dip each ladyfinger into the liquid, coating it lightly without allowing it to become soggy. Set aside until ready to assemble.
- Assemble the First Layer: Arrange a single layer of dipped ladyfingers in the bottom of a small rectangular glass baking dish. Spread half of the mascarpone cream evenly over the biscuits.
- Add the Cinnamon Apples: Spoon half of the cooled apple filling over the cream layer and spread evenly. Add another layer of dipped ladyfingers, followed by the remaining cream and apple filling. Smooth the top gently.
- Chill the Dessert: Cover the dish and refrigerate for at least 4 hours, preferably overnight. Chilling allows the ladyfingers to soften and the creamy layers to set.
- Garnish and Serve: Before serving, dust the top with cinnamon and drizzle with caramel sauce if desired. Add thin apple slices for decoration. Serve chilled and refrigerate any leftovers promptly.
Notes
- Choose firm apples: Honeycrisp, Granny Smith, or Braeburn apples work well because they hold their shape during cooking.
- Cool the filling: Always allow the cooked apples to cool completely before layering to protect the cream’s texture.
- Avoid soggy ladyfingers: Dip the biscuits briefly instead of soaking them.
- Chill before serving: Four hours is the minimum recommended resting time; overnight chilling usually gives the best texture.
- Make ahead: Prepare the dessert a day before serving for convenient entertaining.
- Storage: Cover and refrigerate for up to 2–3 days. Freezing is possible for up to 1 month, although the cream texture may change after thawing.
- Serving: Serve cold. Reheating is not recommended because it can soften the cream and break down the layers.
- Allergen information: Contains dairy and wheat/gluten. Check ingredient labels for additional allergens.
Nutrition Facts
- Calories: 450 kcal
- Carbohydrates: 48 g
- Protein: 6 g
- Total Fat: 25 g
- Saturated Fat: 15 g
- Cholesterol: 85 mg
- Sodium: 150 mg
- Fiber: 2 g
- Total Sugar: 28 g
Note: These are approximate values and may vary depending on the brands used, ladyfinger size, and optional toppings. Verify with a nutrition calculator using your final recipe ingredients before publishing.
Leave a Reply