
There’s something deeply satisfying about a bowl of chocolate whipped cream that you made yourself. No preservatives, no mystery ingredients, just pure, pillowy chocolate bliss that comes together faster than you’d expect. This recipe has become a staple in my kitchen, and once you try it, you’ll wonder why you ever settled for the canned stuff.
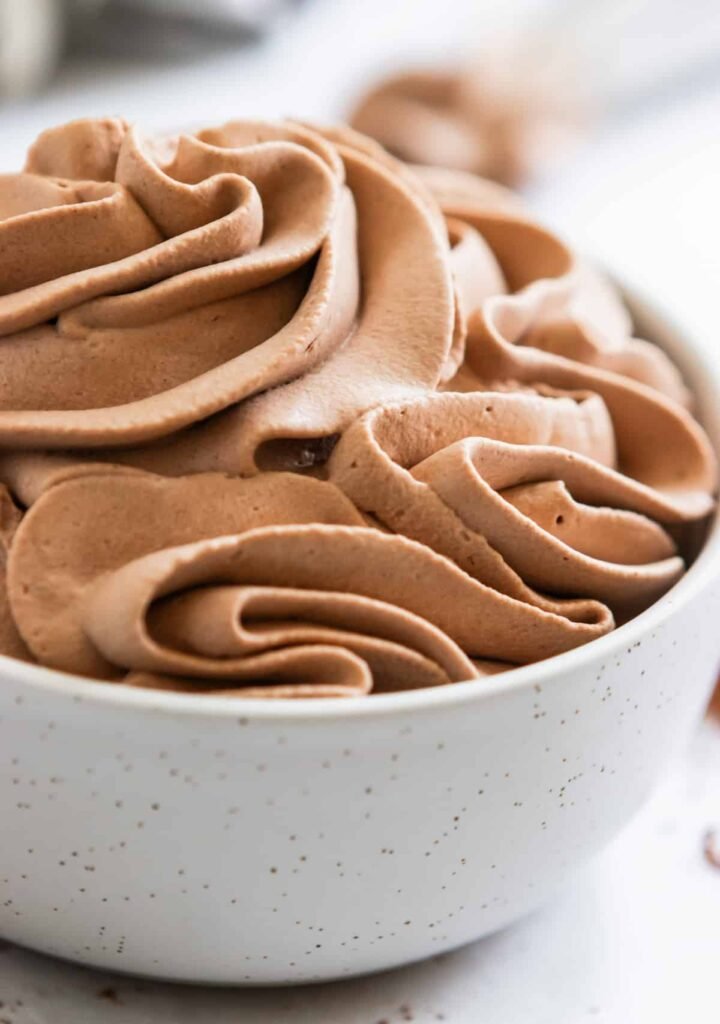
Table of Contents
Why You Will Love This Homemade Chocolate Whipped Cream Recipe:
- It’s genuinely quick. Ten minutes from start to finish — no chilling, no double boilers, no fuss. Even on a busy evening, that’s completely doable.
- The mouthfeel is unlike anything from a can. Think mousse-meets-cloud. It’s airy yet indulgent, and the chocolate flavor runs all the way through rather than sitting on top as an afterthought.
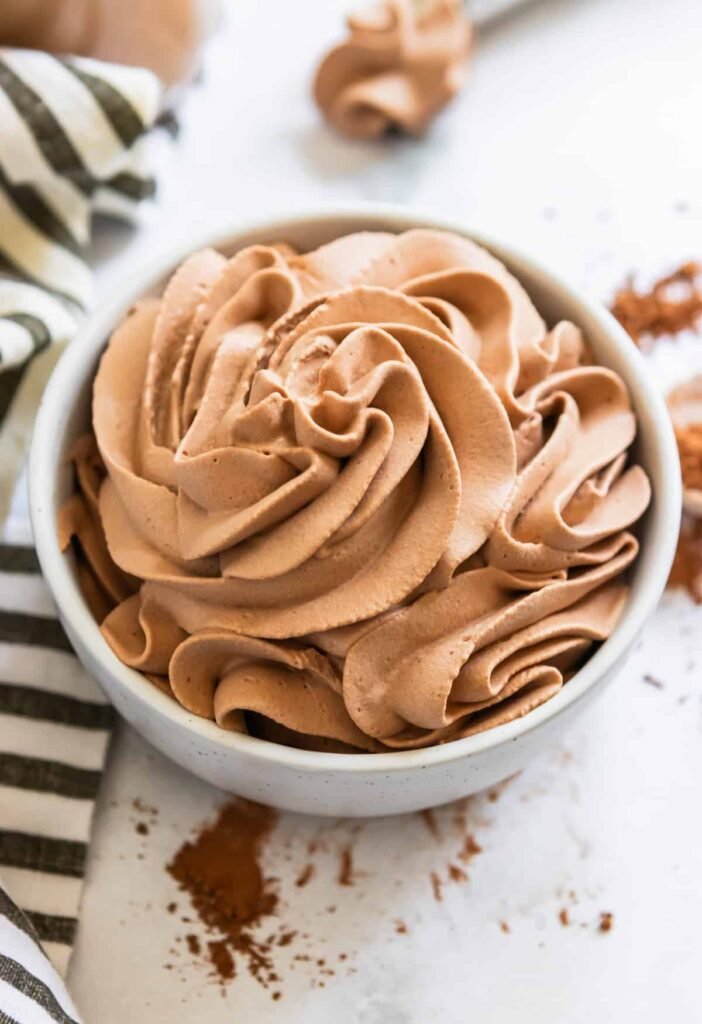
- It plays well with everything. Swirl it over a brownie sundae, pipe it onto vanilla cupcakes, fold it into a trifle, or just eat it off a spoon at midnight — no judgment. If you need something firmer for layer cakes, a chocolate buttercream will hold up better under heavy stacking, but for most uses, this one is ideal.
- The flavor is genuinely impressive. Guests always ask for the recipe. That alone says everything.
Recipe Ingredients:
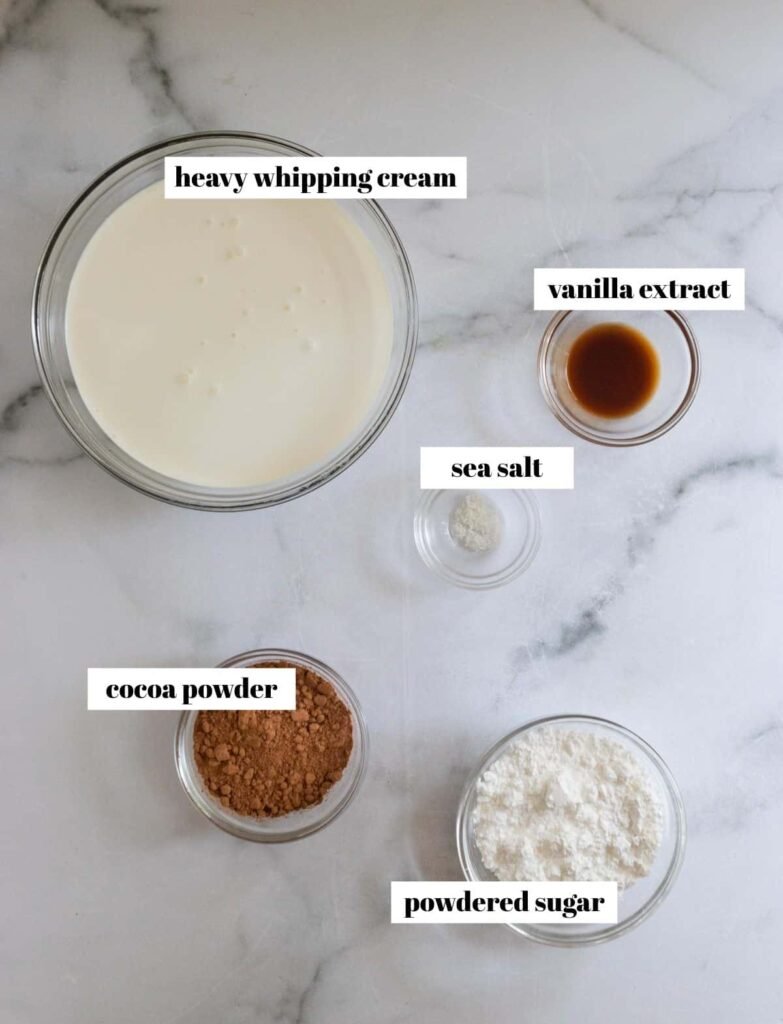
- Heavy whipping cream — Look specifically for “heavy whipping cream,” not just “whipping cream.” The difference is fat content: heavy cream has more of it, which means your finished product will be thicker, richer, and hold its shape when piped. This matters if you’re decorating anything.
- Unsweetened cocoa powder — Classic, natural unsweetened cocoa powder works beautifully here. Want a deeper, more intense color? Swap in Dutch-processed cocoa, or blend the two for a balanced tone and flavor.
- Powdered sugar (confectioners’ sugar) — The cornstarch already mixed into powdered sugar acts as a gentle stabilizer, helping the whipped cream maintain its texture longer. It also sweetens without graininess.
- Pure vanilla extract — Not imitation. Real vanilla rounds out the chocolate in a way that artificial flavoring just can’t replicate. It’s a small investment that makes a noticeable difference.
- Optional: espresso powder — This doesn’t make the cream taste like coffee. What it does is deepen and amplify the chocolate, making it taste more chocolatey. Highly recommended if you have it on hand.
How to Make It — Step by Step
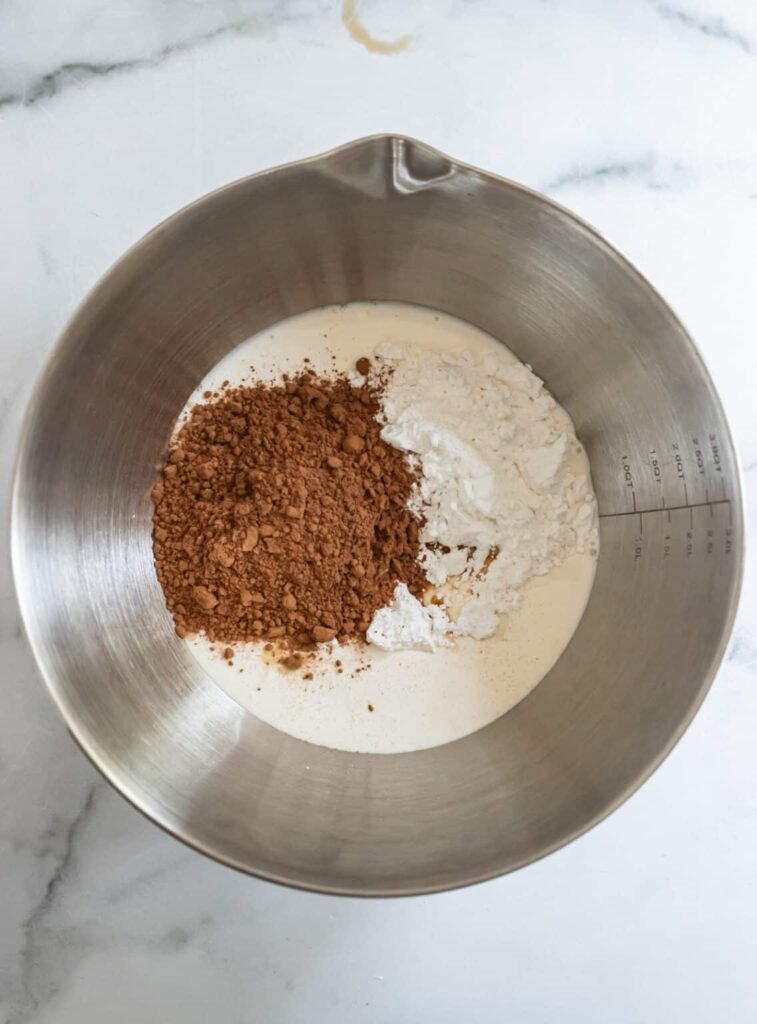
Step 1: Set up your bowl. Use a large, deep bowl — this keeps things tidy when the mixer gets going. For best results, pop the bowl in the freezer for 15 minutes beforehand. Cold equipment means faster whipping and better volume. A stand mixer with a whisk attachment is ideal, but a hand mixer works just as well.
Step 2: Add everything at once. No need to pre-sift or add ingredients in stages. Combine the cream, cocoa powder, powdered sugar, vanilla, and espresso powder (if using) all at once in the bowl.
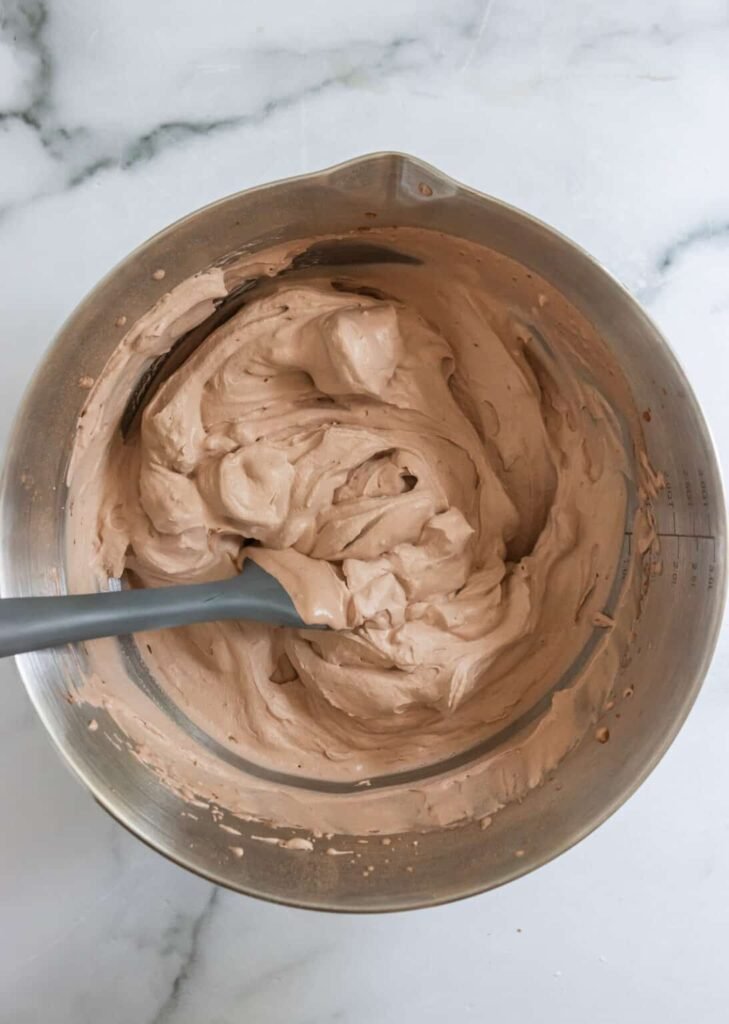
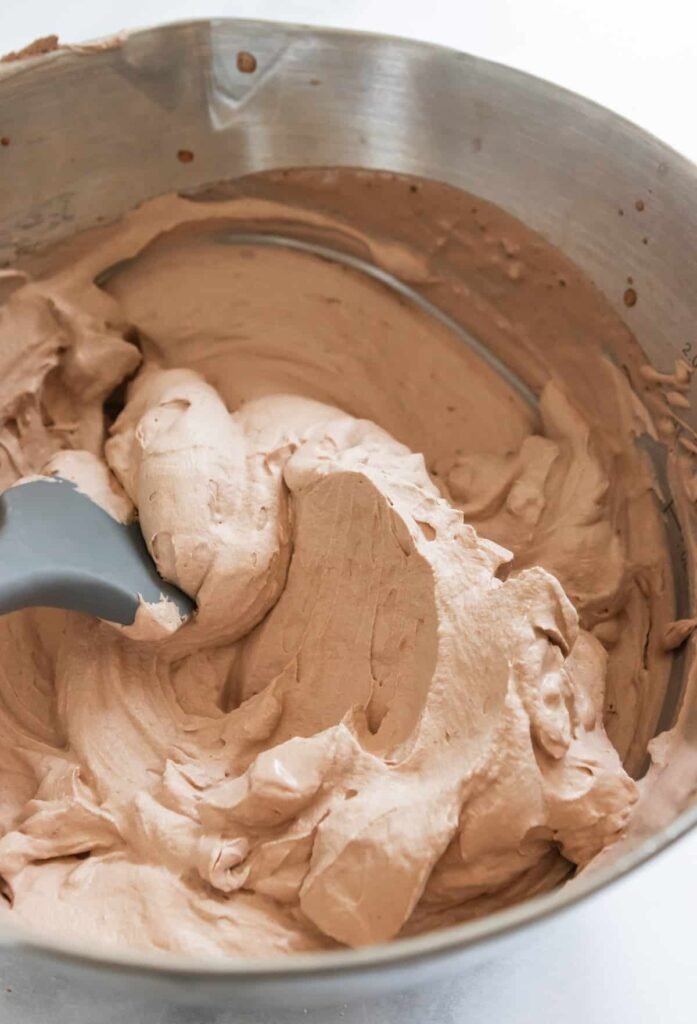
Step 3: Whip to stiff peaks. Start on medium speed and work up to medium-high. In about 4 to 5 minutes, you should see stiff peaks forming — when you lift the whisk, the cream holds its shape without drooping. That’s your signal to stop.
Step 4: Chill until needed. Cover and refrigerate. Transfer to a piping bag when you’re ready to decorate, or simply spoon it straight from the bowl.
Tips Worth Knowing
- Cold cream is non-negotiable. Warm cream won’t whip properly. Keep it refrigerated until the very last moment before use.
- Stop at stiff peaks — seriously. Overbeaten cream turns grainy and starts to resemble scrambled butter. If that happens, a few extra tablespoons of cold cream whisked in by hand can sometimes rescue it.
- Too bitter? Add a tablespoon of extra powdered sugar at a time until it balances out. A small pinch of fine salt can also work wonders for rounding out bitterness.
- Make it a kitchen activity. Add all the ingredients to a large jar, seal it tight, and let kids shake it until it transforms into whipped cream. It takes longer but creates a great moment.

Dairy-Free Version
This recipe adapts well to dairy-free needs. Use two cans of full-fat coconut milk — avoid store-brand versions, as quality varies too widely. Refrigerate the cans overnight so the cream solidifies and separates from the liquid. Scoop out only the thick, solidified cream and discard (or save) the liquid.
From there, follow the same method. The texture will be slightly softer than the dairy version and won’t hold as firmly under a piping bag, but the flavor is genuinely good — rich, chocolatey, and completely dairy-free.
Storage Guide
Refrigerator: Store leftovers in a sealed airtight container, placed toward the back of the fridge where temperatures are most stable. Use within 2 to 3 days for the best texture.
Freezer: Line a baking sheet with parchment and pipe or spoon individual portions onto it, leaving space between each. Freeze until solid (a few hours), then transfer to a freezer-safe bag or container. They’ll keep for up to 3 months. To serve, thaw at room temperature for 15 to 20 minutes.
FAQs
Can I make this ahead of time?
Yes! It keeps well in the refrigerator for 2 to 3 days. Give it a brief re-whisk by hand before using if it’s softened slightly.
Why won’t my cream whip up properly?
Temperature is almost always the culprit. Make sure your cream is very cold — ideally straight from the fridge. Chilling your bowl beforehand also helps significantly. Cream that’s even slightly warm will struggle to hold air.
Can I use milk instead of heavy cream?
Unfortunately, no. Milk doesn’t have nearly enough fat content to whip into a stable cream. Heavy whipping cream is essential for the right texture.
Is Dutch-process cocoa better than natural cocoa here?
It depends on what you’re after. Dutch-processed cocoa gives a darker, more intense color and a smoother, less acidic flavor. Natural cocoa is fruitier and slightly sharper. Either works — or mix them for something in between.
Can I sweeten it with regular sugar instead of powdered sugar?
You can, but the texture may be slightly grainier since granulated sugar doesn’t dissolve as readily in cold cream. Powdered sugar is recommended for the smoothest result and the added benefit of stabilization.
How do I know when I’ve reached stiff peaks?
Lift your whisk straight out of the cream. If the peak that forms holds its shape without bending or drooping, you’re there. If it curls over softly, whip for another 30 to 60 seconds and check again.
Does it work for cake frosting?
It works beautifully as a light frosting for single-layer cakes or cupcakes. For tiered or heavily stacked cakes that need to sit out for a while, a more structured buttercream will hold up better under the weight and room temperature.

Chocolate Whipped Cream
Ingredients
- 1 cup Heavy whipping cream Must be very cold; not regular whipping cream
- 3 tbsp Unsweetened cocoa powder
- 3 tbsp Powdered sugar (confectioners' sugar) Adjust to taste
- 1 tsp Pure vanilla extract
- ½ tsp Espresso powder Optional but recommended — deepens chocolate flavor
- 1 pinch Fine salt
Instructions
- 1. Combine all ingredients in a medium bowl. Using a hand mixer or a stand mixer fitted with a whisk attachment, beat on medium speed until stiff peaks begin to form — this typically takes about 4 to 5 minutes.2. Refrigerate until ready to use. Serve it dolloped straight from a spoon, swirled over cakes or cupcakes as a light and airy frosting, spooned into dessert cups as a filling, and so much more!
Notes
- Stop whipping the moment stiff peaks form. Pushing past that point turns the cream lumpy, grainy, and almost buttery — not what we’re going for. If you do accidentally overwhip, try folding in a few extra tablespoons of cold cream by hand to bring it back.
- Keep everything cold. Cold cream whips up faster, holds its shape better, and gives you a far more stable result. For best results, chill your bowl and whisk attachment in the freezer for 10 to 15 minutes before you start — you’ll notice the difference.
- If the flavor comes out too bitter, balance it out by stirring in an extra tablespoon or two of powdered sugar. A small spoonful of regular granulated sugar works in a pinch as well. Alternatively, a tiny pinch of fine salt can do a surprising job of softening bitterness and rounding out the overall flavor.
Nutrition
Calories: 116kcal, Carbohydrates: 4g, Protein: 1g, Fat: 11g, Saturated Fat: 7g, Cholesterol: 41mg, Sodium: 12mg, Potassium: 43mg, Fiber: 1g, Sugar: 3g, Vitamin A: 437IU, Vitamin C: 1mg, Calcium: 21mg, Iron: 1mg Nutrition information is automatically calculated, so it should only be used as an approximation.Shop this Post:
Cocoa Powder
Hand Mixer
Mixing Bowls
Leave a Reply