
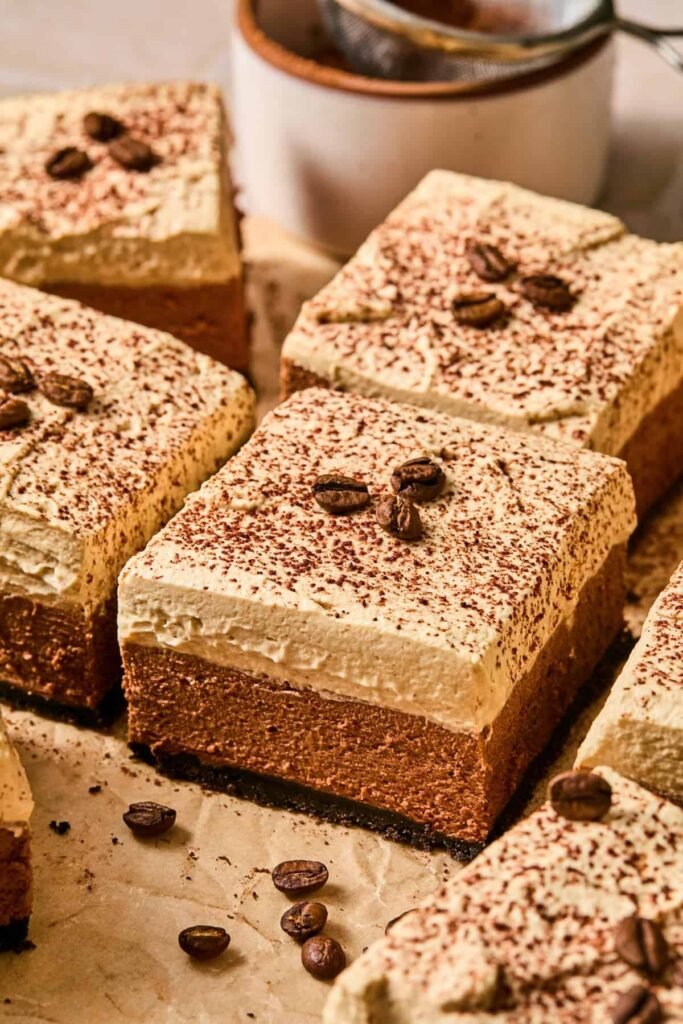
If you love the bold flavor of espresso, the richness of chocolate, and the smooth taste of a classic espresso martini, these No-Bake Espresso Martini Bars are a dessert worth trying. They bring together everything you love about a coffee-inspired cocktail in a creamy, chocolatey treat that looks beautiful on a dessert platter.
The best part? You don’t need to turn on the oven. A crunchy chocolate cookie crust, a smooth espresso-infused filling, and a silky chocolate topping create delicious layers of flavor and texture. A little espresso powder adds that unmistakable coffee kick, while a hint of coffee liqueur gives the bars their signature espresso martini character.
These bars are perfect for dinner parties, holiday gatherings, birthdays, or a weekend treat when you want something a little more special than ordinary brownies. Prepare them ahead of time, let them chill until firm, and slice them into neat squares when you’re ready to serve.
Whether you’re a dedicated coffee lover or simply enjoy chocolate desserts with a sophisticated twist, these no-bake bars are an irresistible addition to your dessert collection.
Table of Contents
Why You’ll Love No-Bake Espresso Martini Bars
- No oven required: These bars come together without baking, making them a convenient dessert for warm days or busy occasions. Simply prepare the layers and let the refrigerator do the work.
- Rich coffee and chocolate flavor: Espresso powder and chocolate create a deliciously bold combination. Every bite has the perfect balance of deep coffee notes and sweet chocolate richness.
- Creamy, indulgent texture: The smooth filling contrasts beautifully with the crunchy cookie crust. A glossy chocolate topping adds an extra layer of decadence.
- Perfect for entertaining: Cut the chilled dessert into neat squares for a party platter or after-dinner treat. Their elegant appearance makes them feel special without complicated decorating.
- Easy to prepare ahead: Make the bars in advance and give them enough time to chill before serving. This makes dessert planning much easier when you’re hosting friends or family.
What Makes Homemade Better?
Making espresso martini bars at home lets you control the sweetness, coffee intensity, and chocolate flavor. You can use a stronger espresso flavor if you prefer a bold coffee dessert or add a little extra chocolate for a sweeter, richer finish.
Homemade bars also allow you to choose quality ingredients, from chocolate sandwich cookies for the crust to real espresso powder and good-quality chocolate for the filling. You can adjust the coffee liqueur or leave out the alcohol entirely while keeping the delicious espresso-inspired flavor.
Another advantage is the texture. When the bars are chilled properly, the crust stays firm, the filling becomes smooth and creamy, and the chocolate topping sets into a neat layer. The result is a dessert that tastes indulgent and looks impressive without requiring baking skills.
Ingredients You’ll Need
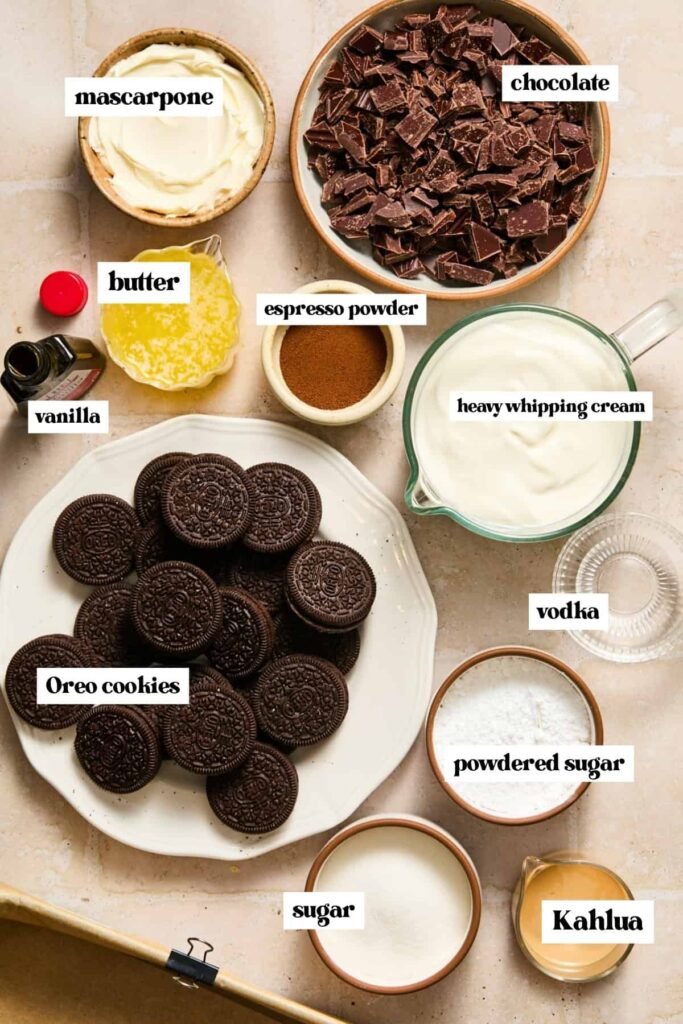
- Chocolate sandwich cookies: These provide a rich, chocolatey base with a delicious crunch. Use the cookies with their filling for an easy crust that holds together well.
- Unsalted butter: Melted butter binds the cookie crumbs and helps create a firm, sliceable crust once chilled.
- Cream cheese: Full-fat cream cheese gives the filling its smooth, creamy texture and a subtle tang that balances the sweetness.
- Powdered sugar: This sweetens the filling while blending smoothly into the cream cheese without leaving a grainy texture.
- Dark chocolate: Melted dark chocolate adds depth and richness to the espresso filling. Choose a good-quality chocolate that melts smoothly.
- Espresso powder: This is the key ingredient for a concentrated coffee flavor. Instant espresso powder works especially well in no-bake desserts.
- Coffee liqueur: A splash adds the familiar coffee-cocktail character associated with an espresso martini. Choose your favorite coffee liqueur or omit it for an alcohol-free version.
- Vodka: A small amount can bring the classic espresso martini flavor profile to the dessert. It’s optional and can be left out without affecting the basic structure of the bars.
- Heavy whipping cream: Whipped cream lightens the filling and gives it a softer, mousse-like consistency.
- Vanilla extract: A little vanilla rounds out the coffee and chocolate flavors.
- Semi-sweet chocolate: Use this for the glossy topping. Its balanced sweetness complements the richer filling.
- Extra whipping cream: This creates a smooth chocolate ganache that spreads easily over the chilled filling.
- Chocolate shavings or espresso powder: These optional finishing touches make the bars look elegant and emphasize their coffeehouse-inspired flavor.
Step-By-Step Direction
Step 1: Prepare the Chocolate Cookie Crust
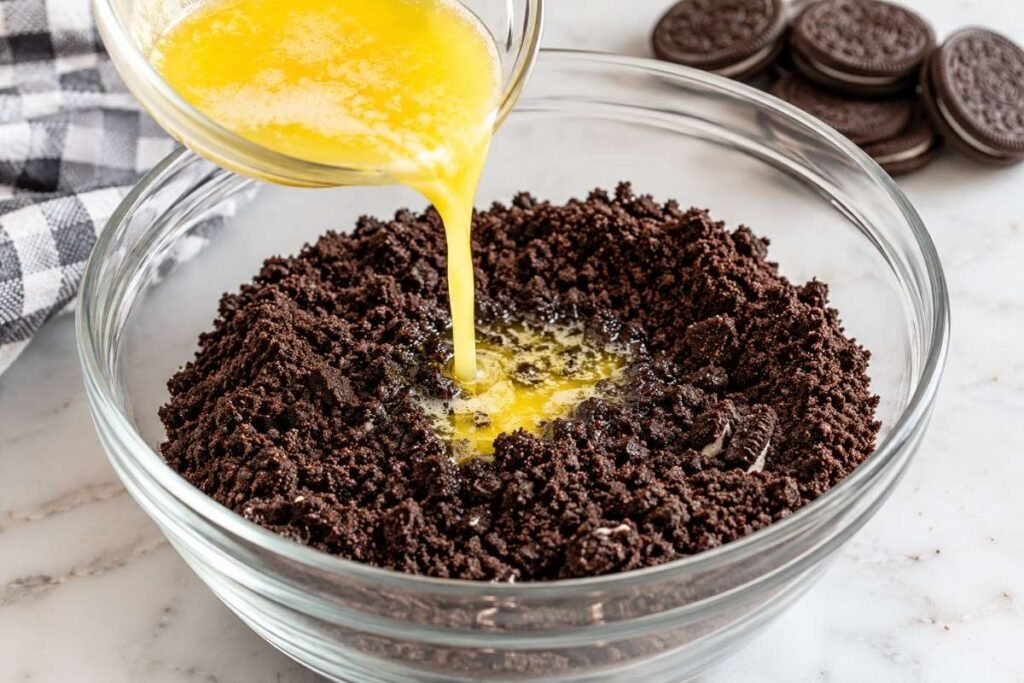
Crush the chocolate sandwich cookies into fine crumbs using a food processor or a sealed bag and rolling pin. Transfer the crumbs to a bowl and stir in the melted butter until the mixture resembles damp sand.
Press the mixture firmly into the bottom of a parchment-lined square baking pan. Use the bottom of a flat measuring cup or glass to create an even, compact layer.
Place the pan in the refrigerator while you prepare the filling. Chilling the crust helps it firm up and makes the finished bars easier to cut.
Step 2: Make the Espresso Cream Filling
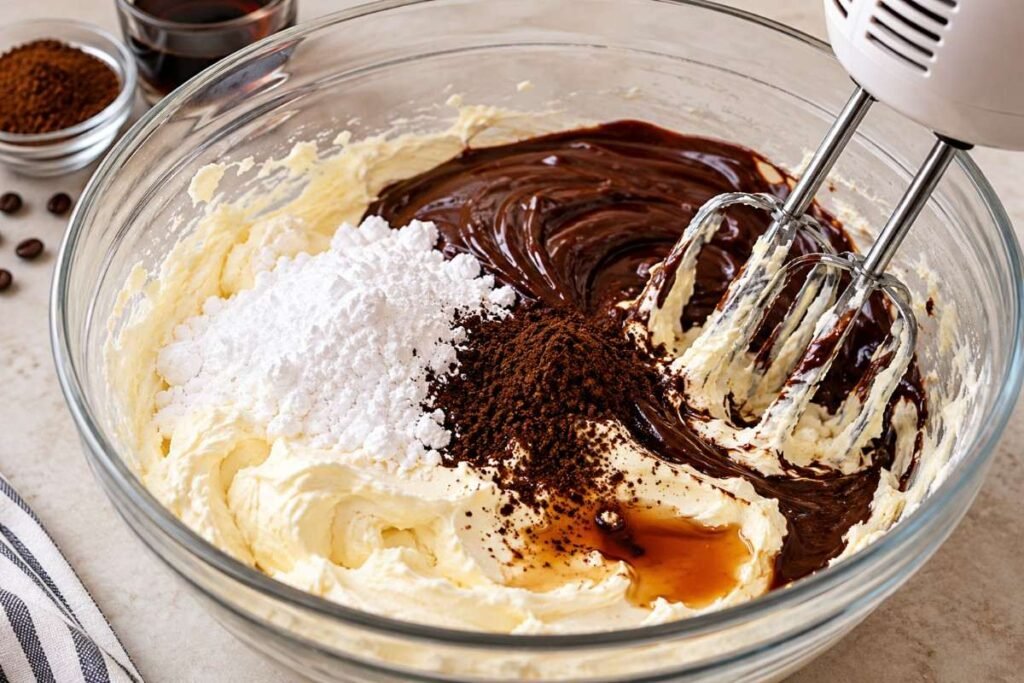
Beat the softened cream cheese until smooth and creamy. Add the powdered sugar, vanilla extract, and espresso powder, mixing until everything is evenly incorporated.
Stir in the cooled melted dark chocolate and coffee liqueur, if using. Add the optional vodka and mix until the filling looks smooth and evenly colored.
Scrape down the sides of the bowl as needed to remove any lumps. The espresso mixture should be creamy, with a rich coffee aroma and a balanced chocolate flavor.
Step 3: Fold in the Whipped Cream
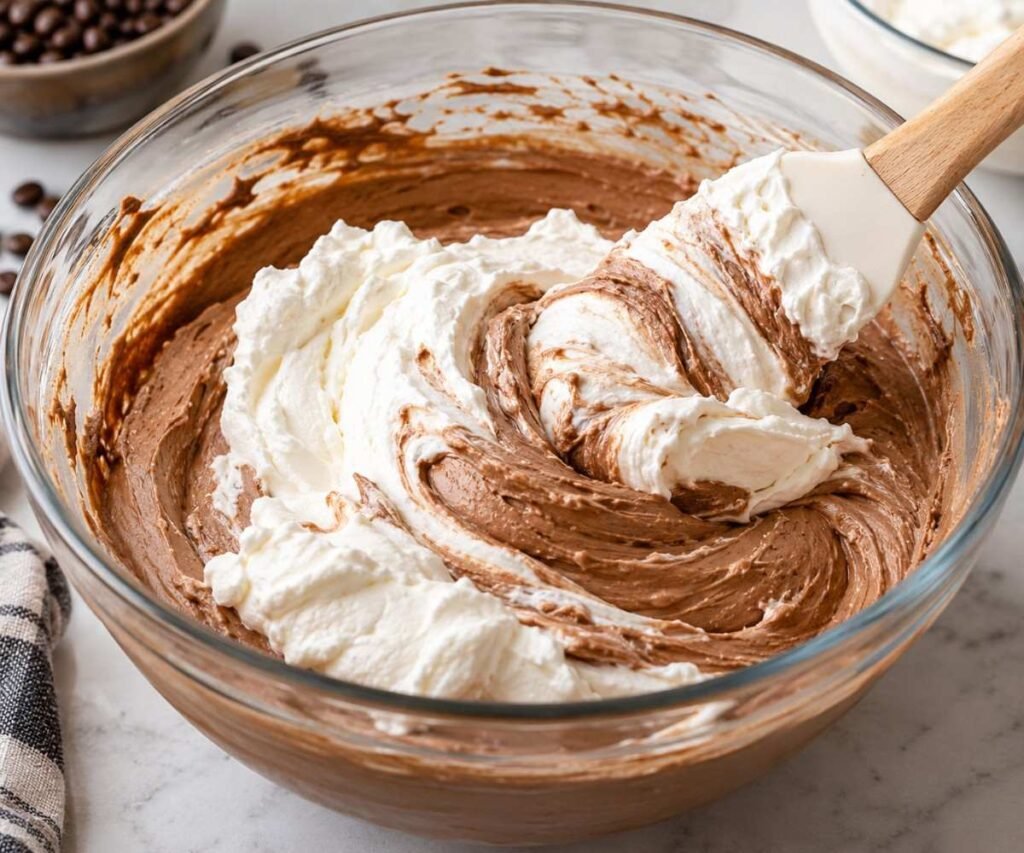
In a separate bowl, whip the heavy cream until it reaches soft-to-medium peaks. Avoid overwhipping, as the cream should remain smooth and easy to fold.
Gently fold the whipped cream into the espresso mixture in batches. Use a spatula and a light hand to preserve the airy texture.
Continue folding until no visible streaks of whipped cream remain. The filling should look light, fluffy, and creamy rather than dense.
Step 4: Assemble the Bars
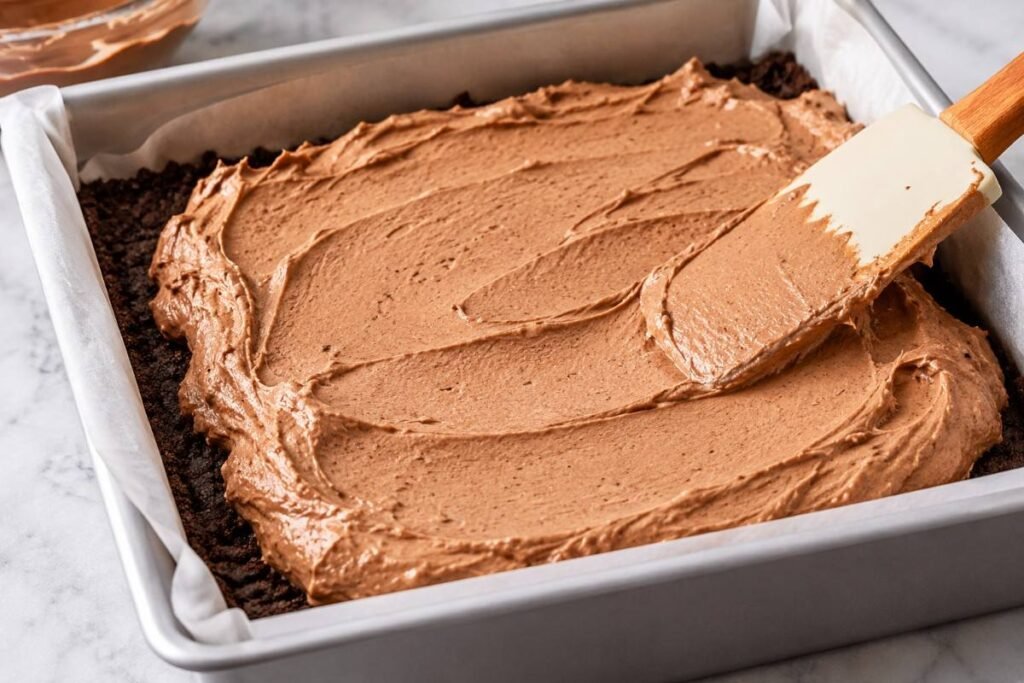
Remove the chilled crust from the refrigerator. Spoon the espresso filling over the cookie base and spread it evenly to the edges.
Smooth the surface with an offset spatula or the back of a spoon. Gently tap the pan on the counter to release any large air pockets.
Cover the pan and refrigerate until the filling is firm enough to support the chocolate topping. The exact chilling time will depend on the thickness of the layers and the temperature of your refrigerator.
Step 5: Add the Chocolate Ganache Topping
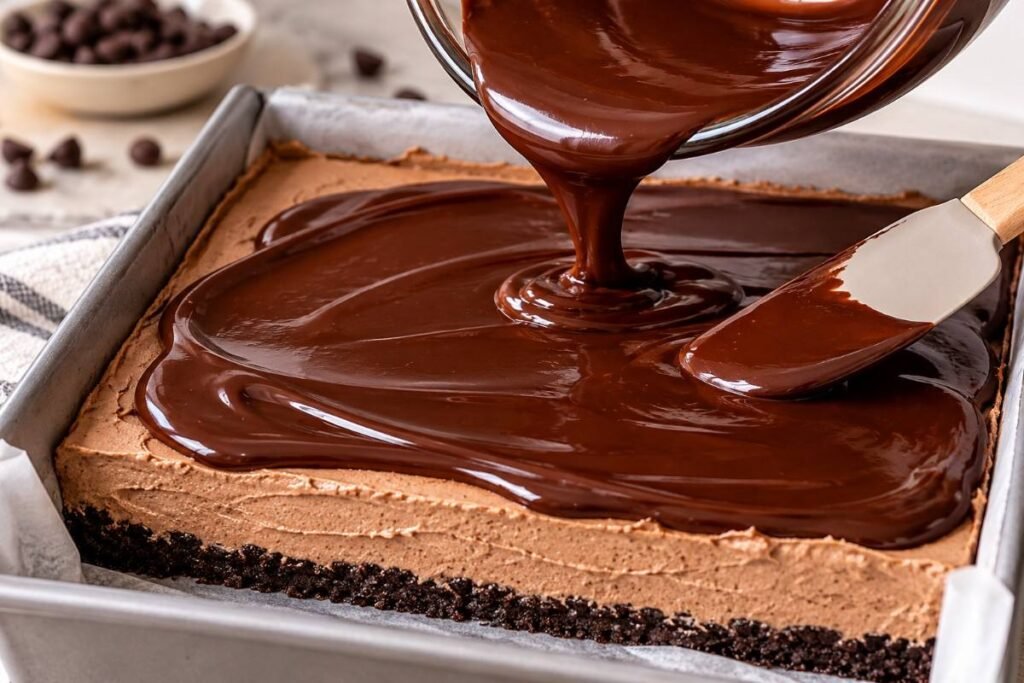
Place the semi-sweet chocolate in a heatproof bowl. Warm the additional whipping cream until hot but not boiling, then pour it over the chocolate.
Let the mixture stand briefly before stirring gently until the chocolate melts and the ganache becomes smooth and glossy. Allow it to cool slightly so it doesn’t soften the filling.
Pour the ganache over the chilled espresso layer and spread it into an even coating. Return the pan to the refrigerator until the topping is set.
Step 6: Slice and Decorate
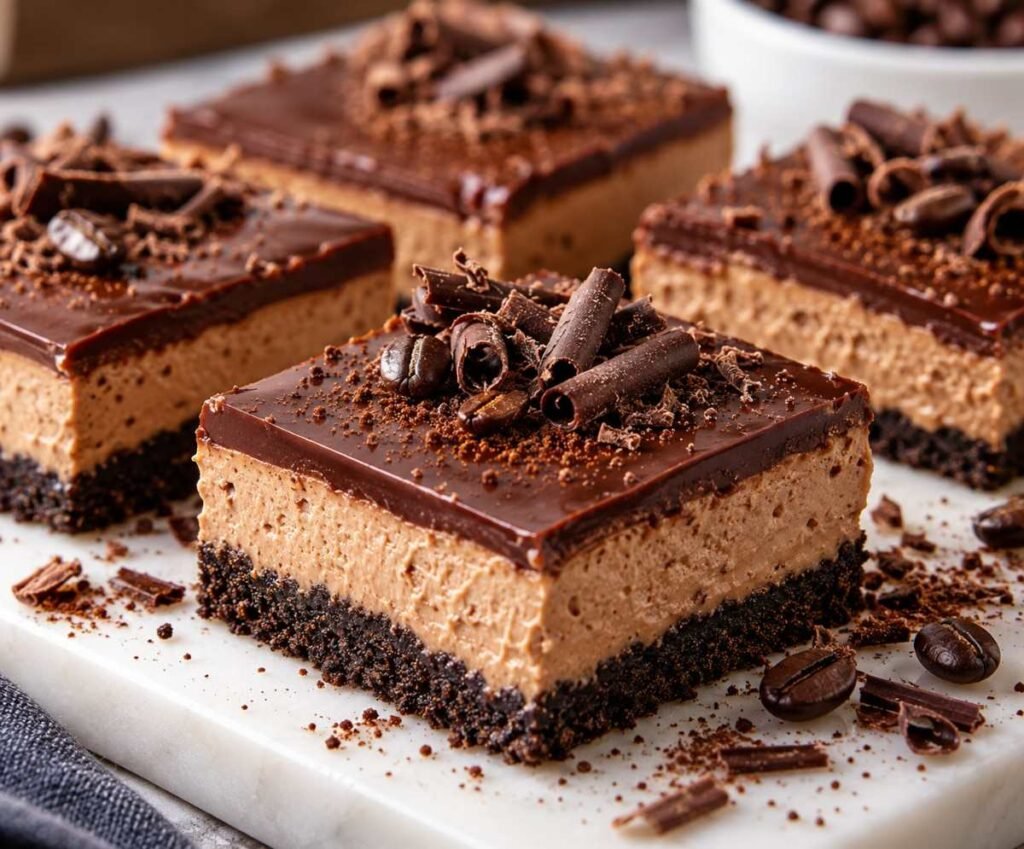
Once the bars are fully chilled, lift them from the pan using the parchment paper. Place them on a cutting board and use a sharp knife to cut them into even squares.
For cleaner slices, warm the knife under hot water, wipe it dry, and repeat between cuts. Finish with chocolate shavings or a light dusting of espresso powder, if desired.
Keep the bars refrigerated until serving so the filling retains its creamy texture and the layers remain neat.
Serving Suggestions
- With freshly brewed coffee: Serve alongside espresso, cappuccino, or a latte for a coffeehouse-inspired dessert pairing.
- As an after-dinner treat: Offer a chilled square after dinner when you want a small but indulgent dessert.
- On a dessert platter: Arrange the bars with chocolate truffles, cookies, and fresh berries for a beautiful party spread.
- With fresh berries: Raspberries or sliced strawberries add a refreshing, slightly tart contrast to the rich chocolate and coffee flavors.
- For holiday gatherings: Decorate with chocolate curls or a light sprinkle of espresso powder to create an elegant finish for festive dessert tables.
- With a scoop of ice cream: Pair a bar with vanilla ice cream for a creamy, cool contrast to the intense coffee flavor.
Tips for the Best Results
- Use softened cream cheese: Let the cream cheese soften before mixing to help prevent lumps. A smooth starting mixture makes the finished filling much creamier.
- Let melted chocolate cool: Hot chocolate can affect the texture of the cream cheese mixture. Allow it to cool until just slightly warm before adding it.
- Fold the whipped cream gently: Use slow, sweeping movements instead of vigorous stirring. This helps keep the filling light and airy.
- Give the bars enough chilling time: The layers need time to firm up before you slice them. Chilling thoroughly helps prevent the filling from smearing or collapsing.
- Use a warm, clean knife: Wipe the blade between cuts for sharp edges and attractive layers. This small step makes homemade bars look much more polished.
Storage Tips
Refrigerator
Store the espresso martini bars in an airtight container in the refrigerator. For the best texture and flavor, enjoy them within three to four days, provided the ingredients remain within their safe storage limits.
Keep the bars chilled when not serving because the cream-based filling is perishable. If the recipe includes vodka or coffee liqueur, remember that the alcohol does not make the dessert shelf-stable.
Freezer
These bars can be frozen for longer storage. Arrange the fully set bars in a single layer until firm, then wrap them individually or place them in a freezer-safe airtight container with parchment paper between layers.
For the best quality, enjoy them within about two months. Thaw them in the refrigerator before serving. The chocolate topping may develop slight changes in appearance after freezing, but the bars should still be delicious.
Reheating
No reheating is necessary for this dessert. These bars are designed to be served chilled.
If the bars are very firm straight from the refrigerator or freezer, let them sit briefly in the refrigerator or at cool room temperature until they are easy to bite into. Avoid microwaving them because heat can melt the filling and chocolate topping.
Final Thoughts
No-Bake Espresso Martini Bars are a delicious way to bring the flavors of coffee, chocolate, and a classic espresso martini into one easy dessert. The crunchy chocolate crust, creamy espresso filling, and smooth ganache topping create a combination that feels special without requiring an oven.
They’re ideal for preparing ahead of a dinner party, sharing with fellow coffee lovers, or keeping in the refrigerator when you want a little something sweet after a meal. You can adjust the coffee intensity, experiment with different chocolates, or leave out the alcohol to suit your preferences.
Give these no-bake espresso martini bars a try the next time you’re craving a rich, coffee-inspired dessert. Cut them into neat squares, add your favorite garnish, and enjoy every creamy, chocolatey bite.
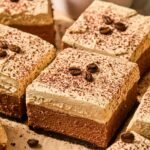
Espresso Martini Bars
Ingredients
Chocolate Cookie Crust
- 100 g chocolate sandwich cookies with filling
- 35 g unsalted butter melted
Espresso Cream Filling
- 100 g cream cheese softened
- 25 g powdered sugar
- 30 g dark chocolate melted and cooled
- 1 tsp instant espresso powder
- 1 tsp vanilla extract
- 1 tbsp coffee liqueur optional
- 1 tsp vodka optional
- 60 ml heavy whipping cream cold
Chocolate Ganache Topping
- 40 g semi-sweet chocolate chopped
- 30 ml heavy whipping cream
Optional Garnish
- 1 tsp chocolate shavings
- A pinch of espresso powder
Instructions
- Prepare the Chocolate Cookie Crust: Crush the chocolate sandwich cookies into fine crumbs using a food processor or rolling pin. Mix with the melted butter until evenly combined. Press firmly into a parchment-lined 6-inch square pan. Refrigerate while preparing the filling.
- Make the Espresso Filling: Beat the softened cream cheese until smooth. Add the powdered sugar, espresso powder, and vanilla extract. Mix until creamy, then blend in the cooled melted dark chocolate, coffee liqueur, and optional vodka.
- Fold in the Whipped Cream: In a separate bowl, whip the cold heavy cream until soft-to-medium peaks form. Gently fold it into the espresso mixture until smooth and fluffy, taking care not to deflate the cream.
- Assemble the Bars: Spread the espresso filling evenly over the chilled cookie crust. Smooth the top with a spatula. Cover and refrigerate until the filling is firm enough to support the ganache.
- Prepare the Chocolate Ganache: Place the chopped semi-sweet chocolate in a heatproof bowl. Warm the heavy cream until hot but not boiling, then pour it over the chocolate. Let stand briefly and stir until smooth. Allow it to cool slightly.
- Add the Topping and Chill: Pour the ganache over the chilled espresso filling and spread evenly. Refrigerate for approximately 3–4 hours, or until the layers are firm enough to slice.
- Slice and Serve: Lift the dessert from the pan using the parchment paper. Cut into four squares with a sharp knife, wiping the blade between cuts. Garnish with chocolate shavings or a light dusting of espresso powder. Keep refrigerated until serving.
Notes
- This is a no-bake, refrigerated dessert.
- The coffee liqueur and vodka are optional. Omit both for an alcohol-free version.
- For a stronger coffee flavor, add a little extra espresso powder to the filling.
- Chill thoroughly before slicing for clean layers.
- Store in an airtight container in the refrigerator for 3–4 days.
- Freeze for up to 2 months for best quality and thaw in the refrigerator before serving.
- Keep the dairy-based dessert refrigerated when not serving.
- Ingredient quantities and timing are estimates; test the recipe before publishing.
Nutrition Facts
- Calories: 450 kcal
- Total Fat: 32 g
- Saturated Fat: 19 g
- Cholesterol: 75 mg
- Sodium: 230 mg
- Total Carbohydrates: 36 g
- Dietary Fiber: 3 g
- Total Sugars: 27 g
- Protein: 5 g
Note: These are rough estimates for one serving, assuming the recipe makes 4 servings. Actual nutrition will vary by brand and ingredient quantities.

Leave a Reply