

When you’re craving a cozy dinner but don’t want a sink full of dishes, Instant Pot Chili Mac and Cheese is a recipe worth keeping on repeat. It brings together hearty chili, tender elbow macaroni, tomatoes, beans, and plenty of melted cheese in one comforting meal.
The Instant Pot helps make this family-friendly dinner with less hands-on cooking and minimal cleanup. The pasta cooks right in the flavorful chili mixture, soaking up the seasonings as it softens. Finish everything with shredded cheddar for a creamy, cheesy dish that’s satisfying on a chilly evening, after a busy workday, or whenever comfort food sounds good.
Serve it straight from the pot with your favorite toppings, and you’ll have a filling dinner that feels special without requiring complicated steps.
Table of Contents
Why You’ll Love Instant Pot Chili Mac and Cheese
- One-Pot Convenience: Brown the meat, build the chili, and cook the pasta in the same pot. You’ll spend less time washing dishes and more time enjoying dinner.
- Rich and Cheesy: Savory chili seasoning, tomatoes, beef, and tender macaroni come together in a thick, flavorful sauce. Melted cheddar adds the creamy finish that makes every bite comforting.
- Perfect for Busy Weeknights: The pressure cooker handles most of the cooking, making this a practical option when you need a hearty meal without standing over the stove.
- Easy to Customize: Adjust the spice level, change the beans, or add vegetables to suit your family. You can also experiment with different cheeses for your favorite flavor.
- Great for Leftovers: The flavors remain delicious the next day, making this recipe useful for lunch or meal prep. Keep extra cheese and fresh toppings ready to brighten up reheated portions.
What Makes Homemade Better?
Making Instant Pot Chili Mac and Cheese at home gives you control over the ingredients, seasoning, texture, and amount of cheese. You can choose lean ground beef or ground turkey, adjust the salt, and use your favorite beans and shredded cheese.
Homemade also makes it easy to tailor the recipe to your family. Add diced bell peppers for extra vegetables, use mild chili seasoning for a gentler flavor, or include a little cayenne pepper if you prefer more heat. You can make it as saucy or cheesy as you like by adjusting the finishing ingredients.
Best of all, the pasta cooks in the seasoned liquid, helping the macaroni absorb the chili flavor. Since everything comes together in one pot, cleanup is easier than preparing chili and macaroni separately.
Ingredients You’ll Need
- Ground beef – Adds savory flavor and makes the chili hearty. Lean ground beef works well because it leaves less excess grease in the pot.
- Elbow macaroni – The classic pasta choice for chili mac. Its shape holds the sauce and cheese in every bite.
- Kidney beans – Add a tender texture and make the meal more filling. Black beans are a good alternative.
- Diced tomatoes – Bring acidity, color, and a fresh tomato flavor to the chili.
- Tomato sauce – Helps create the rich base that coats the macaroni.
- Beef broth – Provides the liquid needed to pressure-cook the pasta while adding savory depth.
- Yellow onion – Adds natural sweetness and flavor as it softens.
- Garlic – Gives the chili a deeper, more aromatic taste.
- Chili seasoning – Provides the familiar chili flavor. Use a store-bought blend or your own mix.
- Ground cumin – Adds a warm, earthy note that complements the beef and beans.
- Paprika – Contributes mild pepper flavor and a little color.
- Salt and black pepper – Bring the other flavors together; adjust to taste.
- Shredded cheddar cheese – Melts into the hot pasta for a creamy, cheesy finish. Sharp cheddar gives the dish a stronger cheese flavor.
- Olive oil – Helps the onion and garlic cook evenly if the beef is especially lean.
- Green onions or fresh cilantro – Optional toppings that add freshness and color.
Step-By-Step Direction
Step 1: Brown the beef
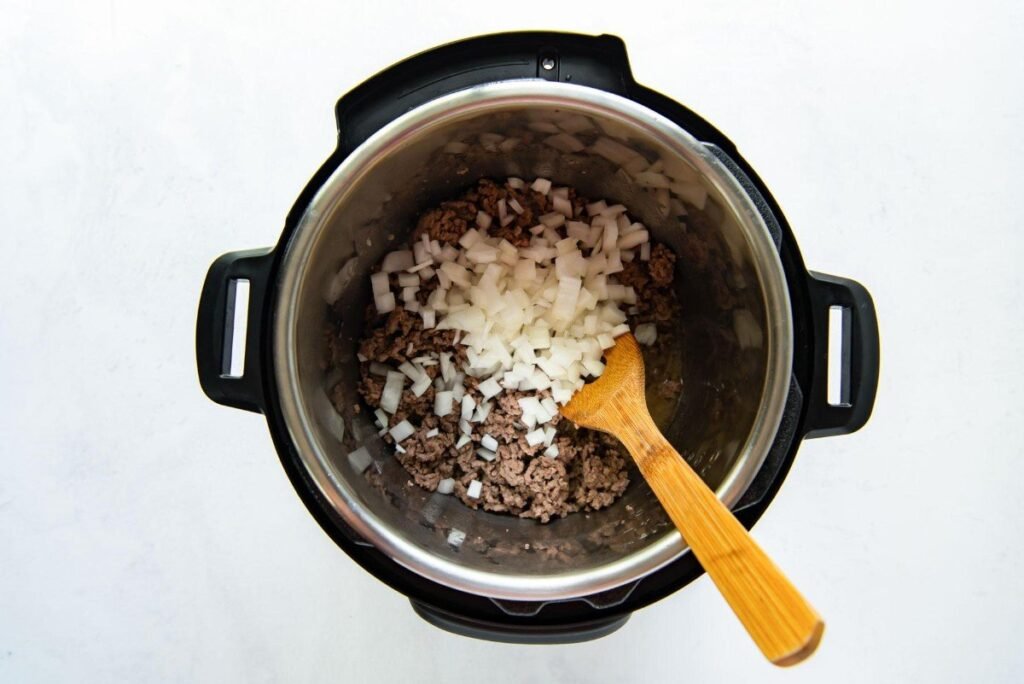
Select the Instant Pot’s Sauté setting. Add the ground beef and cook, breaking it into small pieces, until browned. Add the onion and garlic and cook until softened. Drain excess grease if needed.
Step 2: Add the chili ingredients
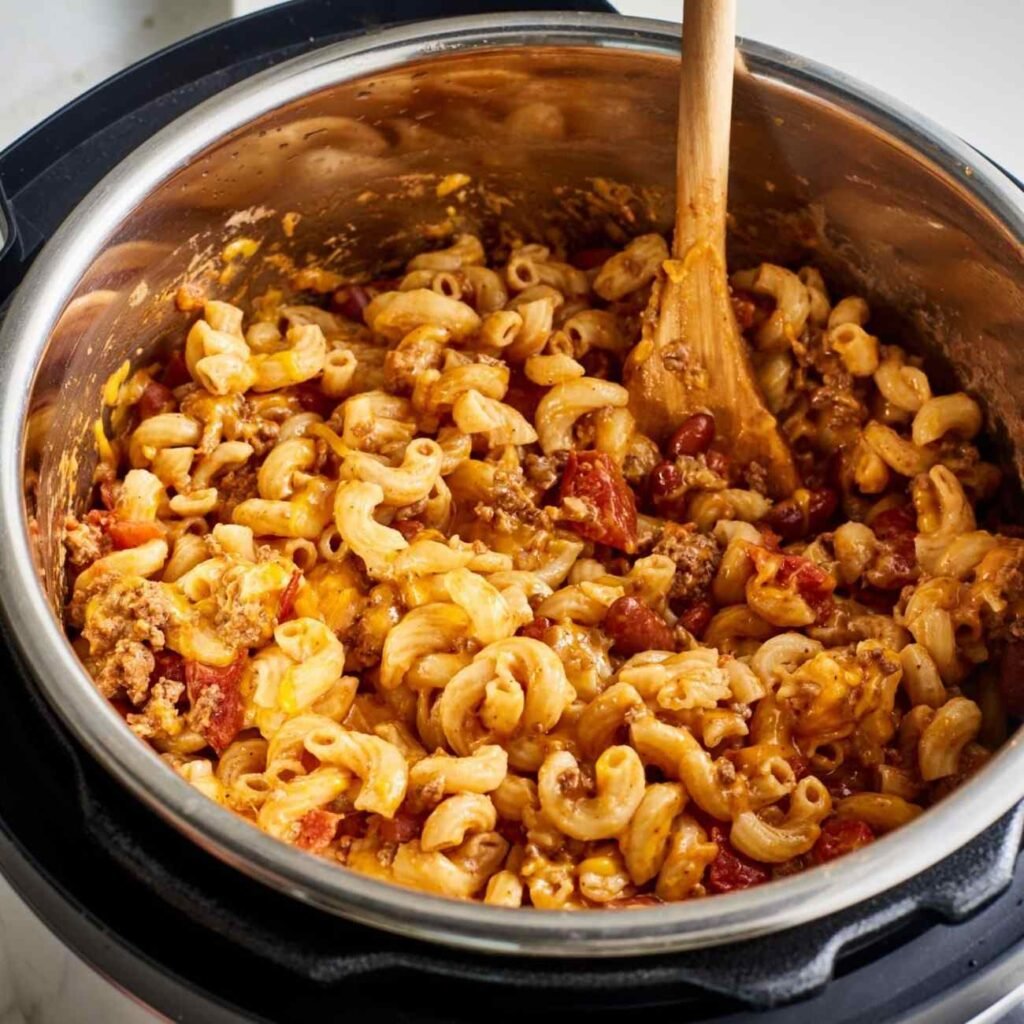
Stir in the chili seasoning, cumin, paprika, beans, diced tomatoes, and tomato sauce. Pour in the beef broth and scrape the bottom of the pot to release any browned bits.
Step 3: Add the macaroni

Add the elbow macaroni and gently press it down so most of the pasta is submerged in liquid. Avoid stirring thick tomato sauce into the very bottom of the pot, which can trigger a burn warning.
Step 4: Pressure-cook
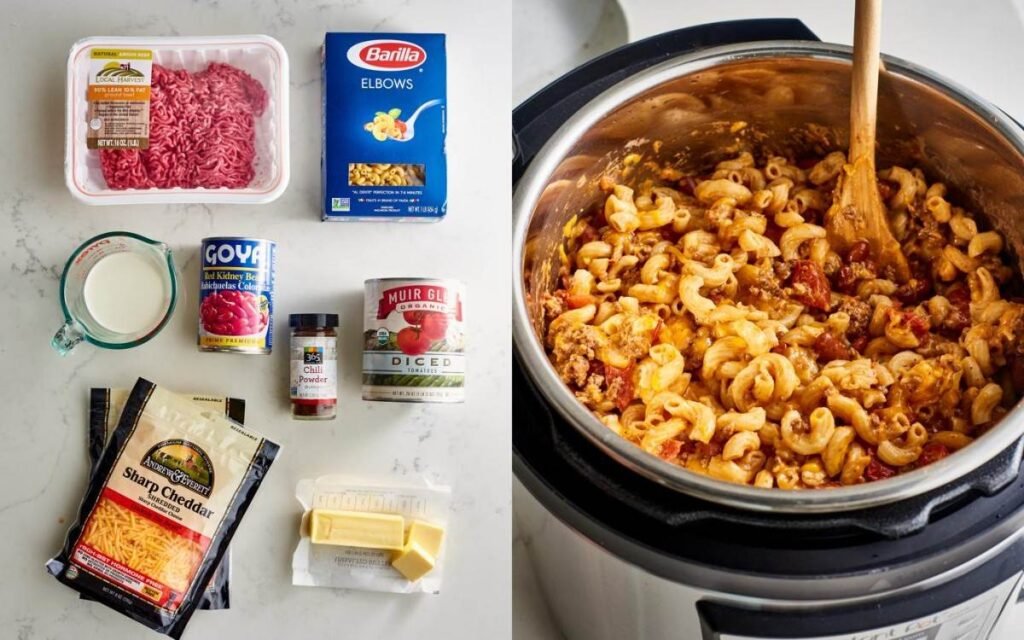
Secure the lid and set the valve to Sealing. Cook on High Pressure for 4 minutes as a starting point for standard elbow macaroni, then carefully perform a quick release according to your Instant Pot’s instructions. If your pasta package recommends a different pressure-cooking time, adjust accordingly.
Step 5: Stir in the cheese and serve
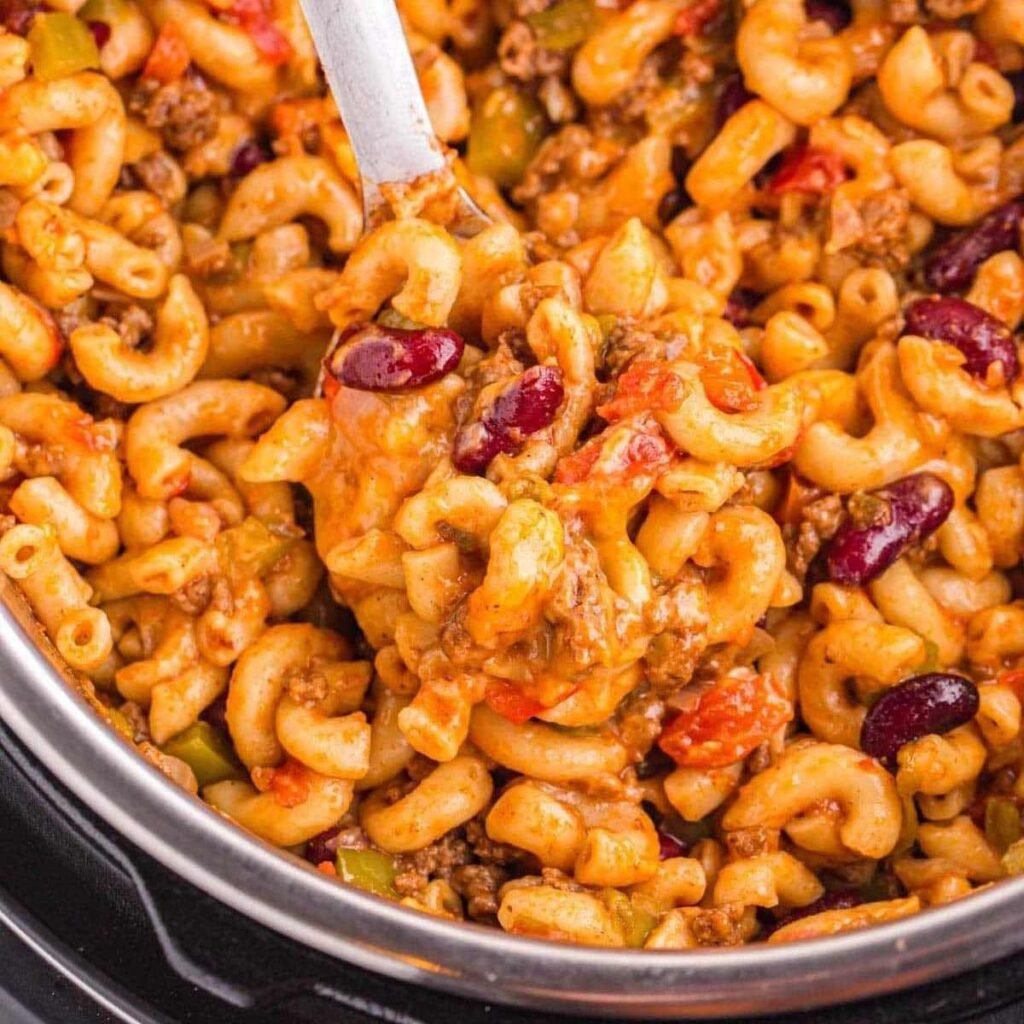
Open the lid once the pressure has fully released. Stir the pasta and check that it is tender. Add the shredded cheddar a handful at a time, stirring until melted. Let the chili mac rest for a few minutes to thicken, then serve warm.
Serving Suggestions
- Extra shredded cheese: Sprinkle cheddar or Monterey Jack over each bowl while it is hot.
- Sour cream or plain Greek yogurt: Add a cool, creamy contrast to the savory chili.
- Green onions or cilantro: Finish with fresh herbs for color and a lighter flavor.
- Garlic bread or cornbread: Serve on the side to soak up the rich sauce.
- A crisp green salad: Balance the hearty pasta with fresh lettuce, cucumber, and a simple dressing.
- Jalapeños or hot sauce: Offer these at the table for anyone who enjoys a spicier bowl.
Tips for the Best Results
- Choose the right pasta: Standard elbow macaroni is a reliable option, but different brands and shapes cook at different rates. Check the pasta texture as soon as pressure cooking is complete.
- Prevent a burn warning: Scrape up browned bits after sautéing, and avoid leaving thick tomato sauce sitting against the bottom of the pot. Keep the pasta mostly submerged in broth.
- Release pressure carefully: Pasta can foam during pressure release. Follow your appliance’s safety guidance, and if liquid begins to sputter, stop the release and allow it to settle before continuing.
- Add cheese after cooking: Stir shredded cheese in after pressure cooking rather than cooking it under pressure. This helps it melt smoothly without becoming oily or grainy.
- Let it rest before serving: Give the chili mac a few minutes to stand after adding cheese. The sauce will thicken as it cools slightly, making each serving rich and satisfying.
Storage Tips
Refrigerator
Let leftovers cool promptly, then transfer them to an airtight container. Refrigerate within two hours and enjoy within 3–4 days.
Freezer
For best texture, freeze cooled portions in freezer-safe containers for up to 2–3 months. Pasta may soften after thawing, so freeze in individual portions for easier reheating. Thaw overnight in the refrigerator when possible.
Reheating
- Stovetop: Warm over low to medium-low heat with a splash of broth or milk. Stir frequently until heated through.
- Microwave: Heat in a microwave-safe bowl in short intervals, stirring between each one. Add a little liquid if the pasta seems dry.
- Food safety: Reheat leftovers to 165°F (74°C) and avoid repeatedly cooling and reheating the same portion.
Final Thoughts
Instant Pot Chili Mac and Cheese brings two comfort-food favorites together in one easy dinner. The beef and beans make it hearty, the spices give it classic chili flavor, and the cheddar turns the macaroni into a creamy, satisfying meal.
Keep it simple for a family weeknight dinner or set out toppings so everyone can customize their bowl. Once you get familiar with your preferred pasta texture and spice level, this one-pot recipe can become a regular part of your dinner rotation.

Instant Pot Chili Mac and Cheese
Ingredients
- 1 pound ground beef
- 1 tablespoon olive oil optional
- 1 medium yellow onion diced
- 2 cloves garlic minced
- 1 tablespoon chili seasoning
- 1 teaspoon ground cumin
- 1 teaspoon paprika
- 1 can (14.5 ounces) diced tomatoes undrained
- 1 can (8 ounces) tomato sauce
- 1 can (15 ounces) kidney beans drained and rinsed
- 2 cups beef broth
- 8 ounces elbow macaroni uncooked
- 1 cup shredded cheddar cheese
- ½ teaspoon salt
- ¼ teaspoon black pepper
- 2 tablespoons chopped green onions or fresh cilantro optional, for garnish
Instructions
- Brown the Beef: Set the Instant Pot to Sauté. Add the olive oil if needed, then add the ground beef. Cook, breaking it into small pieces, until browned. Add the diced onion and minced garlic and cook until softened. Drain excess grease if necessary.
- Add the Chili Ingredients: Stir in the chili seasoning, cumin, paprika, salt, and black pepper. Add the kidney beans, diced tomatoes, and tomato sauce. Pour in the beef broth and scrape the bottom of the pot to loosen any browned bits.
- Add the Pasta: Add the uncooked elbow macaroni and gently press it down so most of the pasta is submerged in the liquid. Avoid stirring thick tomato sauce into the bottom of the pot, as this can contribute to a burn warning.
- Pressure-Cook: Secure the lid and set the pressure valve to Sealing. Cook on High Pressure for about 4 minutes as a starting point for standard elbow macaroni. Carefully release the pressure according to your appliance’s instructions. If liquid sputters or foams, stop the release and allow it to settle before continuing. Check that the pasta is tender.
- Add the Cheese and Serve: Open the lid after the pressure has fully released. Stir the pasta and add the shredded cheddar cheese a handful at a time until melted and creamy. Let the chili mac rest for about 3 minutes to thicken. Garnish with green onions or cilantro, if desired, and serve warm.
Notes
- Pasta: Standard elbow macaroni works well, but pasta brands and shapes may require different cooking times.
- Avoid a burn warning: Scrape the pot thoroughly after browning the beef. Do not leave thick tomato sauce stuck to the bottom.
- Cheese: Freshly shredded cheddar usually melts more smoothly than pre-shredded cheese.
- Spice level: Use mild chili seasoning for a family-friendly version or add cayenne pepper for more heat.
- Consistency: The sauce thickens as the recipe rests. Stir in a small splash of broth if it becomes too thick.
- Storage: Refrigerate leftovers promptly in an airtight container and eat within 3–4 days.
- Freezing: Freeze cooled portions in freezer-safe containers for up to 2–3 months for best quality.
- Reheating: Add a little broth or milk and reheat until the center reaches 165°F (74°C).
- Serving idea: Top with extra cheddar, sour cream, sliced green onions, or jalapeños.
Nutrition Facts
- Calories: 600 kcal
- Total Fat: 25 g
- Saturated Fat: 10 g
- Cholesterol: 85 mg
- Sodium: 1,100 mg
- Total Carbohydrates: 59 g
- Dietary Fiber: 8 g
- Total Sugars: 10 g
- Protein: 34 g
Note: These are estimates. Actual nutrition values vary depending on the brands of beef broth, beans, cheese, and other ingredients used.

Leave a Reply