
This Red Velvet Oreo Fudge is the kind of treat that disappears from the platter before you even set it down. Ready in just 10 minutes of hands-on prep, its bold crimson color makes it a showstopper at birthdays, holiday gatherings, Valentine’s Day, or really any occasion worth celebrating. Whether you’re boxing it up as a homemade gift or setting it out for a crowd, this one never disappoints.
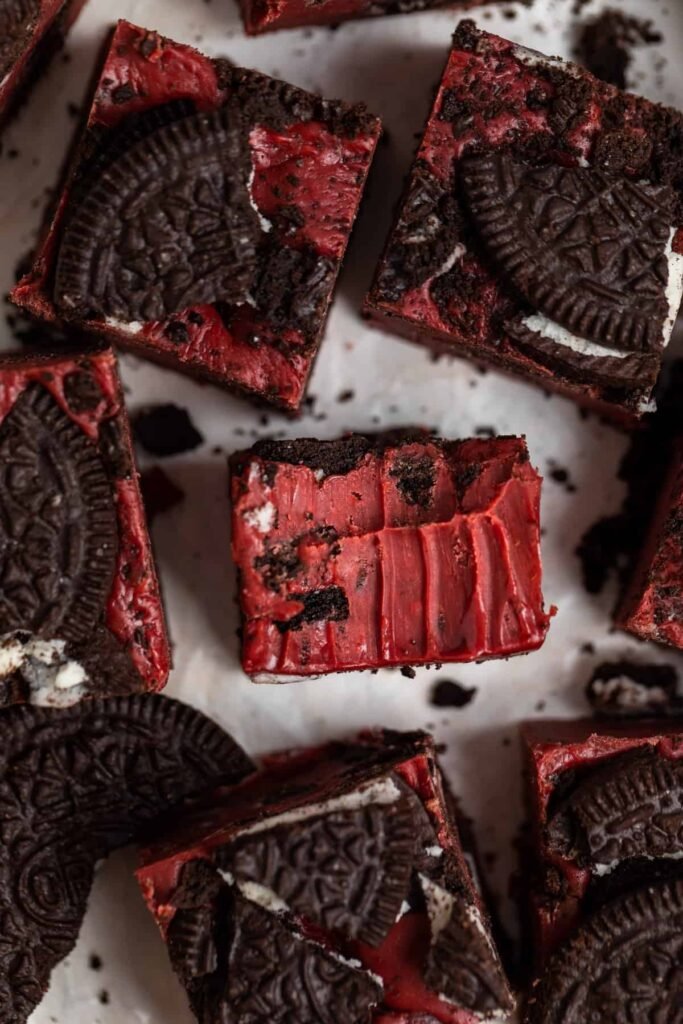
Fudge tends to get pigeonholed as a winter holiday treat, but honestly, it deserves a spot on the dessert table all year long. This red velvet version loaded with chunks of Oreo has earned a permanent place in our household rotation — and once you try it, you’ll completely understand why.
Table of Contents
Why You Will Love This Red Velvet Fudge
- Zero oven time required. No-bake desserts are a lifesaver on busy days or when you just don’t want to deal with preheating and timers. If you enjoy effortless no-bake sweets, White Chocolate Oreo Truffles are another go-to worth trying.
- It’s genuinely beginner-friendly. You’ll need to give the stovetop your undivided attention, but the actual technique here is just stirring. That’s it. It’s actually a fun one to make together — pass the spoon around and let everyone take a turn.
- Great shelf life. Unlike a lot of homemade desserts that go stale quickly, fudge holds up well. Refrigerated, it stays fresh for weeks, and frozen, it can last months — which makes it ideal for making ahead.
- The flavor is worth every bite. Creamy, rich, packed with Oreo pieces, and perfectly sweet — this fudge hits that spot when nothing else will do.
What You’ll Need
- White chocolate: Quality matters here more than in most recipes. Since there’s no batter to hide behind, the chocolate is front and center in terms of both flavor and texture. Ghirardelli is a top pick and consistently delivers.
- Chocolate chips: Go with semi-sweet or milk chocolate. Semi-sweet gives a slightly deeper color while milk chocolate brings a sweeter, creamier flavor. Skip dark chocolate — it mutes the red color significantly.
- Marshmallows: An old-school fudge ingredient that earns its place every single time. Melted marshmallows give fudge that irresistibly smooth, melt-in-your-mouth texture.
- Unsalted butter: Just a small amount, but it makes the final texture noticeably silkier. You can leave it out in a pinch, but it’s worth including.
- Sweetened condensed milk: The backbone of the recipe. Always use full-fat, and double-check the label — evaporated milk looks almost identical on the shelf but will completely ruin the fudge.
- Red food coloring: Beet-based natural dyes are a great option if you prefer to go that route. If using liquid coloring versus gel, you’ll need to adjust the quantity since they differ in concentration.
- Oreos: Standard classic Oreos work better than double-stuffed in this recipe. For a gluten-free version, Oreo’s certified gluten-free variety swaps in seamlessly.
How To Make This Red Velvet Oreo Fudge:
Attention is the most important ingredient here. The process is simple, but the chocolate requires constant watching.
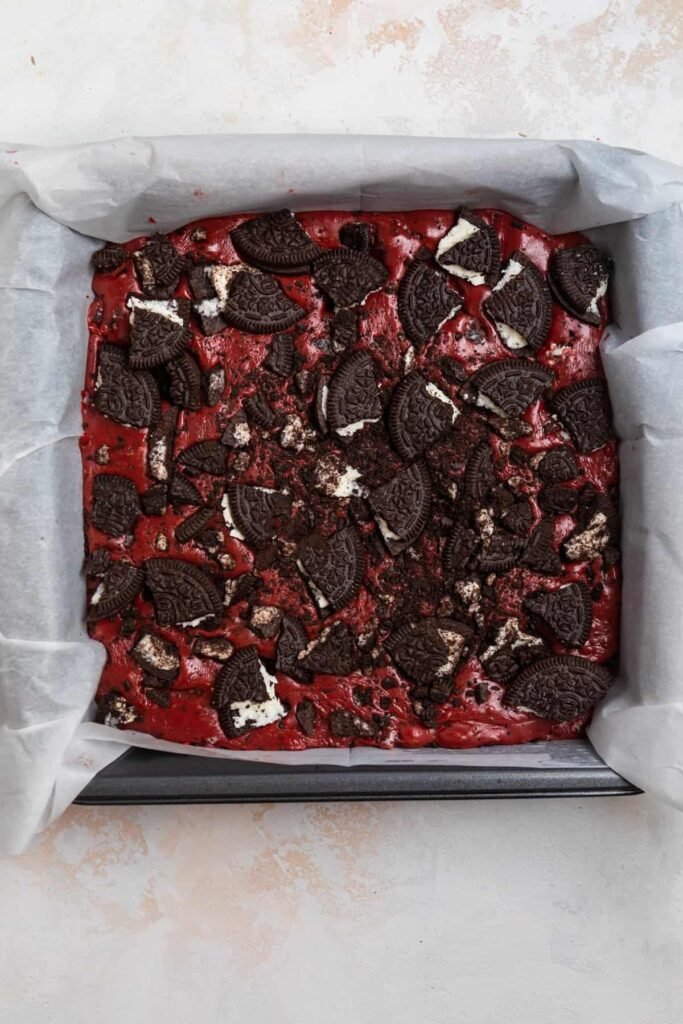
Start by lining an 8×8-inch baking pan with parchment paper. Let it hang over the edges — this makes lifting the fudge out much easier later.
- Add the sweetened condensed milk, marshmallows, white chocolate chips, semi-sweet chocolate chips, and sliced butter to a medium saucepan. Set the heat to low or medium-low.
- As everything begins to warm and melt, start stirring continuously with a wooden spoon or a firm silicone spatula. The mixture will feel thick and take some effort — that’s completely normal. Keep the chocolate moving so nothing sticks to the bottom or sides. Scorched chocolate will seize up into a grainy, chalky mess. Plan for 7 to 9 minutes of steady stirring over gentle heat.
- Once the mixture is completely smooth and glossy, pull it off the heat. Stir in vanilla extract and your red food coloring until evenly combined. Fold in roughly three-quarters of the chopped Oreos.


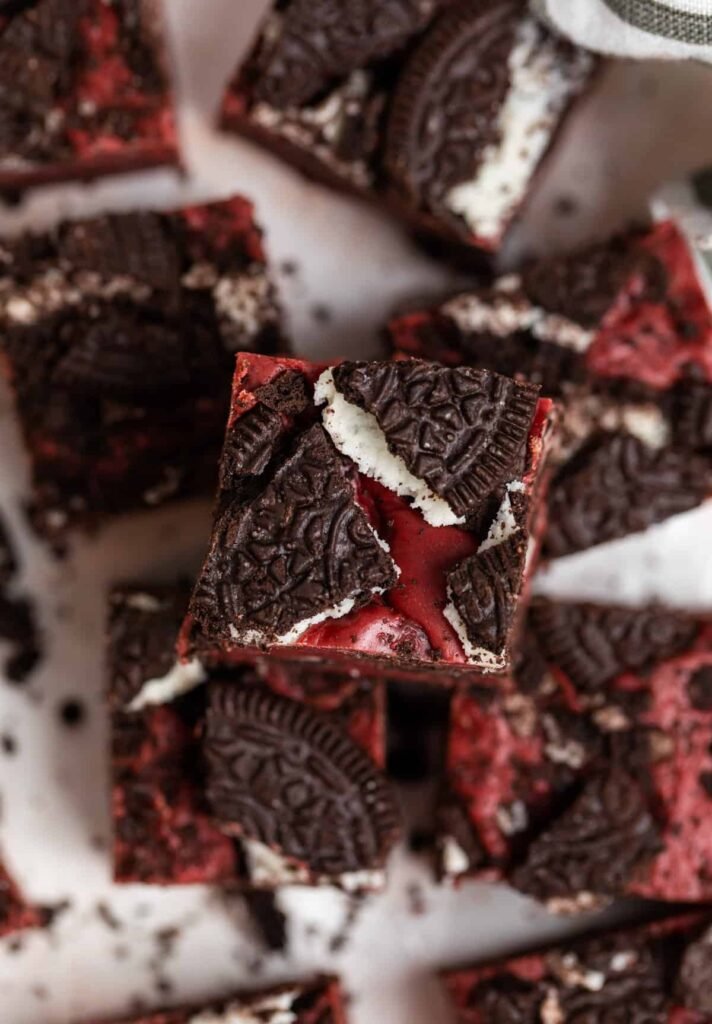
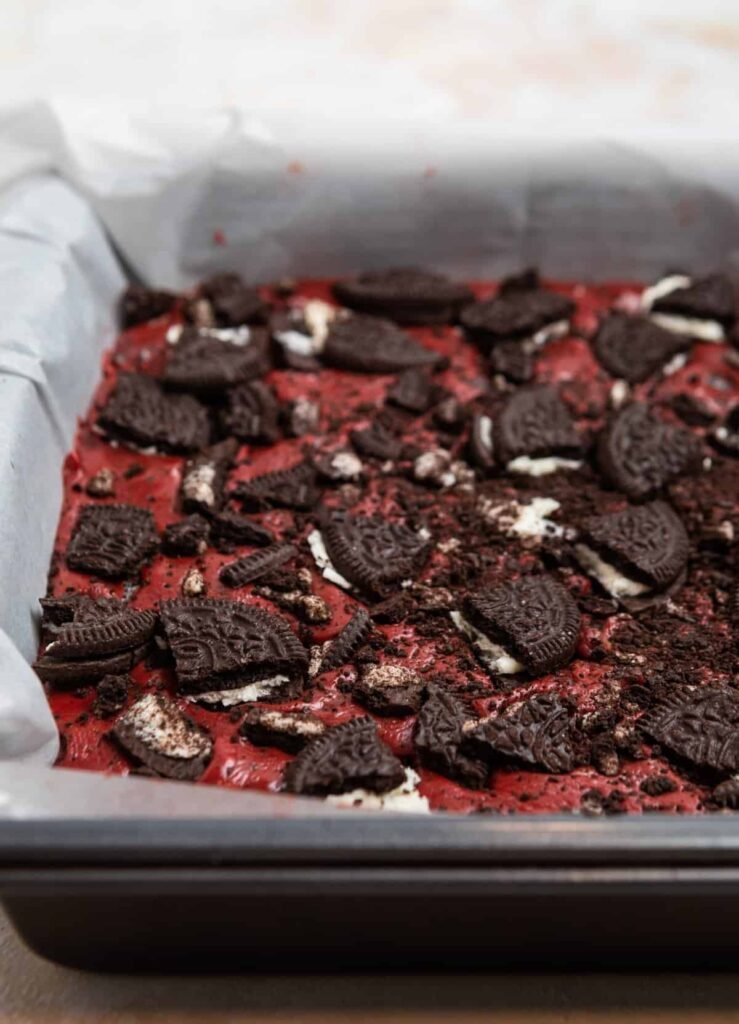
- Pour the fudge into your prepared pan, spreading it out evenly. Tap the pan gently on the counter a few times to help it settle and release any air pockets. Scatter the remaining Oreo pieces on top, pressing them lightly into the surface. Add more if you like a heavier topping.
- Refrigerate for at least 2 hours until fully set, then slice and serve.
Notes and Tips for the Best Results
- Invest in good chocolate. In a recipe this straightforward, the quality of your chocolate is the recipe. Better chocolate equals smoother texture and richer flavor. Off-brand chips technically work, but you’ll notice the difference.
- Do not walk away from the stove. Even for a minute. If the chocolate gets too hot or sits too long without stirring, it can scorch, and the whole batch is lost. Stay close and keep that spoon moving.
- Avoid the microwave method. Some fudge recipes call for melting everything in the microwave in short bursts. It can technically work, but it significantly increases the risk of overheating the chocolate. The stovetop gives you far more control and a more reliable result.
Storage Instructions
- Keep the fudge refrigerated in a sealed container. For the best texture and flavor, let it sit at room temperature for about 15 minutes before serving.
- Refrigerated fudge will stay fresh for 2 to 3 weeks — though in most households, it doesn’t last anywhere near that long.
- To freeze, place pieces in an airtight container and freeze for up to 3 months. Flash-freeze the pieces on a tray first so they don’t stick together in the container.
Frequently Asked Questions
Can I use white chocolate chips instead of a bar?
Yes, white chocolate chips work well in this recipe. Just make sure you’re using a good quality brand. Cheap white chips can be waxy and may not melt as smoothly, which can affect the final texture of the fudge.
Can I make this ahead of time?
Absolutely — and it’s actually better when made a day ahead. The fudge sets up beautifully overnight and the flavors have time to come together. It’s a great make-ahead treat for parties or gifting.
Do I have to use both white and semi-sweet chocolate chips?
Both are important for the flavor balance and the final color. The white chocolate creates the creamy base, while the semi-sweet adds depth. Using only one or the other will give you a noticeably different result in both taste and appearance.
Can I swap out the Oreos for a different cookie?
You can experiment with other chocolate sandwich cookies, but classic Oreos give the best flavor contrast and hold their texture nicely in the fudge. Other cookies may become too soft or too crumbly.
Can I double the recipe?
Yes — just use a 9×13-inch pan instead of the 8×8. Keep in mind that a larger batch will take slightly longer to set in the refrigerator, so give it at least 3 hours before slicing.

Red Velvet Oreo Fudge
Ingredients
- 14 oz Sweetened condensed milk Full fat; NOT evaporated milk
- 1 cup Mini marshmallows
- 1 cup White chocolate chips High quality, such as Ghirardelli
- 1 cup Semi-sweet chocolate chips Or milk chocolate chips
- 2 tbsp Unsalted butter Sliced into small pieces
- 1 tsp Vanilla extract
- 1-2 tbsp Red food coloring Adjust based on liquid vs gel
- 02 Oreo cookies Roughly chopped; divided
Instructions
- 1. Line an 8×8 inch baking pan with parchment paper, allowing it to hang over all four sides for easy removal later. Set aside.2. Add the sweetened condensed milk, mini marshmallows, white chocolate chips, semi-sweet chocolate chips, and sliced butter to a medium saucepan. Place over low to medium-low heat.3. As the mixture begins to warm, stir continuously with a wooden spoon or sturdy silicone spatula. Keep the chocolate moving at all times to prevent it from sticking or scorching on the bottom and sides of the pan. Continue stirring for 7 to 9 minutes until completely melted and smooth.4. Once the mixture is glossy and fully combined with no lumps remaining, remove the saucepan from the heat immediately.5. Stir in the vanilla extract and red food coloring. Mix until the color is fully and evenly incorporated throughout the fudge.6. Fold in approximately three-quarters of the chopped Oreos, reserving the rest for topping.7. Pour the fudge mixture into the prepared baking pan. Spread it out evenly with a spatula. Tap the pan gently on the counter a few times to help it settle and release any air pockets.8. Scatter the remaining chopped Oreos over the top, pressing them gently into the surface. Add more Oreos if desired.9. Refrigerate for a minimum of 2 hours, or until fully firm and set.10. Lift the fudge out of the pan using the parchment paper overhang. Slice into squares and serve. Enjoy!
Notes
- Use high-quality chocolate chips for the best texture and flavor. Since this recipe is simple, the chocolate carries the whole dish — it’s worth the upgrade.
- Never step away from the stovetop while the mixture is heating. Constant stirring is essential. Overheated or scorched chocolate will seize up and the batch cannot be saved.
- Avoid the microwave method. The stovetop gives you control over the heat that a microwave simply can’t match, and the risk of overcooking is much higher.
- For a gluten-free version, swap in Oreo’s certified gluten-free cookies — they work perfectly in this recipe.
- Store in an airtight container in the refrigerator for up to 2–3 weeks, or freeze for up to 3 months. Flash freeze individual pieces first to prevent them from sticking together.
- Remove from the refrigerator about 15 minutes before serving for the best texture.
Nutrition
Calories: 170kcal, Carbohydrates: 22g, Protein: 2g, Fat: 8g, Saturated Fat: 5g, Polyunsaturated Fat: 1g, Monounsaturated Fat: 3g, Trans Fat: 0.03g, Cholesterol: 8mg, Sodium: 57mg, Potassium: 117mg, Fiber: 1g, Sugar: 19g, Vitamin A: 55IU, Vitamin C: 0.3mg, Calcium: 56mg, Iron: 1mg Nutrition information is automatically calculated and should only be used as an approximation.Shop This Post:
Baking Pan, 8×8 Inch
Silicone Spatulas
White Chocolate Chips
Leave a Reply