
This pesto chicken pasta salad is light, vibrant, and loaded with delicious flavor in every bite. Made with tender chicken, creamy mozzarella pearls, fresh vegetables, pasta, and a homemade basil pesto, it’s an easy dish that everyone enjoys. Perfect as a hearty main course or a tasty side, it’s also simple to customize with your favorite ingredients.
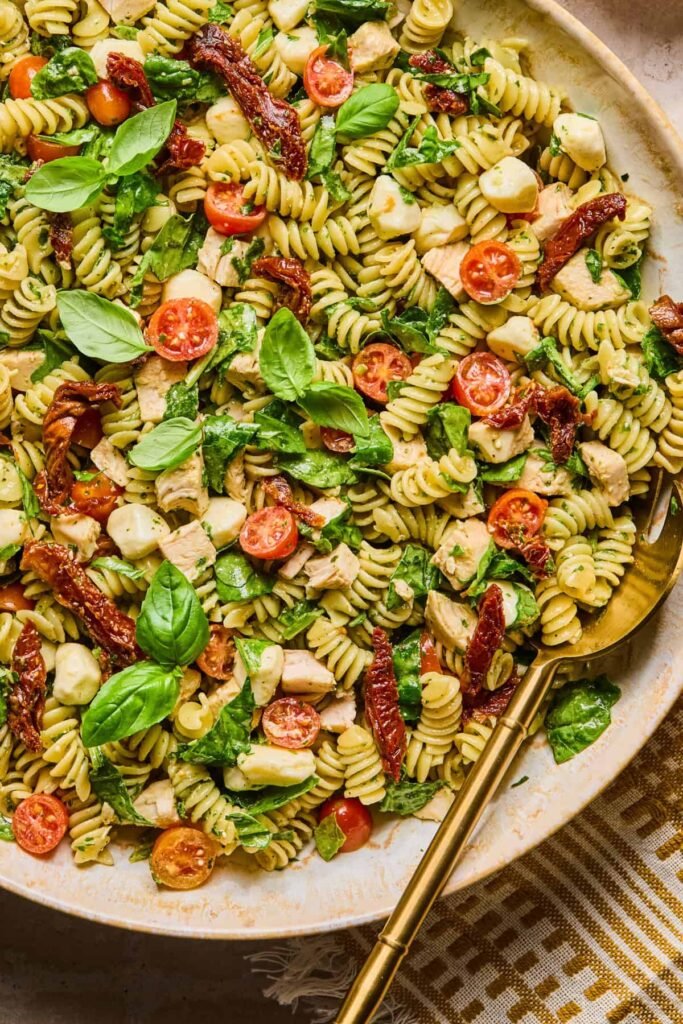
Table of Contents
Why We Love This Pesto Chicken Pasta Salad
Pasta salad gets a bad reputation. Too often it’s bland, overdressed, or just an afterthought on the potluck table. This one is different. The pesto does the heavy lifting here — it’s vibrant, nutty, and garlicky, and it coats every single piece of pasta beautifully. Add in the chicken for staying power and you’ve got a full meal that doesn’t feel like diet food.
Here’s why people keep making it:
- The flavors genuinely get better as it sits, making it perfect for meal prep
- It works hot, cold, or room temperature — incredibly versatile
- You can clean out your fridge with the add-ins
- Kids and adults both love it (that’s rare and valuable)
- It comes together in under 30 minutes if your chicken is already cooked
Can’t wait to hear what you think!
Ingredient Notes
Full measurements are listed in the recipe card below.
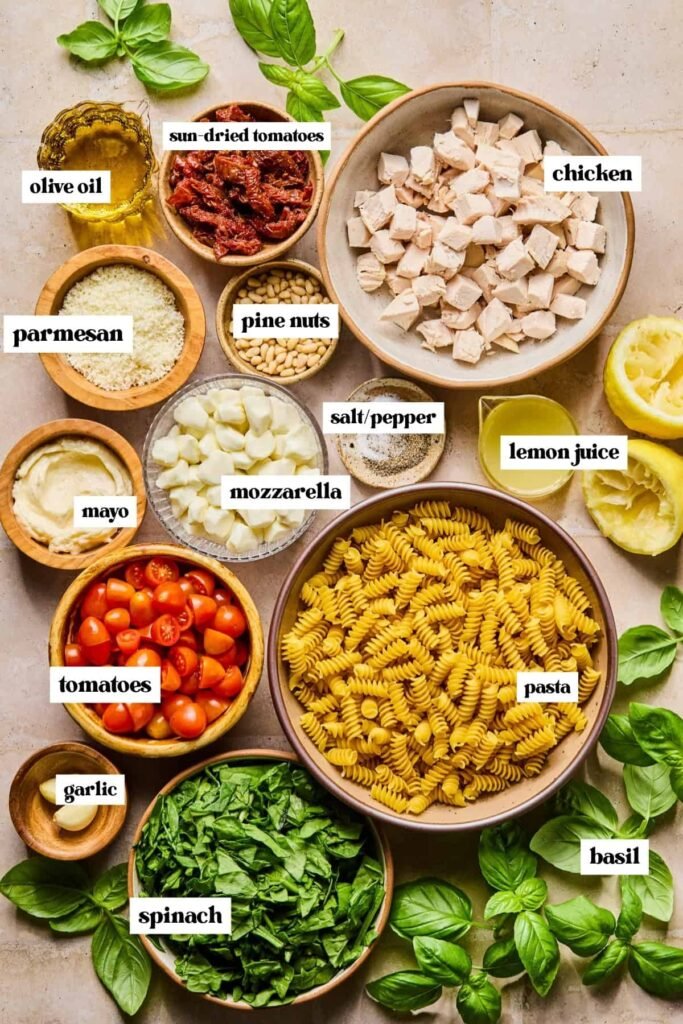
- The Pesto: Homemade pesto is worlds apart from the jarred version — it takes about 5 minutes in a food processor and the color alone is worth it. If you’re in a pinch, refrigerated store-bought pesto is an acceptable backup. Avoid the shelf-stable versions in the pasta aisle; they tend to be oily and flat-tasting.
- Nuts: Traditional basil pesto calls for pine nuts, but they’ve become surprisingly expensive. Walnuts are an excellent substitute — slightly earthier but just as good once blended. Buying from the bulk bins at your grocery store cuts the cost significantly.
- Mayonnaise: A small amount of mayo acts almost like a binder here, helping the pesto cling to the pasta instead of pooling at the bottom of the bowl. It also adds a subtle creaminess that rounds out the sharpness of the garlic. Room-temperature Greek yogurt works as a swap if you prefer.
- Chicken: This is a great recipe for using up leftover chicken. Rotisserie chicken is the most convenient option, but grilled, baked, or poached chicken all work perfectly. Even canned chicken in a pinch — just drain it well.
- Pasta Shape: Go for pasta with ridges, spirals, or curves. Rotini, fusilli, cavatappi, or farfalle all trap pesto in their grooves instead of letting it slide off. Avoid smooth pasta like penne or rigatoni for this one. Bonus idea: swap the pasta for cheese tortellini for a richer, more indulgent version.
Ways To Vary This Recipe
- More vegetables: Roasted red peppers, halved cherry tomatoes, blanched asparagus tips, or grilled corn cut off the cob all play nicely here
- Change up the greens in the pesto: A handful of spinach or arugula blended in with the basil keeps the color vivid longer and adds a peppery note
- Extra add-ins: Sun-dried tomatoes, sliced kalamata olives, capers, or a pinch of chili flakes all bring something interesting
- Make it heartier: A handful of white beans or chickpeas bumps up the protein and makes it even more filling
- Cheese options: Swap mozzarella pearls for crumbled feta for a saltier, tangier bite
Step-By-Step Instructions
Step 1: Bring a large pot of salted water to a boil and cook your pasta about 1–2 minutes shy of the package directions. You want it slightly underdone now, since it will continue to soften as it absorbs the pesto. Drain immediately and rinse under cold running water until completely cool. Spread it out on a sheet pan if you want it to dry faster.
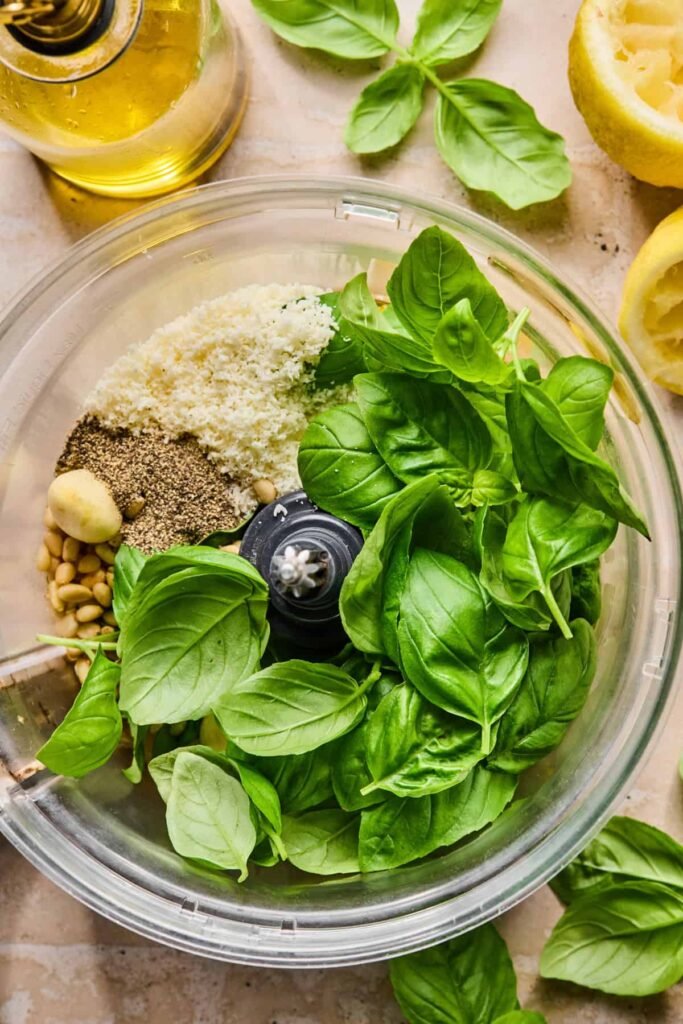
Step 2: Add all pesto ingredients to a food processor. Start with the smaller amount of olive oil and pulse in short bursts rather than running it continuously — you want it smooth but with just enough texture to feel rustic, not completely pureed. Taste and adjust salt, lemon, or garlic as needed.
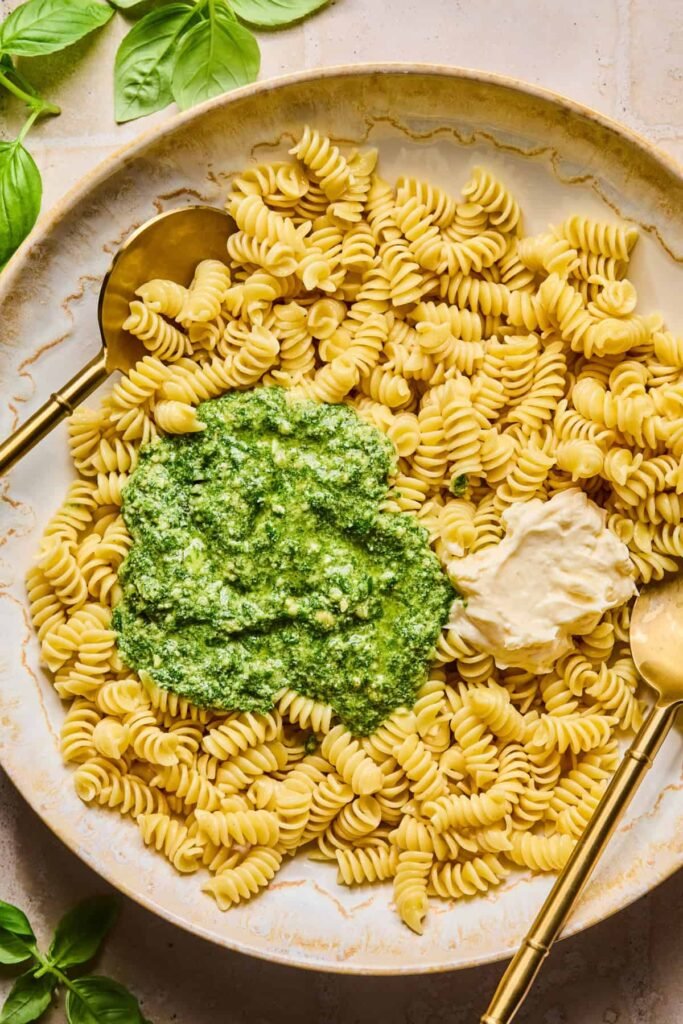
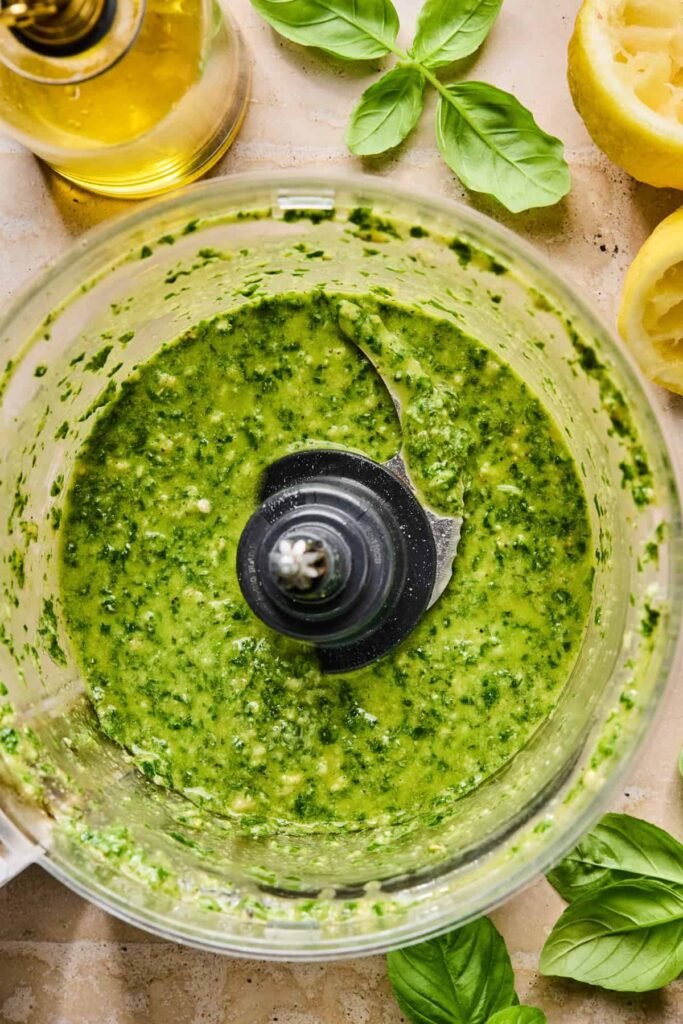
Step 3: Drizzle in the remaining olive oil a little at a time until the pesto is loose enough to pour. It should fall slowly off a spoon rather than clump.
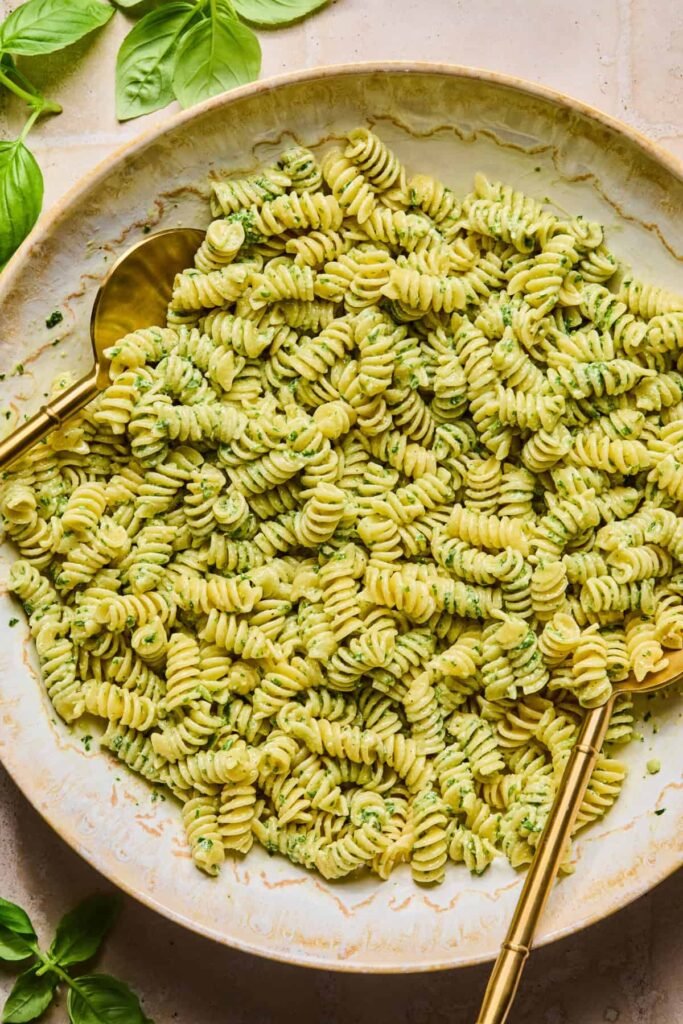
Step 4: Transfer the cooled pasta to a large mixing bowl. Add the pesto and mayo and toss thoroughly — take your time here and make sure every piece is coated. The pasta will look very dressed at this point, which is exactly what you want.
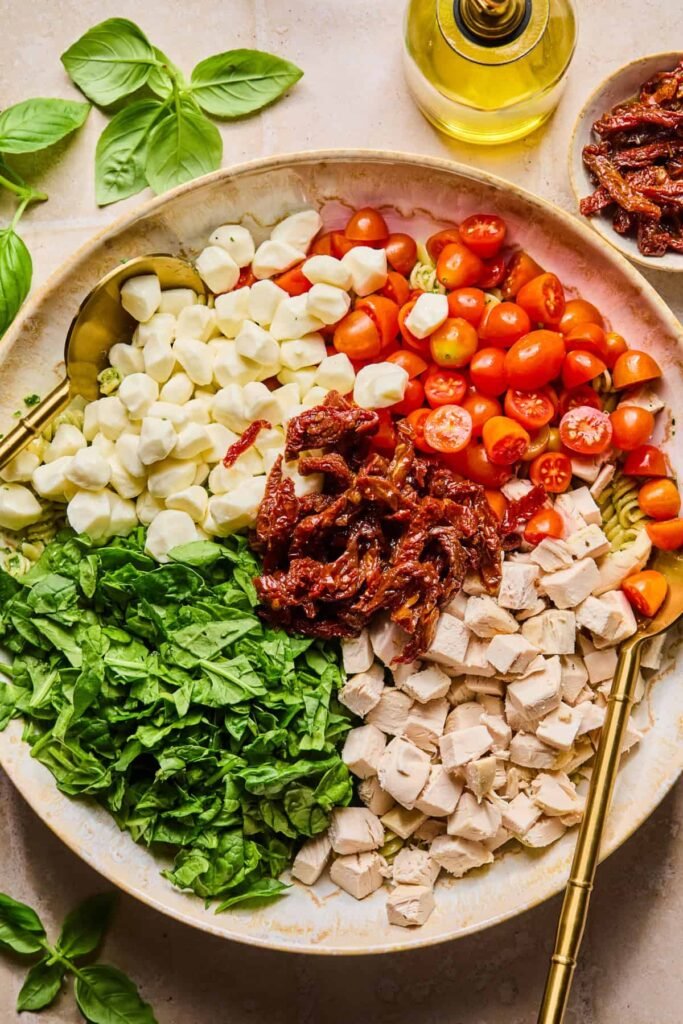
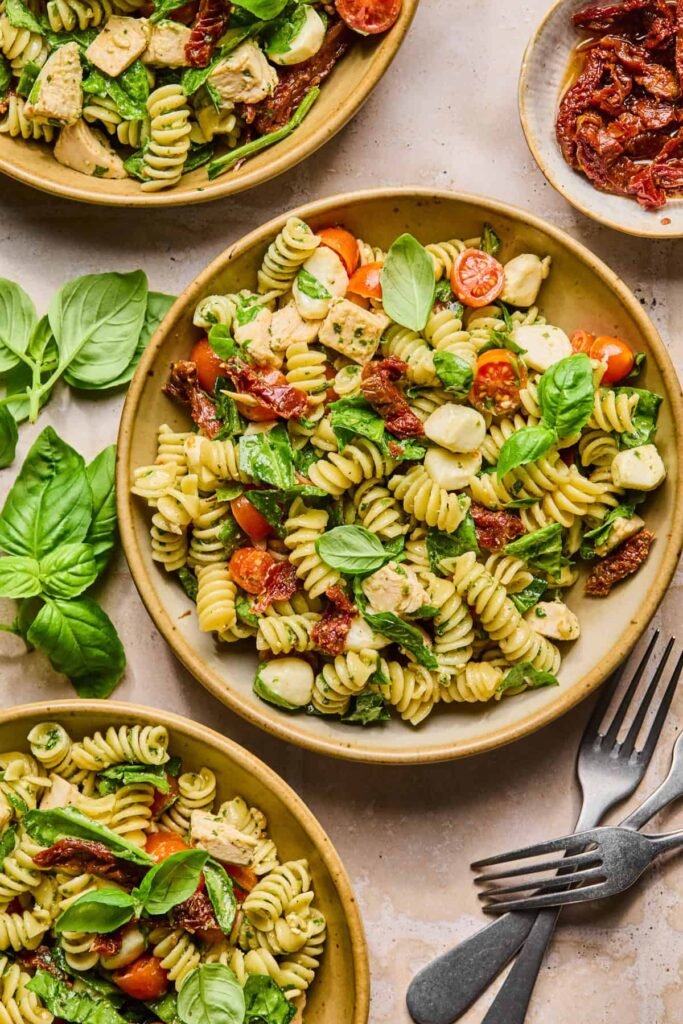
Step 5: Add the chicken, mozzarella, and any vegetables. Fold gently so the mozzarella doesn’t break apart. Taste and season with salt and pepper.

Step 6: Cover and refrigerate for at least 30 minutes before serving. When ready to serve, give it a good stir, taste again, and finish with torn fresh basil leaves on top.
Recipe Tips
Timing matters: This salad is at its absolute peak on the day it’s made. The pesto stays bright green and glossy, and the texture is ideal. That said, it’s still completely delicious the next day — just expect the color to deepen.
Don’t skip rinsing the pasta: Running cold water over the pasta stops the cooking process immediately and prevents the dreaded mushy pasta salad situation.
Before serving from the fridge: Pull the salad out about 15–20 minutes before you plan to eat. The olive oil in the pesto firms up when cold, and letting it come slightly toward room temperature loosens everything up. A small drizzle of fresh olive oil stirred through also helps revive it.
Season at every stage: Salt the pasta water generously, taste the pesto before adding it, and season the finished salad again before serving. Pasta salads need more seasoning than you’d expect.
Storage
Keep leftovers in a sealed container in the refrigerator for up to 4 days. The flavor holds up well; the appearance just dulls slightly after day one. This salad doesn’t freeze well — the pesto separates and the pasta turns mushy after thawing.
FAQs
Can I make this pasta salad ahead of time?
Yes, with a small adjustment. If you’re making it more than a few hours ahead, consider storing the pesto separately and tossing it with the pasta and other ingredients an hour or two before serving. This keeps the pesto color vibrant and the texture fresher.
What can I use instead of basil for the pesto?
You have plenty of options. Sun-dried tomato pesto gives it a completely different but equally delicious flavor. Kale pesto, parsley pesto, or even a mint-walnut pesto all work. Each one changes the personality of the dish a bit, so it’s fun to experiment.
Is this recipe gluten-free?
It can be. Simply swap in your favorite gluten-free pasta — chickpea pasta or brown rice fusilli both hold up well in pasta salads. Everything else in the recipe is naturally gluten-free.
How do I keep the pesto from turning brown?
A squeeze of fresh lemon juice in the pesto helps preserve the color by slowing oxidation. Also, storing the salad in an airtight container with minimal air exposure helps. The color shift is purely cosmetic — it doesn’t affect the taste.
Can I serve this warm?
Absolutely. While it’s most commonly served cold or at room temperature, you can toss everything together while the pasta is still warm and serve it immediately. Just know the mozzarella will soften and the pesto will be more fragrant.
My pasta salad looks dry after refrigerating. How do I fix it?
This is completely normal. The pasta absorbs the pesto as it sits. Before serving, drizzle in a tablespoon or two of olive oil and toss well. A small spoonful of extra pesto or mayo also works perfectly to bring the creaminess back.
Can I make this vegetarian?
Yes — simply leave out the chicken. It’s substantial enough without it, especially if you add extra vegetables or a cup of white beans for protein. The pesto and mozzarella carry plenty of flavor on their own.

Pesto Chicken Pasta Salad
Ingredients
For the Homemade Pesto:
- 2 cups fresh basil leaves packed
- ⅓ cup pine nuts or walnuts for a budget-friendly swap
- 3 cloves garlic peeled
- ½ cup Parmesan cheese freshly grated
- ½–¾ cup extra virgin olive oil start with ½ cup, add more to thin
- 1 tbsp fresh lemon juice
- ½ tsp salt or to taste
- ¼ tsp black pepper
For the Pasta Salad:
- 12 oz rotini or fusilli pasta
- 2 cups cooked chicken shredded or chopped; rotisserie works great
- 1 cup mozzarella pearls
- 1 cup cherry tomatoes halved
- 1 medium cucumber diced
- ¼ cup mayonnaise room temperature; Greek yogurt can sub
- ¼ cup fresh basil torn, for garnish
- salt and black pepper to taste
Instructions
- Group: Make the Pesto1. Add basil, pine nuts, garlic, and Parmesan to a food processor. Pulse several times until roughly broken down.2. With the processor running, slowly pour in ½ cup of olive oil. Blend until smooth but slightly textured. Add remaining olive oil a little at a time until the pesto is loose and pourable. Season with lemon juice, salt, and pepper. Taste and adjust.Group: Cook the Pasta3. Bring a large pot of generously salted water to a boil. Cook pasta 1–2 minutes shy of the package directions — you want it slightly underdone.4. Drain the pasta in a colander and rinse immediately under cold running water until completely cool. Shake off excess water and set aside.Group: Assemble the Salad5. Add the cooled pasta to a large mixing bowl. Spoon in the pesto and mayo. Toss thoroughly until every piece of pasta is well coated. If the mixture looks dry or thick, drizzle in a little extra olive oil and toss again.6. Add the shredded chicken, mozzarella pearls, cherry tomatoes, and cucumber. Fold gently to combine without breaking up the mozzarella.7. Taste and season with salt and black pepper as needed.8. Cover and refrigerate for at least 30 minutes before serving.Tip: Before serving, let the salad sit at room temperature for 15 minutes. The olive oil in the pesto firms up in the fridge — resting it slightly and adding a small drizzle of fresh olive oil brings everything back to life.9. Garnish with torn fresh basil leaves and serve.
Notes
- Make it ahead: For the freshest look, toss the pesto with the pasta no more than a few hours before serving. If prepping earlier, store pesto and pasta separately and combine closer to serving time.
- Reviving leftovers: After refrigerating, stir in a drizzle of olive oil or a small spoonful of mayo to restore creaminess before serving.
- Storage: Store in an airtight container in the refrigerator for up to 4 days. Do not freeze.
- Gluten-free option: Use your favorite gluten-free rotini or fusilli pasta.
- Vegetarian option: Omit the chicken and add a can of drained white beans or chickpeas for protein.
Leave a Reply